What to Do for Garage Door Maintenance: A Homeowner's Guide
A practical, step-by-step guide for homeowners to perform safe, effective garage door maintenance. Learn lubrication, balance checks, track alignment, weather sealing, and opener safety to extend door life and reduce costly repairs.

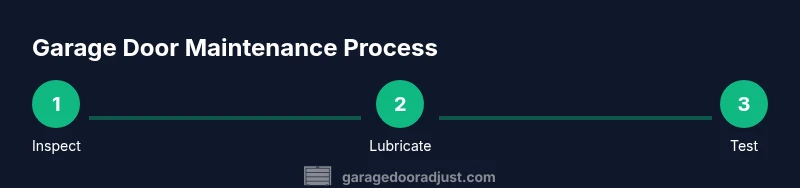
A proactive routine covers safety, lubrication, balance, weather sealing, and opener function to keep your garage door reliable. You’ll disable power, inspect cables and tracks, lubricate moving parts with silicone, test balance and safety sensors, and seal gaps as needed. Gather basic tools and follow manufacturer warnings to avoid injury.
What maintenance covers and why it's essential
A proactive maintenance routine for your garage door focuses on safety, reliability, and longevity. Knowing what to do for garage door maintenance helps you spot small issues before they become costly repairs. The core areas are hardware inspection, lubrication, balance and alignment, weather sealing, and opener function. By performing these tasks on a regular cycle, you reduce the chance of surprise breakdowns, limit noise, and extend the life of springs, cables, tracks, and rollers. From the GarageDoorAdjust team's experience, a simple, repeatable checklist can make maintenance feel manageable rather than intimidating. Start with a calm, methodical approach, wear protective gear, and work in a dry, well-lit space. You’ll save money and minimize downtime while keeping your family safe around the door.
According to GarageDoorAdjust, a consistent maintenance cadence reduces the likelihood of sudden failures and helps you catch wear before it affects performance. Treat this as a home safety routine, not a one-off chore, and you’ll enjoy smoother operation and fewer emergency calls.
Safety first: lockout and power-off
Safety comes first when servicing a garage door. Always disconnect the opener from power and engage any manual disconnect so the door cannot move unexpectedly. If you use a wall switch, unplug the unit or switch off the circuit breaker for the duration of the assessment. Keep children and pets away and avoid working beneath a door that could shift or drop. A brief safety pause can prevent injuries and set the stage for a controlled inspection.
Visual inspection routine
Walk around the door and inspect visible hardware: cables, rollers, hinges, springs, brackets, and tracks. Look for frayed cables, rust, shiny wear on rollers, loose bolts, bent tracks, or loose mounting hardware. Note any unusual gaps or door wobble. If you see damaged parts, do not attempt large repairs—mark the area and plan a professional repair. Capture photos to reference later.
Lubrication and moving parts
Lubrication reduces friction and noise in hinges, rollers, bearings, and the opener carriage. Use a silicone-based lubricant on metal hinges and rollers; apply sparingly and avoid over-wetting tracks or springs unless the manufacturer specifies. Wipe away excess lubricant to prevent dust buildup. Do not oil on nylon rollers where advised by the manufacturer. Regular lubrication improves efficiency and prolongs component life.
Balance, torsion spring, and track alignment checks
Test door balance with the opener disconnected so the door is moved manually. A well-balanced door should stay in place when raised halfway and should descend slowly and evenly. If the door falls or rises quickly, the springs or balance may be worn and require professional service. Inspect track alignment by checking that tracks are vertical and evenly spaced; tighten any loose mounting screws and straighten any slight bends. Do not attempt significant spring or track repairs yourself.
Opener maintenance and safety sensors
Check that safety sensors align and stay clean; misalignment can cause false reversals. Test the auto-reverse function by placing a rigid object in the door's path—if the door does not reverse, stop and service the opener. Check remote batteries and re-program remotes as needed. If you adjust opener force or travel limits, do so only within the manufacturer’s guidelines to avoid excessive door movement.
Weatherstripping and insulation
Inspect bottom seals and weatherstripping for gaps, cracks, or compression. Replace damaged seals to improve energy efficiency and keep out moisture, dust, and drafts. If you see cracking or tearing, measure and cut new weatherstripping to fit the door length. Proper sealing reduces energy loss and helps protect garage contents.
Seasonal and weather considerations
Seasonal upkeep is practical: in spring, inspect for wear after winter usage; in fall, focus on weather seals and lubrication before cold weather. Temperature fluctuations cause metal to expand or contract, so re-tighten hardware and re-check balance periodically. Keeping a simple calendar for maintenance tasks helps ensure you don’t skip important steps.
When to call a pro and what to expect
Some issues require professional service, especially when springs, cables, or tracks are involved. If you notice persistent imbalance, frayed cables, loud grinding, or visible track bends, contact a qualified technician. A pro can safely replace springs, cables, and misaligned tracks and confirm your opener settings are correct. Expect a diagnostic visit followed by a repair plan and a price estimate.
Tools & Materials
- Ladder(Extendable aluminum ladder tall enough to reach tracks safely)
- Safety glasses(Protect eyes from debris and pinch points)
- Silicone-based lubricant(Use on hinges, rollers, and springs as recommended)
- Adjustable wrench or set of wrenches(For tightening brackets and hardware)
- Allen/hex keys(If your door uses hex fasteners)
- Phillips and flathead screwdrivers(General hardware access)
- Clean rags(Wipe excess lubricant and dust)
- Flashlight(Inspect dark tracks and hinges clearly)
- Battery-powered drill (optional)(For faster hardware tightening if present)
- Soap and water spray bottle (mild)(Gentle cleaning before lubrication)
Steps
Estimated time: 60-90 minutes
- 1
Prepare and safety lockout
Clear the workspace and power down the opener. Engage the manual disconnect so the door stays in place. Put on protective gear and ensure children and pets are clear of the area.
Tip: Setting up a clean, well-lit area reduces mistakes and injuries. - 2
Inspect cables and springs visually
Look for fraying, corrosion, or loose connections on cables and springs. Do not touch or adjust springs yourself; note any concerns for a pro.
Tip: Take photos for reference if you plan to call a tech. - 3
Test door balance manually
Disconnect the opener and manually lift the door to about halfway. It should stay put; if it drifts, balance or springs may be worn.
Tip: If the door drops quickly, stop and arrange professional service. - 4
Lubricate moving parts
Apply silicone lubricant to hinges, rollers, and bearings. Wipe away excess to prevent dust buildup. Do not over-lubricate tracks or springs unless the manual says so.
Tip: Lubrication reduces noise and wear when done sparingly. - 5
Check tracks and hardware
Ensure tracks are vertical and aligned; tighten screws and brackets. Gently tap bent sections back into position and avoid forcing misaligned parts.
Tip: A small misalignment can cause binding and wear over time. - 6
Test opener safety features
With the door closed, test the auto-reverse by placing a barrier in the path. Clean sensors and verify alignment and wiring if needed.
Tip: Keep sensors clean and unobstructed for reliable safety behavior. - 7
Check weatherstripping
Inspect bottom seal for cracks and compression. Replace worn seals to improve energy efficiency and protect the garage interior.
Tip: Measure length and trim to fit exactly. - 8
Document and plan next steps
Record findings, replacements, and dates for future checks. Schedule a pro if major components require service.
Tip: A simple log helps you stay on track and budget maintenance.
Got Questions?
How often should I perform garage door maintenance?
Aim for a basic check every 1-3 months, with a more thorough inspection seasonally. Document wear and plan professional service if you notice significant issues.
Do a quick check every few months and a deeper one with seasonal weather changes; call a pro if you see major wear.
Is it safe to lubricate torsion springs?
Lubricating torsion springs is generally not recommended unless the door manufacturer specifically advises it. Improper lubrication or attempts to adjust tension can cause injury.
Don’t lubricate torsion springs unless the manual says so. It can be dangerous.
What lubricant should I use for garage door parts?
Use a silicone-based spray on hinges, rollers, and bearings. Avoid heavy oils on tracks and springs unless the manufacturer instructs otherwise. Wipe away excess.
Prefer silicone lubricant on moving parts and wipe off any extra.
Can I adjust track alignment myself?
Minor adjustments to tracks can be attempted, but avoid bending or forcing tracks. If misalignment persists, call a professional to prevent binding or harmful damage.
Small tweaks may be possible, but persistent misalignment needs a pro.
How do I test safety sensors?
Clean the sensors and verify alignment. Place a light obstacle in the beam and operate the opener to confirm the door reverses as required.
Make sure the sensors are clean and aligned, and test the auto-reverse with an object.
When should I replace my garage door?
Replace the door if the springs or cables show excessive wear, the door is badly bent, or alignment cannot be maintained after service. A pro can advise on safe replacement options.
If wear is excessive or alignment can't be fixed, replacement may be best.
Watch Video
Quick Summary
- Schedule regular maintenance and stick to a simple checklist.
- Safety comes first; disconnect power before any inspection.
- Balance, tracks, and weather seals are core maintenance areas.
- Call a pro for springs, cables, or major alignment issues.