Garage Door Vinyl Seal Replacement Guide
Learn how to inspect, measure, and replace a worn garage door vinyl seal to stop drafts and improve insulation with a safe, step-by-step method.

This guide shows homeowners how to inspect a worn garage door vinyl seal, remove damaged sections, and install a new weather-tight seal to stop drafts and improve insulation. You’ll get a clear tool list, safety reminders, and a practical, step-by-step approach designed for homeowners who want a reliable, long-lasting seal.
Why a vinyl seal matters for garage doors
A worn or missing vinyl seal leaves your garage door susceptible to drafts, moisture, dust, and pests. A proper seal creates a tighter barrier between the door and the threshold, cutting air infiltration and reducing energy costs. According to GarageDoorAdjust, a healthy vinyl seal not only blocks cold air but also minimizes wind-driven rain intrusion that can enter along the bottom edge. Indoors, you’ll notice a more stable temperature and less dust tracked inside.
Vinyl seals are designed to flex with door movement. They compress when the door closes and rebound when it opens, maintaining a barrier even as the surface temperature fluctuates. When the seal starts to fail, you’ll see visible cracks, compression gaps, or material that has become brittle or warped, with small chunks breaking away. Another sign is a door that seems to stick or drag along the bottom when opening, indicating an imperfect seal that creates drag on the door’s travel.
The cost of a new seal is modest compared with the energy savings from reducing drafts. While there are several profiles and sizes, most homeowners can select a universal or width-matching seal that fits their door. The GarageDoorAdjust Team emphasizes that the most reliable results come from choosing a seal specifically designed for your door’s width and bottom profile. A correctly sized seal also prevents debris from collecting in the track and helps preserve the door’s finish by reducing moisture exposure.
Weather stripping isn’t a “set it and forget it” task, though. Seasonal temperature changes and humidity can cause seals to shrink or warp over time. Periodic inspection—at least twice a year—helps catch wear before it leads to bigger issues. If you are unsure about whether your seal is serviceable, perform a quick test: run a piece of tissue along the door bottom; it should resist easy passage when the door is closed and pass with little resistance when the door is open. Small drafts are not always obvious, especially on windy days, so a systematic check matters. GarageDoorAdjust’s observations highlight that even small gaps matter, especially for attached garages or spaces connected to living areas.
Types of vinyl seals and compatibility
Vinyl seals fall into a few common profiles: bottom bulb seals that sit in contact with the threshold, V-shaped or T-shaped edge seals that run along the sides, and door-bottom “bulb-in-channel” designs that use a channel to guide the seal. The right seal depends on your door’s bottom profile, width, and whether you have an expansion joint at the threshold. When choosing, measure the door width precisely and compare it to the seal’s stated width range. If your door has a double-car setup, you may need a longer seal that covers both panels or two seals that meet at the meeting edge. For metal doors, ensure the seal has a compatible metal strip or mounting method; some designs use screws, others rely on adhesive backing. If you’re unsure, consult the manufacturer’s guidance or a skilled technician. GarageDoorAdjust recommends selecting a seal that matches your door’s width and bottom profile for the best fit and longevity.
The seal’s material and density influence how well it seals in cold weather. In damp climates, a seal with a slightly thicker bulb tends to compress more against the threshold, improving water resistance. For attached garages that back up to living spaces, prioritize a seal with low air leakage rating (a common spec on many brands) and one that resists UV degradation to prevent brittleness over time. When in doubt, choose a seal designed for metal doors and a width that leaves a small allowance for contraction and expansion during temperature swings.
Maintenance matters. A seal that’s kept clean and free from debris will perform better and last longer. Use a soft brush or cloth to wipe away dust, dirt, and small pebbles. Avoid aggressive scraping that could nick the vinyl. If you notice sticking or hard compression in cold weather, consider replacing with a higher-density seal designed for low-temperature performance.
Assessing wear and choosing the right seal
Inspecting the vinyl seal requires a methodical approach. Start at the bottom edge where the seal meets the concrete or threshold. Look for cracks, gaps, torn sections, or hardening of the material. Check the entire length of the seal—edges, corners, and any sections near door hardware—for signs of detachment or tearing. If the seal has become stiff, cracked, or permanently compressed, it’s time to replace. Compare the seal’s profile to the door’s bottom lip. Some doors require a bulb seal that sits in a groove, while others use a pour-in or push-on style that’s simply pressed into place.
When selecting a replacement, bring measurements and a photo of the door edge to a local hardware store. Opt for a seal rated for your climate (cold-weather performance helps prevent cracking) and one designed to fit your door width. If your door has a threshold with a raised lip, a flexible bulb that fills gaps without binding will work best. Remember to consider installation method: adhesive-backed seals are easier but may not be as durable as screw-fastened varieties, especially on windy days. The GarageDoorAdjust analysis emphasizes matching the seal to your door’s bottom profile and width for a lasting seal and fewer call-backs.
Before ordering, confirm whether your door is single- or double-panel and measure each panel’s width. If the panels expand and contract differently in your climate, you may need two seals to achieve continuous coverage. Finally, consider future maintenance: choose a seal that’s easy to replace when worn and that can be trimmed to length with ordinary tools.
Replacement workflow overview
Replacing a vinyl seal is a straightforward, repeatable process when you have the right seal and tools. Begin by setting up the work area, ensuring the door is fully open and supported. Remove the old seal carefully, without bending or scratching the door bottom lip. Clean the surface to ensure the new seal bonds properly if using an adhesive-backed option. Cut the new seal to length, leaving a small margin for trimming after test fits. Install the new seal along the bottom edge, aligning it with the door lip and ensuring it sits flush across the entire length. If the seal uses screws or brackets, secure it at regular intervals to prevent sagging during operation. After installation, run the door slowly to check for binding and adjust as needed. Finally, wipe away any excess adhesive or molding compound and perform a test with a tissue or light to confirm the seal blocks drafts when the door is closed.
For the homeowner, the most important steps are accurate measurement, careful removal of the old seal, and slow testing of the new seal to ensure a tight fit. If the new seal is too tight, you may cause resistance or misalignment; if it’s too loose, drafts will persist. The goal is a snug, uniform seal along the entire bottom edge. If you notice uneven gaps at the corners, re-check alignment and ensure the seal is seated into any grooves or channels correctly. A well-installed seal should require only light pressure to compress when closed and should rebound freely when opened.
Installation pitfalls and how to avoid them
Common mistakes include cutting the seal too short, which creates gaps at the ends, failing to remove all old adhesive residue, and choosing a seal with an incompatible profile for the door. Cutting too long can cause awkward overlaps that snag during operation. Another pitfall is installing a seal that’s too rigid for the door’s movement, which can lead to binding or accelerated wear. Always verify the seal’s length with a minor overhang at both ends and trim gradually. Be cautious around metal edges to avoid cuts, and never force a seal into a tight groove, which can deform the lip. If the seal uses screws, pre-drill holes to prevent splitting the door lip and use a speed counter-sink to ensure screw heads sit flush.
Temperature can affect seal flexibility; install during mild conditions if possible. For adhesive-backed seals, ensure a clean, dry surface and press firmly for a full cure. If you hear squeaks or see misalignment after the first few door cycles, re-check the attachment points and trim the seal as needed. As a safety note, unplug garage door openers or disconnect the door’s power to avoid accidental movement during installation.
The GarageDoorAdjust team recommends verifying compatibility with your door’s bottom profile and testing with the door manually before reactivating the opener. This reduces the risk of misalignment and ensures your seal remains effective under normal use.
Maintenance and long-term care
Once the new vinyl seal is in place, establish a simple maintenance routine to extend its life. Inspect the seal at least twice a year, paying attention to cracks, compression, and any hardening that reduces effectiveness. Keep the seal clean by gently brushing away dirt and debris; avoid harsh chemicals that can degrade the vinyl. If the seal begins to show wear, consider replacing it sooner rather than later to prevent energy loss and moisture intrusion. A well-maintained seal stays flexible and continues to form a tight barrier even as the door cycles daily. Lubricate any moving hardware lightly with a silicone-based product to reduce friction and prevent premature wear on the seal mounting points.
Safety and performance go hand-in-hand. The GarageDoorAdjust team stresses the importance of checking for signs of water intrusion or mold around the threshold, which may indicate a compromised seal elsewhere in the door system. Keep an eye on the track and rollers; if the door becomes noisy or binds, a seal replacement should not be delayed in order to avoid further wear on the opener.
When you do replace the seal again, reuse the same workflow and choose a seal with the same profile and width class. This consistency helps ensure a tight seal without the need for rework on the door lip or frame. The goal is repeatable results and a door that seals reliably across seasons.
Authoritative sources and safety considerations
For further reading and best practices on weather sealing and door maintenance, consult credible sources:
- https://www.energy.gov – Weather-stripping and energy efficiency guidance for residential buildings.
- https://www.osha.gov – Safety considerations when performing home maintenance and use of tools around doors and openers.
- https://www.nist.gov – General guidelines for material performance and environmental durability.
Notes: Always prioritize safety when performing any door maintenance. Wear protective gloves to guard against sharp edges and use proper eye protection when cutting or handling seal components. This article leans on industry best practices and the GarageDoorAdjust analysis to provide practical guidance for homeowners.
Tools & Materials
- New vinyl door seal (bottom seal for garage doors)(Choose a seal length equal to door width; have at least 6 inches extra for trimming.)
- Utility knife or scissors(For trimming the seal to length.)
- Measuring tape(Accurate door width measurements are essential.)
- Screwdriver (Phillips and flat-head)(If mounting brackets are used on your seal.)
- Pliers or pry bar(Helpful for removing old seal if it’s stuck.)
- Caulk gun and weatherproof sealant(Optional for sealing edges after install.)
- Silicone-based lubricant(Light lubrication for tracks and hardware after sealing.)
Steps
Estimated time: 30-60 minutes
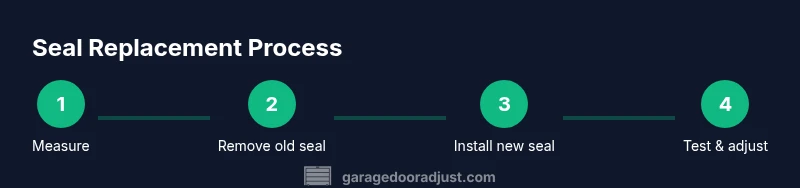
- 1
Measure door width and prep
Measure the full width of the door bottom and note any variations along the length. This ensures you select a seal that fits without gaps. Gather your seal, cutting tools, and protective gloves before starting.
Tip: Double-check measurements against the seal packaging to avoid ordering a wrong size. - 2
Remove the old seal
Carefully pry away the existing seal from the bottom lip and remove any screws or brackets if present. Clean the surface to remove residue and debris that could hinder adhesion or seating.
Tip: Wear gloves to protect your hands from sharp edges and use a flat-head screwdriver to lift stubborn portions gently. - 3
Cut the new seal to length
Lay the new seal along the door bottom and mark any excess length. Cut slightly long, then test-fit and trim as needed. Ensure the ends meet cleanly without folds or kinks.
Tip: Cut slowly and make a few small adjustments rather than one large cut. - 4
Attach the new seal
Position the seal along the bottom edge and secure it with screws or push-in fittings as appropriate for your model. Start at one end and work toward the other, keeping the seal flush with the door.
Tip: If adhesive-backed, press firmly and evenly; avoid stretching the seal during install. - 5
Seal edges and test
Close the door slowly and check for uniform contact along the entire length. Re-seat any areas that show gaps or misalignment. Wipe away excess adhesive if used and allow any sealant to cure per manufacturer guidelines.
Tip: Use a tissue-drag test to identify drafts along the bottom edge. - 6
Final checks
Inspect corners and transitions to ensure a continuous seal. Apply a light coat of silicone lubricant to moving parts if needed. Store leftover materials for future maintenance.
Tip: Document the seal type and width for future replacements. - 7
Wait for cure (if adhesive used)
If your seal uses adhesive, let it cure before subjecting the door to heavy use. Check after cure for any repositioning needs.
Tip: Avoid heavy door operation during the cure window.
Got Questions?
Do I need to replace only the bottom seal or the entire door weather seal?
If the bottom seal shows wear but the side seals are intact, replacing only the bottom seal is typically sufficient. Inspect the side edges as well; if they’re cracked or loose, you may need to replace those sections or the entire weather seal kit to maintain a uniform seal.
Usually you replace the worn bottom seal first, but inspect the sides too. If they’re damaged, you may replace those sections for a better overall seal.
Can I reuse an old seal if it’s torn?
No. A torn or hardened seal cannot provide an effective barrier. Replacing with a correctly sized seal designed for your door ensures you get a reliable weather seal and energy savings.
No—torn seals won’t seal properly. Replace with a correctly sized seal for your door.
How long does installation take for a typical single-car garage door?
Most homeowners complete a basic vinyl seal replacement in 30 to 60 minutes, depending on door design and whether screws or adhesive are involved. Planning and measurement add a little extra time.
Most installations take about 30 to 60 minutes with the right tools.
Is a vinyl seal compatible with all garage door materials?
Vinyl seals are generally compatible with most metal and wooden doors, but you should confirm the seal’s profile matches your bottom lip and mounting method. Some doors need a specific groove or channel design for best results.
Most metal or wood doors work, but verify the profile fits your bottom lip.
Should I hire a pro if I’m unsure about measuring or installation?
If you’re unsure about measurements, seal profiles, or the door’s hardware, hiring a professional can prevent misfits and costly mistakes. A quick check by a technician can save time and ensure a durable seal.
If you’re uncertain, a quick professional check can save time and ensure a durable seal.
What maintenance helps extend seal life?
Regularly clean the seal, inspect for cracks, and re-seal edges as needed. Lubricate nearby moving parts and verify the door closes evenly to maintain a consistent seal.
Keep it clean, inspect for cracks, and re-seal as needed. Lubricate nearby parts too.
Watch Video
Quick Summary
- Inspect seal wear and confirm compatibility before buying.
- Accurate measurements prevent gaps and drafts.
- Follow the correct attachment method for your seal profile.
- Test the seal thoroughly and perform maintenance regularly.