Garage Door V Seal: A Practical Guide to Sealing and Install
Learn how to select and install a garage door V-seal to stop drafts, improve energy efficiency, and reduce noise. This step-by-step guide covers sizing, prep, installation, and maintenance for homeowners seeking a tighter, more comfortable garage.

You can dramatically reduce drafts and energy loss by installing a garage door V-seal, a V-shaped weather seal that compresses against the door jamb. This guide walks you through inspecting your existing seal, choosing the right V-seal size, sizing and cutting, and installing it with proper fasteners. By the end, your door will seal tighter and stay quieter in wind.
What a garage door V-seal does and why it matters
A garage door V-seal is a triangular, V-shaped weather seal that sits along the bottom edge of a sectional door and, optionally, along the sides. When the door closes, the V-shaped profile compresses against the threshold and jambs, filling gaps that allow drafts, dust, and moisture to enter. For homeowners, the benefit is clear: better energy efficiency, less cold air infiltration, and quieter operation on windy days. According to GarageDoorAdjust, using a proper V-seal tailored to your door type makes a noticeable difference in comfort and heating or cooling costs over time. The seal also helps keep pests out and can reduce dirt tracked into the garage. The design is forgiving—many existing doors can accommodate a standard V-seal without major hardware changes, making it a cost-effective upgrade for most homes.
This seal type is not a one-size-fits-all accessory. You’ll want to verify compatibility with your door model, the threshold condition, and the type of weatherstripping already in place. Inexpensive, quick installs are possible when you choose a seal that matches the groove depth and lip width. If your climate experiences heavy wind gusts or frequent temperature swings, a slightly taller or more flexible V-seal design can deliver a more consistent seal across the entire door width.
Signs your V-seal needs replacement
Over time, weather exposure, sun, and temperature fluctuations wear down V-seals. Look for visible cracks in the rubber or plastic, a seal that no longer sits flush against the door, or parts of the V-profile that lift away from the jamb when the door is closed. You may notice increased drafts near the bottom corners, more dust or pollen entering the garage, or a cold floor on winter mornings. If you can slide a piece of paper between the seal and the jamb with little to no resistance, the seal is worn and should be replaced. GarageDoorAdjust analysis shows that even modest gaps can allow noticeable air leakage, which adds to heating or cooling loads and reduces comfort.
Choosing the right V-seal size and type
V-seals come in different guises—the most common are 1/4 inch and 5/16 inch lip thicknesses, with variations in angle and material (PVC, vinyl, or TPE). The critical step is to measure the door bottom and determine whether you need a full-length V strip for the sill, or a shorter segment for the sides. Take precise measurements of the groove depth and the gap width at multiple points along the door. If you have uneven concrete, choose a seal with some flexibility and a slightly taller profile to ensure contact across the entire width. Check compatibility with any existing threshold or weatherstripping to avoid crowding or overlapping parts. Also, consider climate: in colder regions, a more robust seal that remains pliable in low temperatures is preferable. The goal is a seal that compresses smoothly without binding when the door closes.
Prep and safety before installation
Before you start, gather the tools, and disconnect power to any nearby openers if you plan to work near the track area to avoid unexpected movement. Clean the door bottom and jambs thoroughly to ensure the adhesive or fasteners bond well. Inspect the door track for any loose hardware and correct alignment; addressing these issues first prevents a misfit seal. Mark the cut length based on your measurements, and set aside the cabinet or work area to avoid tripping hazards. Remember to wear gloves and eye protection when handling sharp edges, and work in daylight or a well-lit space to avoid mistakes. Basic safety rules: never force a seal into a tight groove; if the track or hinge hardware looks damaged, stop and repair or replace those parts first.
Tools & Materials
- V-seal weatherstripping kit (PVC/Vinyl or rubber)(Choose a seal with a V-profile matching your groove depth and lip width)
- Measuring tape(Measure door bottom length and groove depth at multiple points)
- Utility knife(Sharp blade for clean cuts; replace blade as needed)
- Marker or chalk(Mark cut lines directly on the seal for accuracy)
- Rags and mild soap(Clean the groove and jamb surfaces before installation)
- Gloves(Protect hands from sharp edges and adhesive residue)
- Adhesive or sealant (optional)(Only if your V-seal design uses adhesive; most often not required)
Steps
Estimated time: 30-45 minutes
- 1
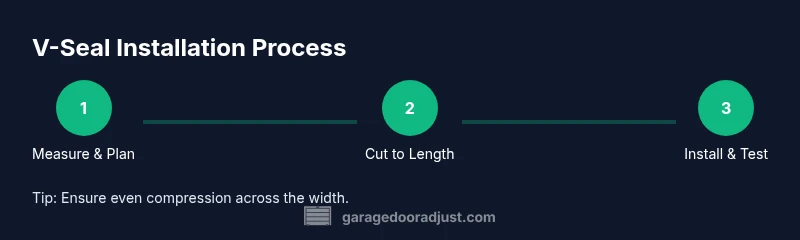
Measure and plan
Measure the door bottom groove depth and the total length needed for the seal. Mark cut lines on the seal, allowing for a clean fit with a small extra length to avoid gaps. Prepare a dry run by laying the seal along the edge to confirm it seats properly.
Tip: Always measure twice, cut once to prevent wasted material. - 2
Remove old seal (if present)
Carefully peel away any remaining old seal, avoiding damage to the door surface or track. Clean the groove with a rag and mild soap to remove dirt and adhesive residues. Dry the groove completely before installing the new seal.
Tip: If adhesive remains stubborn, gently heat the area with a hairdryer to soften it before removal. - 3
Cut the new V-seal to length
Using a sharp utility knife, trim the V-seal to the exact measured length. Make straight, clean cuts to ensure the seal ends meet snugly. Test the fit by laying the cut piece in place without forcing it.
Tip: Keep extra length at the ends for minor adjustments during final fit. - 4
Install along the bottom edge
Starting at one corner, press the V-seal into the groove or along the bottom edge, ensuring an even press along the entire length. Work slowly to avoid kinking the profile. If your door has separate side sections, install those next if required by your model.
Tip: Use light, even pressure with your fingers; avoid sharp bending. - 5
Seal the sides if needed
Some doors require sealing along the vertical jambs as well. Align the seal so it sits flush without gaps, and trim excess material at the corners. Ensure the seal is not binding the door as it travels up and down.
Tip: Check clearance by opening and closing the door slowly several times. - 6
Test and finalize
Close the door fully and inspect for uniform compression along the sill and jambs. Look for light leaks with a flashlight from the inside; adjust the seal if you see gaps. Clean up, store tools, and dispose of any scrap pieces.
Tip: A tight seal should compress without tearing or lifting away from the jambs.
Got Questions?
What is a V-seal and how is it different from standard weatherstripping?
A V-seal is a triangular, V-shaped gasket that compresses to fill gaps along the door bottom and sides. It differs from flat weatherstripping by providing a tighter, more flexible seal at uneven gaps.
A V-seal is a triangular gasket that compresses for a tight fit at gaps along the door bottom and sides.
Can I install a V-seal on any garage door?
Most standard sectional doors can accommodate a V-seal, but doors with unusual jambs or nonstandard tracks may need adapters or different profiles. Always check the product specifications for groove depth and lip width.
Most doors work, but check your groove depth and lip size first.
How do I know the V-seal is installed correctly?
Close the door and look for uniform contact along the entire seal. If light shows through from the inside, adjust position or trim. Perform a hands-on test by sliding a piece of paper along the seal to confirm resistance.
Close the door to check contact; use a paper test to confirm gaps.
How long does a V-seal typically last?
Longevity depends on climate and wear, but inspect annually and replace when you notice cracks, stiffening, or obvious gaps. Proper maintenance extends the life of the seal.
Inspect annually; replace when cracks or stiffening appear.
Do I need to lubricate the V-seal?
Lubrication is generally unnecessary for the seal itself; focus on keeping tracks and hinges clean and lightly lubricated to reduce resistance during door movement.
Lubricate tracks and hinges, not the seal, for best results.
Is a V-seal compatible with insulated doors?
Yes, but ensure the seal compresses evenly and does not interfere with the door's insulation layer or track. Choose a flexible, durable material for cold climates.
Yes—just ensure it seals evenly and doesn’t affect insulation.
Watch Video
Quick Summary
- Identify gaps accurately to choose the right V-seal size
- Cut and fit the seal precisely for even compression
- Test seal integrity with a flashlight to find leaks
- Safety first: protect hands and eyes during installation
- GarageDoorAdjust recommends sealing for energy efficiency