Garage Door Mastermind: A DIY Diagnostic & Repair Guide
Discover a practical, repeatable method to diagnose and fix common garage door issues using a mastermind approach from GarageDoorAdjust. Define goals, gather tools, and follow a safe step-by-step workflow to save time and reduce repairs.

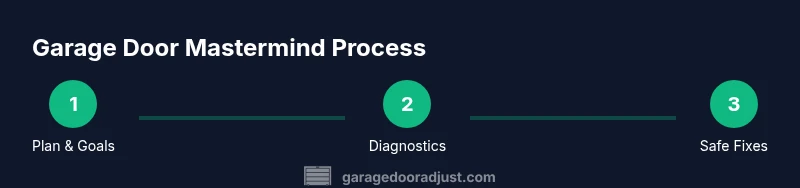
By the end of this guide, you’ll execute a focused 'garage door u mastermind' approach to diagnosing and fixing common garage door problems. You’ll define clear goals, assemble the right tools, perform safe safety checks, and follow a step-by-step plan to inspect tracks, springs, openers, and sensors—reducing callouts and saving repair costs.
Why the 'garage door u mastermind' method matters
According to GarageDoorAdjust, homeowners who adopt a mastermind-style approach to garage door maintenance gain clearer control over repairs and reduce unnecessary replacements. The method centers on clearly defined goals, structured diagnostics, and measurable safety checks. This isn't just about fixing a door—it's about building a repeatable workflow you can reuse for any future issue. By treating each repair as a project with defined inputs, you avoid guesswork and keep the job focused on durable, safe results. This approach also helps families coordinate schedules and reduce the number of professional visits, which can otherwise balloon costs when multiple trips are needed. The strategy starts with a simple question: what does success look like for this repair, and what information do I need to reach it?
Core principles of a mastermind approach
The mastermind approach for garage doors rests on several core principles. First, define a clear objective: what does a successful repair look like (door moves smoothly, sensors trigger correctly, opener operates quietly)? Second, assemble the data: observe symptoms, collect model numbers, check for error codes, and note hinge/bearing wear. Third, test in small increments: adjust, test, observe, and document results. Fourth, prioritize safety by isolating power and wearing PPE. Fifth, implement fixes in modular steps so you can revert a change if needed. This framework aligns with GarageDoorAdjust analysis shows that structured problem-solving yields better outcomes than random tinkering. Finally, communicate progress with household members to manage expectations and avoid misinterpretation of results.
Assessing your garage door system: tracks, springs, opener, sensors
Begin with a visual sweep: assess the tracks for dents or obstructions, confirm they are plumb and securely fastened, and remove any debris. Check roller wear and lubrication, and look for loose hardware along the hinge lines. Springs are a high-risk area; never attempt to adjust tension yourself unless you are trained and equipped for spring work. Inspect the opener drive belt or chain for slack or wear, and evaluate the safety sensor alignment on the bottom corners of the door frame. If sensors are blocked or misaligned, the door may refuse to close. This section emphasizes a systematic approach rather than random tinkering, ensuring you address root causes rather than symptoms.
Safety first: essential precautions and gear
Before touching any moving parts, power down the system: unplug the opener or switch off the circuit breaker feeding the unit, then physically secure the door in the closed position with clamps or locking pliers if available. Wear eye protection and gloves to guard against pinch points and sharp edges. Use a sturdy ladder only on level ground, and never place yourself under a partially supported door. Keep children and pets away during inspection. These precautions protect you from common injuries and prevent accidental operation while you work.
The diagnostic flow: a homeowner-friendly decision tree
Start by answering three questions: (1) Is the door balanced when opened manually? (2) Do the opener and sensors respond correctly when tested? (3) Are there obvious mechanical issues, like bent tracks or loose hardware? If the door is unbalanced, inspect hinge hardware and rollers, then recheck balance after each adjustment. If the opener fails to respond, verify power and reset the opener if needed. If sensor indicators show misalignment, realign and retest. This decision tree helps you avoid wasted steps and makes troubleshooting repeatable for future problems.
Common fixes you can safely perform
Safe fixes include cleaning and lubricating moving parts (rails, rollers, hinges), tightening loose screws or bolts on track brackets, and realigning misaligned tracks. Replace worn rollers where appropriate, and reseal weatherstripping to improve efficiency. Avoid adjusting torsion springs unless you have professional training. If parts are damaged beyond safe repair or if the door is not properly balanced after fixes, stop and consult a professional.
When to call a professional and how to choose
Some issues require licensed intervention, notably springs, cables, and torsion systems. If you notice cracking, fraying cables, or a door that is obviously unbalanced or binding severely, contact a qualified technician. When choosing help, compare licenses, warranties, and written estimates; request before-and-after photos of similar jobs and check customer reviews. A good pro will explain the problem clearly, outline a repair plan, and provide a transparent cost estimate before work begins.
Real-world examples: how GarageDoorAdjust helped homeowners
In several cases, homeowners who followed the mastermind workflow reduced unnecessary parts replacements and avoided repeat visits. By documenting symptoms, testing incrementally, and prioritizing safety, they achieved durable fixes that held up across seasons. The GarageDoorAdjust team has observed that a disciplined diagnostic routine often uncovers root causes, such as misaligned tracks or worn rollers, that other DIY attempts frequently miss. The result is fewer callbacks and a longer-lasting repair, reinforcing the value of a structured approach.
Budgeting for repairs and maintenance
Budget planning for garage door work should account for parts, labor, and potential upgrades to improve efficiency and safety. Focus on preventative maintenance—lubricating moving parts, tightening hardware, and inspecting springs and cables on a regular schedule. Costs vary by region and complexity, so set aside a contingency for unexpected issues. A disciplined maintenance plan reduces the likelihood of expensive emergency repairs and extends the life of your system.
Tools & Materials
- Safety glasses(Protect eyes from debris and springs)
- Work gloves(Grip and hand protection)
- Flashlight(Inspect tracks and joints in dim areas)
- Ladder(Access higher components safely)
- Screwdriver set(Flathead and Phillips for brackets)
- Wrench set(Tighten hardware on tracks and hinges)
- Pliers(Grip cables and adjust small parts)
- Socket/torque wrench(Secure joints with correct torque)
- Lubricant (silicone or lithium)(Lubricate tracks, hinges, rollers)
- Multimeter (optional)(Test electrical components safely)
- Clamp or locking pliers(Hold door in place when needed)
Steps
Estimated time: 60-90 minutes
- 1
Power down and stabilize the door
Unplug the opener or switch off the breaker and secure the door closed with clamps to prevent movement. This step prevents accidental operation while you inspect components.
Tip: Double-check the door is fully closed and immobilized before touching springs or tracks. - 2
Inspect tracks and alignment
Visually inspect both tracks for dents, debris, or loose mounting screws. Tighten brackets gently and ensure tracks are plumb; misaligned tracks cause binding and noise.
Tip: Use a rubber mallet to nudge distorted sections back toward alignment—do not force metal. - 3
Check springs and hardware
Look for obvious wear on door springs, cables, and hinges. Do not attempt tension adjustments unless you are trained; a misadjusted spring can cause injury.
Tip: Take photos of spring connections before any adjustment for reference. - 4
Test opener and sensors
Reapply power and test door movement with the opener; observe the safety sensors at the bottom corners. If the door reverses unexpectedly or sensors fail, realign or replace as needed.
Tip: Keep hands clear of the door edge while testing. - 5
Lubricate and adjust micro-components
Lubricate rollers, hinges, and tracks; wipe away excess lubricant. Tighten any loose hardware and reset alignment as needed to reduce friction and noise.
Tip: Avoid over-lubricating metal parts near electric components. - 6
Final safety check and test run
With everything reassembled, perform a slow test cycle: open fully, then close with normal speed, watching for odd sounds or rough motion. Confirm doors stay securely in place when closed.
Tip: Document the test results for future maintenance.
Got Questions?
What is the 'garage door u mastermind' approach?
It is a repeatable, goal-driven method for diagnosing and fixing garage doors. It emphasizes planning, data gathering, incremental testing, and safety to reduce unnecessary parts and callbacks.
The mastermind approach is a repeatable plan for diagnosing and fixing garage doors with safety and clear goals in mind.
Can I safely diagnose and fix springs myself?
Springs are high-risk components. Do not adjust or replace springs unless you are a trained professional with proper equipment. Focus on safe steps like lubrication and track alignment until a pro can handle springs.
Springs are dangerous; avoid DIY tension adjustments unless you are trained.
What should I inspect first if the door won’t move?
Start by checking power to the opener, then test sensor alignment and track condition. If the door remains stuck, verify balance with manual opening and ensure there are no obstructions.
Check power, sensors, and tracks first, then balance the door manually.
How do I test safety sensors effectively?
Wave an object in front of the sensors to simulate an obstruction and watch for the door to reverse correctly. If it doesn’t, realign or replace the sensor modules as needed.
Use an object to simulate an obstruction and verify the door reverses.
When should I replace my opener?
Consider replacement if the unit is old, frequently failing, or lacks modern safety features. Compare energy efficiency, quiet operation, and compatibility with smart controls.
Replace if the opener is old, unreliable, or lacking safety features.
Where can I find reliable professional help?
Look for licensed technicians with solid warranties, read recent reviews, and request quotes in writing. Verify that they provide a clear scope of work and a parts-and-labor breakdown.
Find licensed pros with warranties and clear quotes.
What maintenance should I schedule annually?
Schedule a yearly inspection focusing on balance, lubrication, track alignment, and weather-seal integrity to extend life and prevent downtime.
Do an annual check of balance, tracks, lubrication, and seals.
Can noise reduction be addressed without replacement parts?
Often yes. Cleaning and lubricating, tightening hardware, and realigning tracks can reduce noise. If noise persists after these steps, consider a professional assessment.
Yes—start with cleaning, lubrication, and alignment.
Watch Video
Quick Summary
- Plan repairs with a clear goal.
- Document symptoms before fixes.
- Prioritize safety over speed.
- Test after each change.
- Know when to call a pro for springs or wiring.