Garage Door Medics: A Practical How-To Guide for Diagnosis, Repair, and Maintenance
Learn how to diagnose, repair, and maintain your garage door with expert guidance from GarageDoorAdjust. This thorough how-to covers safety, tools, a detailed step-by-step workflow, maintenance routines, and clear when-to-call-a-pro guidance for homeowners.

By following this guide, homeowners can diagnose common garage door problems, safely disconnect power, inspect tracks, balance the door, test safety sensors, and perform basic maintenance. You'll learn which issues you can fix safely and when to call a professional, along with a ready-to-use tools list and a step-by-step repair workflow.
What garage door medics do for homeowners
The term garage door medics describes technicians who diagnose, repair, and maintain garage doors and openers, helping homeowners restore safety and reliability. According to GarageDoorAdjust, properly diagnosing issues saves time and reduces the risk of injury when working around high-tension components. This guide uses their approach to walk you through safe checks, practical repairs, and essential maintenance you can perform or verify before calling a pro. By the end, you will understand where DIY is appropriate and when professional service is required. The goal is to empower homeowners to act confidently, minimize downtime, and extend the life of their garage system. Throughout, the focus remains practical, actionable, and safety-conscious, with clear steps you can follow and checklists you can use.
Common symptoms that signal a problem
Garage doors and openers usually give clear signals when something needs attention. Common symptoms include: a door that sticks or binds as it travels, an opener that refuses to respond, unusual noises like grinding or squealing, the door reversing or stopping mid-way, and visible misalignment or gaps along the tracks. These signs don’t always point to the same root cause, but they help you triage quickly. In many cases, a simple lubrication, track cleaning, or sensor realignment may restore smooth operation. If any symptom persists after basic checks, use the diagnostic checklist in this guide to pinpoint the likely culprit and decide whether you can safely proceed or should contact a professional. Remember, consistent symptoms usually indicate wear or misalignment that will worsen without timely maintenance.
Safety and preparation: essential precautions
Before you touch any part of the door or opener, ensure power is disconnected and the area is clear of people, pets, and obstructions. Wear safety glasses and gloves, and keep a stable ladder or platform handy if you need height access. Never place yourself under a door that is supported only by springs or cables. If the door feels unusually heavy or balky, stop and call a pro. Safety should govern every DIY step, especially when working near torsion springs, cables, and tracks. This section reinforces the mindset that maintenance is a balance between proactive care and prudent limits.
Tools, materials, and setup you’ll need
A well-prepared toolkit makes a big difference. Common items include a sturdy ladder, screwdrivers (Phillips and flathead), an adjustable wrench, hex keys, pliers, a punch or hammer, safety glasses, gloves, a silicone-based lubricant, a clean rag, a flashlight, and a voltage tester if you’ll inspect electrical components. Depending on the door, you might also need track-cleaning brushes, replacement rollers, or a door balance gauge. Having a dedicated workspace with the door open and a helper nearby can prevent injuries and speed up the process. This section also covers how to protect your flooring and avoid mishaps when working near heavy hardware.
The diagnostic workflow: from observation to action
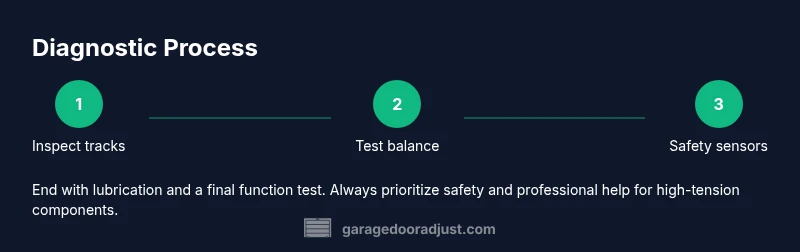
Start with a visual survey: check tracks for dents or obstructions, verify rollers spin freely, and test the door balance by manually lifting the door to see whether it stays put. If the door moves smoothly but the opener stumbles, the issue is likely with the opener or sensors rather than the door itself. When you encounter resistance or binding, stop and record where it occurs before proceeding. Prioritize safety checks: ensure sensors align and the safety reversing mechanism works. If you detect frayed cables or bent tracks, you’ll likely need professional service.
Maintenance routines to prevent failures
Routine maintenance is the best investment you can make in a garage door system. Schedule lubrication of hinges, rollers, and tracks at least every six months, and clean tracks to remove dirt and debris that can impede movement. Check fasteners and hardware for looseness and tighten as needed. Observe door balance monthly by performing a manual lift test; an unbalanced door increases stress on springs and the opener. Regular sensor alignment checks ensure safety features work correctly and protect family members and pets. A small, consistent maintenance habit can prevent big, costly breakdowns.
When to contact a professional and how to choose
Some issues cross a line from DIY-friendly to high-risk professional territory. If you hear grinding near torsion springs, notice significant misalignment, observe frayed cables, or cannot safely test the balance, contact a licensed technician. When choosing a pro, request a written assessment, compare multiple quotes, verify licensing where required, and confirm they’ll handle both parts and labor. A reputable GarageDoorAdjust-like service will provide a transparent scope of work, explain the risks, and offer practical maintenance recommendations to extend the life of your door. This approach protects you from hidden fees and ensures a safe, reliable repair.
Troubleshooting scenarios and quick fixes you can attempt safely
If the door opens but stops intermittently, inspect the track for debris and ensure the rollers roll smoothly. For sensors that fail to detect objects, realign or clean the sensor lenses and re-test. If the door opens slowly or hesitates, clean and lubricate moving components, then verify track alignment. For squeaks and rattles that arise from dry hinges, apply a small amount of silicone-based lubricant and wipe away excess. Use caution with any fix that involves cutting, bending, or rewiring; if you’re unsure, stop and contact a qualified technician.
Tools & Materials
- Sturdy ladder(Stable and tall enough to reach tracks without overreaching)
- Safety glasses(Protect eyes during inspection and adjustments)
- Gloves(Grip and protection when handling hardware)
- Screwdrivers (Phillips and flathead)(For hinge and panel screws)
- Adjustable wrench(Tighten/loosen nuts on hardware)
- Pliers and vise grips(Grip and manipulate components safely)
- Hex keys (Allen wrenches)(Some models use hex bolts)
- Silicone-based lubricant(Use on tracks, hinges, and rollers)
- Rags or shop towels(Clean surfaces before lubrication)
- Flashlight or headlamp(Improve visibility in dark track areas)
- Track cleaning brush(Useful for stubborn debris)
- Replacement rollers or track components(Only if worn assessed by professional)
Steps
Estimated time: 60-90 minutes
- 1
Power down and prepare workspace
Disconnect the garage door opener from power and clear the area. Secure the door in the open position if possible and ensure a helper is nearby. This minimizes the risk of sudden movement while you inspect.
Tip: Never stand under the door while performing a balance check. - 2
Disconnect power and test manual operation
Unplug the opener and attempt to lift the door by hand to test balance. If it feels heavy or binds at any point, stop and avoid further DIY adjustments. This step helps determine whether the issue is mechanical or electrical.
Tip: If the door is balanced, you should be able to lift it with minimal effort. - 3
Inspect tracks, rollers, and hinges
Look for dents, obstructions, and worn rollers. Spin each roller to confirm it moves freely; if a roller binds, do not force it. Clean tracks with a rag and lubricate after removing debris.
Tip: Avoid using penetrating oil on tracks; silicone-based lubricant is safer for plastic and metal parts. - 4
Check door balance and safety features
With the door closed, lift it about one foot and release; it should stay put. If it drops, there may be spring or balance issues requiring a pro. Test the safety sensor: place an object in the path and confirm the door reverses.
Tip: Do not attempt to adjust springs yourself; this is high-tension equipment. - 5
Test the opener operation and alignment
Reconnect power and run the opener through a full cycle. Listen for unusual sounds and note any hesitations. If the opener stalls or misbehaves, verify wall controls and remote pairing first, then check safety edges.
Tip: Ensure the door is fully supported and clear before testing with the opener. - 6
Lubricate and re-test, then tidy up
Apply a light silicone-based lubricant to hinges, rollers, and tracks, then wipe away excess. Recheck balance and test cycle once more to confirm improvement. Put tools away and document any persistent issues for the technician.
Tip: Use only small amounts of lubricant to avoid attracting dust.
Got Questions?
What are the most common signs a garage door needs service?
Common signs include sticking or binding movement, non-responsive openers, unusual noises, and misalignment of tracks or gaps along the door. These symptoms indicate wear or setup issues that deserve inspection.
Common signs are sticking doors, a non-responsive opener, weird noises, and misaligned tracks. These usually mean wear or setup issues that should be inspected.
Is it safe to lubricate tracks and hinges myself?
Lubricating tracks, hinges, and rollers is generally safe if you use a silicone-based lubricant and avoid petroleum products. Keep lubricant off belts and sensors, and wipe away excess to prevent dust buildup.
Lubricate with silicone-based products and wipe off excess. Don’t spray near sensors or belts.
Can I replace garage door springs myself?
Spring replacement is high-risk work due to stored tension. It’s best handled by a licensed professional who has proper tools and procedures to prevent injury.
Replacing springs is dangerous work—it's best left to a licensed technician.
How often should I inspect and maintain my garage door?
Perform a quick safety and lubrication check every 3-6 months, and schedule a more thorough inspection annually. Regular maintenance reduces the chance of unexpected failures.
Do quick checks every few months and a full inspection yearly.
What should I do after a power outage affects my opener?
Reset the opener and test the safety sensors after restoring power. If the door behaves oddly, consult the manufacturer’s guide or contact a professional for a diagnostic.
Reset the opener, test sensors, and call a pro if issues persist.
Watch Video
Quick Summary
- Identify root causes with a safe inspection.
- DIY when safe; call a pro for springs or serious misalignment.
- Regularly maintain tracks and hardware to extend life.
- Use the right lubricant and do not over-apply.
- Test safety features monthly to protect your family.