Garage Door Track Repair: Step-by-Step Guide
Learn how to diagnose and fix garage door track repair issues. This homeowner-friendly guide covers essential tools, safe steps, and maintenance to restore smooth, reliable operation.

Understanding garage door track repair
A garage door relies on precision-aligned tracks to guide the carriage and rollers through a smooth arc as the door opens and closes. When tracks bend, crack, or become misaligned, you may notice binding, grinding sounds, or a door that stalls at a certain point. It’s essential to distinguish between a track that needs minor realignment and a track that’s damaged beyond repair. According to GarageDoorAdjust, most track-related problems stem from loose mounting hardware, impact damage, or accumulated debris that restricts movement. A careful assessment should cover the vertical tracks (which keep the door plumb), the horizontal rails (which guide the rollers), the rollers themselves, and any mounting brackets. Your goal is to ensure the track is straight, firmly secured, and free of obstructions that could pinch a roller or trap dust and grit. This sets the foundation for safe, reliable operation and reduces the risk of sudden derailment or door imbalance.
Safety first: prerequisites and protective gear
Safety comes first when working on a garage door track repair project. Before you touch any moving parts or power sources, disconnect power from the garage door opener to prevent unexpected movement. Wear safety glasses to protect eyes from flying debris, and use gloves to protect your hands from sharp edges. Keep children and pets away from the workspace. If you’re working on a two-car garage, set the door to the half-open position and place a sturdy support under the door edge so it can’t drop suddenly. A well-lit workspace helps you spot misalignment, damaged brackets, or bent rails more clearly. Remember that tracks can be heavy and awkward to handle—work with a partner if possible. This is also a good time to gather the tools you’ll need and clear the floor of clutter to prevent trips and slips.
Common causes of track misalignment
Misalignment often starts with simple looseness, but gradual wear compounds the problem. GarageDoorAdjust analysis shows that loose mounting screws, sagging hinges, or worn rollers are common culprits for vertical track drift. Debris and dirt on the rail create resistance, while bent or dented sections can redirect the door path. Uneven floor settlement beneath the door can tilt the bottom brackets, pulling the tracks out of square. A key sign is a door that binds at a single point or travels off-center as it moves. Recognizing these causes helps you plan targeted fixes rather than a broad, risky overhaul. If you find multiple issues—like bent rails and worn rollers—consider replacing damaged components or consulting a professional to preserve safety and door balance.
Tools you’ll need and why each matters
This section provides guidance on choosing the right tools and how they contribute to a safe, successful repair. You’ll likely use a drill with multiple bits, a set of wrenches, screwdrivers, a level, and a carpenter’s square to verify plumb. A pry bar can help reposition brackets, while a rubber mallet minimizes metal marring on rails. A small ruler or tape measure ensures brackets are spaced correctly and that vertical tracks remain perfectly plumb. Lubricants are helpful after realignment to reduce friction, but avoid over-lubrication near the door’s electrical components. Always choose tools with solid grip and appropriate size to prevent slips. If parts show obvious wear—like cracked brackets or severely bent tracks—plan for replacement rather than “temporary” fixes to avoid recurring safety risks.
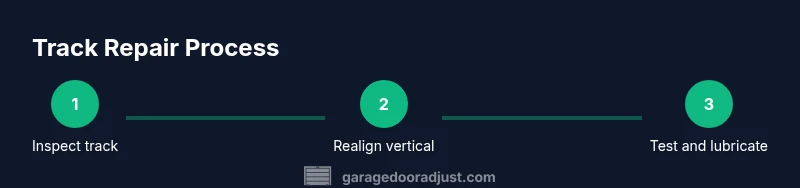
Step-by-step plan to realign a track
A practical plan keeps you organized and reduces the chance of missteps. Start by inspecting for visible damage and clean the rails to remove dirt and debris. Next, gently loosen the mounting screws or bolts just enough to allow slight movement without letting components sag. Realign the vertical tracks so they are perfectly plumb (use a level against the edge of the track); repeat for the horizontal section, ensuring the rail forms a smooth arc with the door in its open position. Re-tighten brackets in small increments, re-check alignment, and confirm that the door can move freely through its full travel without rubbing. Finally, reinsert and adjust the rollers, lubricate lightly, and test the door several times at increasing speeds to verify stability and balance. If any bracket shows signs of bending, replace it before finishing. This sequence minimizes stress on components and helps preserve door balance.
Lubrication, testing, and fine-tuning
After alignment, a light lubrication on moving parts reduces friction and wear, but avoid applying lubricant directly to the track where it can attract dirt. Run the door up and down slowly, listening for unusual noises or resistance. If you hear grinding or feel sticking at a specific point, pause and re-check the track and rollers. Keep a close watch on the door’s balance: if it tends to drift down or up when released, the torsion system or springs may be out of tune and require professional attention. Periodic checks—every 6 to 12 months depending on use—help prevent future misalignment and extend the life of rollers and rails.
Final checks and safety reminders
With the track realigned and lubricated, re-test the door in multiple cycles, from fully closed to fully open. Ensure the door stops cleanly at its limits and that the opener responds smoothly without strain on the motor. Tighten any loose fasteners and verify brackets sit flush against the wall. If you notice new creaks, shifts, or unusual heat from the opener, shut down the system and reassess or call a pro. The GarageDoorAdjust team recommends documenting the steps you took and scheduling a follow-up inspection if seasonal changes or heavy use continue to cause drift. Regular maintenance is your best defense against recurring misalignment.
Quick maintenance habits to prevent future issues
Establish a simple routine that includes cleaning tracks, tightening brackets, and inspecting rollers every few months. Wipe away dust and debris with a dry rag, inspect for rust or corrosion, and ensure the weather seals at the bottom are intact and not interfering with the track. Replace worn rollers and bent brackets promptly to minimize misalignment risk. Finally, ensure the door’s balance remains correct—an imbalanced door places extra load on rails and springs, accelerating wear and misalignment over time. The more proactive you are, the longer your door will run smoothly.