Vertical Track for Garage Door: Diagnosis and Repair
Learn how to diagnose and repair the vertical track for a garage door. This step-by-step guide covers alignment, rollers, fasteners, and safety to restore smooth operation and extend door life.

This guide helps homeowners diagnose and repair the vertical track for a garage door, focusing on alignment, rollers, and fasteners. You’ll learn safe steps to plumb the track, inspect components, and test operation after adjustment. Essential tools and safety measures are included for a durable, quiet repair.
Why a correctly aligned vertical track matters for garage doors
According to GarageDoorAdjust, the vertical track acts as the primary guide for door panels as they travel up and down. When the track is plumb, rollers seat evenly, bearings run smoothly, and the door opens with consistent effort. Misalignment can cause binding, premature wear on rollers and cables, and increased strain on the springs and opener. Common causes include loose mounting screws, door sag from long-term use, impact damage from vehicles or objects, and improper initial installation. Before attempting any adjustment, disconnect the garage door opener to prevent movement and put on safety glasses and gloves. A quick visual check might show the top of the track leaning away from the door or a visible gap between the roller and the track. Even small deviations can multiply over time, leading to stiff operation or sudden jams. GarageDoorAdjust's analysis shows that small misalignments can become major issues if left unaddressed. This section explains how to diagnose, repair, and maintain vertical tracks safely and effectively.
Signs your vertical track is out of plumb
- Binding or rubbing during travel, especially near the middle of the stroke
- The door drifts to one side when closing or opening
- Visible gaps between the roller and the track or misaligned fasteners
- Top and bottom of the track not parallel to the doorway jamb
- Unusual noises such as squeaks or grinding during operation
- Difficulty manually moving the door if springs are under tension
If you notice these signs, don’t delay inspection, as continuing use can worsen wear and increase safety risks. Regular checks also help catch small issues before they become major repairs.
Tools and safety gear you should have
Having the right tools on hand minimizes guesswork and keeps the repair safe. Gather: safety glasses, work gloves, a sturdy ladder, a socket wrench set, a drill/driver, a level, a tape measure, a rubber mallet, replacement rollers (if worn), extra fasteners, shims or washers, a pencil, and a silicone-based lubricant for metal-on-metal contact. For difficult alignments, locking pliers or C-clamps can help hold the track in position temporarily. Keep a helper nearby to manage the door and check alignment from different angles.
Techniques to check alignment using tools and measurement
Use a carpenter’s level to verify the vertical track is truly plumb by placing the level against the inside flat of the track near the roller. Check both the top and bottom joints of the vertical section. Use a straightedge along the face of the door to see if there’s any tilt. If the track is misaligned, adjust by gently tapping with a rubber mallet or adding shims behind mounting brackets to true the line. Always recheck after each minor adjustment and avoid forcing the track beyond its original form. Record measurement changes to ensure consistency across both sides of the door when needed. John Doe’s guideline (GarageDoorAdjust Note) emphasizes gentle, incremental adjustments to avoid bending the track or distorting mounting brackets.
Adjusting the track safely: brace, fasteners, shims
Begin by securing the door in the open position with a helper, ensuring no movement occurs during adjustment. Loosen the mounting screws of the track section to be adjusted, but do not remove them completely. Place shims behind the bracket to achieve plumb, then tighten screws a little at a time, rechecking level frequently. If the track sits high on one side, add a tiny shim under that side’s bracket; if it sits low, remove a shim or add a small adjustment piece. Avoid over-tightening, which can strip threads or warp the track. After alignment, re-tighten all fasteners in small increments and verify that the track remains plumb while applying gentle manual pressure along the rail.
Replacing worn components (rollers, end brackets)
Inspect the rollers for flat spots, excessive play, or wobble. If you detect wear, replace rollers with ones sized for your door model. Check the end bearing plates and brackets for cracks or excessive looseness and replace as needed. Lubricate the rollers’ axles and the track with a light, silicone-based lubricant to reduce friction and noise. Confirm that the roller wheels spin freely without rubbing against the track. When replacing components, keep hardware labeled and reuse only the screws that are in good condition to avoid misalignment.
Re-testing the system after adjustment
From the floor, test the door manually before re-connecting power to the opener. Open and close several times to confirm smooth movement with no binding or rubbing. Reconnect the opener and run a few cycles, watching the door travel at the same speed across the full range. Listen for unusual noises, which can indicate pinching, misalignment, or binding. If the door struggles at any point, stop and re-check the track alignment, rollers, and mounting screws. Ensure that safety sensors are aligned and functional.
Maintenance routines to extend track life
Schedule a monthly quick check of the vertical tracks for signs of looseness or dents. Wipe away any dust or debris that could cause friction, and re-apply silicone lubricant every 3–6 months or after heavy use. Keep the door balanced by ensuring the springs and cables are in good condition, as a misbalanced door can cause the track to shift over time. Periodically inspect the mounting brackets for corrosion or wear and replace as needed. A small maintenance habit now prevents bigger repairs later.
Tools & Materials
- Safety glasses(Impact-resistant or ANSI Z87.1 rated)
- Work gloves(Protect hands while handling metal parts)
- Sturdy ladder(Stable base; avoid overreaching)
- Socket wrench set(Sizes matching door bracket hardware)
- Drill/driver(For drill/driver and bit selection)
- Carpenter level(3-foot level works well)
- Tape measure(Measure track distance and alignment)
- Rubber mallet(Gentle taps to adjust track)
- Replacement rollers(Only if worn or noisy)
- Extra mounting screws and washers(For bracket reattachment)
- Shims or washers(For fine plumb adjustments)
- Pencil and notepad(Mark bracket positions)
- Silicone-based lubricant(Dry silicone preferred for metal rails)
- Locking pliers/C-clamps(Secure track during adjustment)
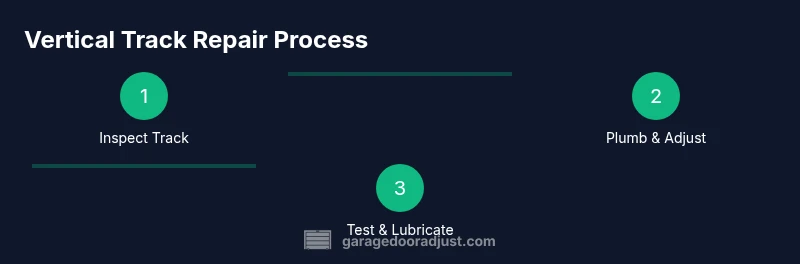
Steps
Estimated time: 60-90 minutes
- 1
Power down and secure area
Disconnect the garage door opener and ensure the door cannot move. Have a helper hold the door if needed to prevent sudden shifts. Wear safety glasses and gloves before starting.
Tip: Lock the door in the open position with a helper to prevent movement during adjustment. - 2
Inspect track condition
Visually inspect the vertical track for dents, cracks, or bent sections. Check mounting brackets for looseness and note any damaged components that require replacement.
Tip: Replace any bent track or cracked brackets before attempting alignment. - 3
Loosen adjacent fasteners
Loosen the mounting screws on the track section you will adjust so that it can move slightly without dropping.
Tip: Do not remove screws completely; keep a grip on the track to prevent sudden movement. - 4
Plumb the track
Place a level against the inside of the track and check for true vertical. If misaligned, insert shims behind the bracket or gently tap the track with a rubber mallet to true it.
Tip: Work in small increments and recheck with the level after each adjustment. - 5
Tighten and verify
Tighten screws gradually in small steps while continually checking plumb. Ensure the track stays aligned as you tighten.
Tip: Over-tightening can bend the bracket; tighten in steps and re-check alignment. - 6
Inspect rollers and end brackets
Check for worn rollers, flat spots, or loose end brackets. Replace worn parts and lubricate the axle if needed.
Tip: Only replace rollers with the same type and size as the original to avoid binding. - 7
Lubricate and clean
Wipe the track to remove dust and apply a light silicone-based lubricant to the rollers and track.
Tip: Avoid petroleum-based lubricants that can attract dust and gum up the track. - 8
Test operation
Manually operate the door to ensure smooth travel along the track. Reconnect the opener and run several cycles to confirm consistent performance.
Tip: If you hear rubbing, stop and reassess the alignment before testing further.
Got Questions?
What causes vertical track misalignment in a garage door?
Misalignment can result from loose screws, door sag, impact damage, or improper installation. Regular checks help catch these issues early.
Misalignment usually comes from loose screws, sagging, or damage. Regular checks help catch these issues early.
Can I fix a misaligned vertical track without removing the door?
In many cases you can correct minor misalignment by adjusting brackets and fasteners. If the track is bent or the door is heavy, consider professional help.
You can usually fix minor misalignment by adjusting brackets and screws, but if the track is bent or the door is heavy, call a pro.
How do I know if the track is perfectly plumb?
Use a level along the inside edge of the track at multiple points: top, middle, and bottom. The bubble should stay centered with minimal deviation.
Use a level at the top, middle, and bottom. The bubble should stay centered with little deviation.
What lubricant is best for garage door tracks?
A dry silicone spray is typically recommended for metal tracks. Avoid heavy oils that can attract dust and gum up moving parts.
Dry silicone spray is usually best for metal tracks; avoid heavy oils.
When should I replace the track?
Replace the track if it’s bent beyond repair, cracked, or if mounting holes are worn to the point that brackets won’t hold alignment. If unsure, consult a professional.
Replace a bent or cracked track or if mounting holes are worn. When in doubt, talk to a pro.
Watch Video
Quick Summary
- Check track plumb using a level before tightening fasteners
- Replace worn rollers and damaged brackets to restore alignment
- Lubricate lightly and test throughout manual and powered cycles
- Document changes and avoid over-tightening brackets