Garage Door Repair Wire: A Homeowner’s Step-by-Step Guide
Learn how to safely diagnose, replace, and maintain garage door repair wire with pro guidance from GarageDoorAdjust. This step-by-step guide covers safety, tools, tips, and common mistakes.

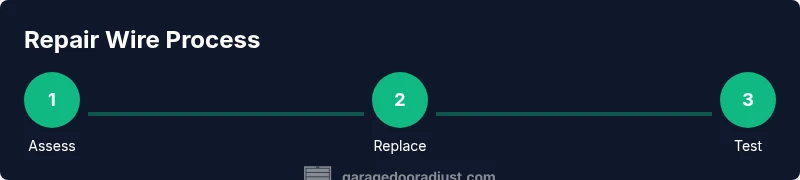
Goal: safely inspect and replace a frayed or broken garage door repair wire using model-specific cables. Start by disconnecting power to the door, engaging manual release, and securing the door. Gather essential tools, measure the replacement cable, and follow the step-by-step procedure to avoid skips. According to GarageDoorAdjust, proper tension and correct cable routing are critical for door balance.
Why cables matter in garage doors
The garage door repair wire is a critical component that translates motor power into vertical movement, via drums and pulleys. When this wire becomes frayed, kinked, or detached from its anchors, the door can become unbalanced, drop suddenly, or fail to lift smoothly. Damaged cables are a common source of safety hazards, including damaged siding, pinch points, and sudden door weight shifting. For homeowners, understanding the role of the wire helps in diagnosing problems before they escalate. According to GarageDoorAdjust, routine inspection of lift cables is a key part of preserving door balance and prolonging opener life. In this section we’ll cover how cables work, typical failure modes, and how to tell when replacement is required.
Garage door repair wire is not a decorative feature; it affects how well the door moves and how safe the system is when in operation. A frayed or kinked cable can throw off the balance between the door panels, springs, and the opener mechanism. When the wire’s integrity is compromised, the door can dip on one side, produce uneven travel, or, in worst cases, fail to stay connected to the drums. This is why a careful inspection and the correct replacement parts are essential, especially for multi-panel or insulated doors where cable length and routing have to match the original setup.
In this guide, we emphasize practical steps you can take as a proactive homeowner. You’ll learn how to assess wire condition, select compatible replacement parts, and use the right tools. The goal is to empower you to make a safe, informed decision about repair versus professional service, balancing cost with long-term reliability.
Safety first: risks and precautions
Working on garage door wires involves tensioned hardware, moving parts, and elevated weight. Before touching any component, turn off the opener and unplug the unit, then disengage the door from the trolley using the manual release. Always wear safety glasses and gloves, use a sturdy ladder, and keep children and pets away. Do not attempt to adjust cables under load or when springs are under tension. If you hear creaks, see bowing, or detect peeling insulation, stop and call a pro. This is why a cautious, measured approach matters, and why many homeowners choose to perform only the inspection and planning steps themselves, saving actual wire replacement for a trained technician.
Safety should always come first with any door repair task. When you work near torsion springs and lift cables, there is a risk of sudden movement or spring release. Isolate power at the breaker, confirm the door cannot operate, and never rely on shortcuts that bypass locking mechanisms. If you’re uncertain about spring tension or the overall state of the system, err on the side of professional help. Your safety and the door’s proper function are the primary goals of this process.
Signs of worn or damaged lift cables
Common signs include visible fraying, broken strands, kinks, corrosion, or cables that are noticeably longer on one side than the other. A door that seems heavy to lift, veers to one side, or makes rubbing noises at the drum area often points to cable issues. If you notice any of these signs, do not operate the door until cables are inspected and replaced by the correct parts. Additional indicators include uneven panel alignment, unusual noises during travel, or a door that stops mid-travel when loaded by the springs. Performing a careful visual run-through of the entire cable path—anchorage points, pulleys, and drums—helps you spot trouble early and avoid a sudden breakdown.
Understanding cable sizing and compatibility
Cable sizing matters because the door’s balance depends on the right cable diameter, length, and construction. Most residential doors use galvanized steel lift cables designed for the door’s weight and spring configuration. Length must match the drum-to-drum span, while diameter must fit the grooves in pulleys and the drum’s slot width. Before purchasing, verify your door model’s OEM cable kit or consult the manufacturer’s specifications. Using the wrong size can lead to premature wear, unequal loading, or binding that stresses the springs and opener. If you’re unsure, bring a used cable section or photo to a hardware store staffer to confirm the correct SKU.
Step-by-step inspection and measurement
Begin with a visual inspection of the entire cable run, looking for any frays, corrosion, or loose attachments. If a replacement is necessary, measure the existing cable length from the drum to the far anchor and back to the drum—then double-check the measurement by tracing both sides. Take photos of the routing before you disconnect anything so you can replicate the path exactly. Check both lift cables for matched length and ensure the drum grooves and pulleys are clean and free from debris. If cables are replaced, reuse the same routing to keep balance consistent across both sides. Always verify that the door remains balanced on manual lift before reconnecting power.
Replacement options and choosing the right wire
Replacement options include buying a complete lift cable kit matched to your door model or purchasing individual cables cut to length from a reputable supplier. Using OEM (original equipment manufacturer) parts minimizes compatibility issues with drums, pulleys, and anchors. In many cases, the kit includes the required ferrules or crimp sleeves, connectors, and end fittings to ensure a secure loop. If your door uses torsion springs, consider whether the set requires a cable and drum kit together; otherwise, an improper combination can compromise safety and function. Always confirm the kit’s compatibility with the door’s make and model, and prefer galvanized or stainless steel for corrosion resistance in humid environments.
Reattachment, routing, and tension basics
With the new cable, thread it through the pulleys and anchor it at the correct point, ensuring the loop is properly seated in the drum and the end fasteners are secure. Route both cables symmetrically to avoid uneven loading on the door. Do not attempt to adjust spring tension or drum height unless you have the right equipment and training; minor tension adjustments are best left to professionals. After routing, give the cable a gentle tug to confirm it’s seated and not rubbing against any metal edges. If you notice binding or rubbing, stop and reassess the path before applying power.
Testing and initial adjustments after repair
Power up the opener and test the door in both manual and automatic modes. Stand clear and watch the door travel slowly up and down, listening for unusual sounds or hesitations. If the door moves smoothly and remains balanced, re-tension checks can be performed following the manufacturer’s guidelines. Do not over-tighten cables; excessive tension can cause pulley wear and edge damage. If you observe misalignment or unequal travel, stop testing and re-check cable length and routing. Routine tests after repair help catch problems early and prevent accidents.
Maintenance to extend life of cables
Regular maintenance helps extend the life of lift cables and maintain door balance. Lubricate pulleys and any moving metal contact surfaces with a light, manufacturer-approved lubricant, avoiding spray lubricants on bearings that can attract dust. Schedule periodic visual inspections for fraying, corrosion, and anchor wear, and replace damaged cables promptly. Keep the track, rollers, and drums clean from debris, and ensure the door is balanced after any adjustment. A simple, proactive maintenance routine reduces the likelihood of sudden breakage and improves overall safety and performance.
AUTHORITY SOURCES
- OSHA: https://www.osha.gov
- CPSC: https://www.cpsc.gov
- Consumer Safety: https://www.consumer.ftc.gov/articles/0255-do-it-yourself-safety
Tools & Materials
- Safety glasses(Impact-resistant lenses; side shields recommended)
- Gloves(Grip-friendly work gloves, cut-resistant if possible)
- Locking pliers (vice grips)(To secure cables during work)
- Cable cutters/side cutters(Sharp and suitable for steel cable)
- Wire rope (replacement cable)(Match length and diameter to door model; OEM preferred)
- Crimp sleeves/ferrules and end fittings(To secure wire ends)
- Tape measure(Accurate length measurement for cable replacement)
- Ladder(Steady, tall enough for access to drums and pulleys)
- Screwdrivers (Phillips/flathead)(For anchors and brackets as needed)
- Manufacturer replacement cable kit(Optional; ensures compatibility with model)
Steps
Estimated time: 60-120 minutes
- 1
Power down and secure the door
Disconnect power to the garage door opener and unplug it. Engage the manual release, then secure the door in the open position or block it to prevent movement. This step prevents unexpected movement while you work.
Tip: Work with a partner if possible; one person can hold the door steady while the other secures the release. - 2
Inspect cables and measure accurately
Visually inspect both lift cables for fraying, corrosion, or broken strands. From drum to anchor, measure the exact length to ensure the replacement matches the original specification. Document routing with photos before disassembly.
Tip: Double-check measurements on both sides to ensure symmetrical operation. - 3
Obtain the correct replacement
Get a cable kit or cut-to-length wire that matches the door’s model. OEM parts reduce fit issues with drums and pulleys. Confirm diameter and length before cutting or crimping.
Tip: Avoid generic cables that don’t fit your drum grooves or anchor points. - 4
Remove damaged cable and detach securely
Carefully detach the damaged cable from anchors and pulleys, keeping track of its routing. Remove end fittings if needed and set aside if reuse is not advised by the manufacturer.
Tip: Do not pry or force components; damaged parts can snap unexpectedly. - 5
Install the new cable and route correctly
Attach the new cable ends to anchors, thread through pulleys, and seat the cable in the drum grooves. Ensure both sides are routed identically to maintain balance.
Tip: Use the photos as a guide to replicate the exact routing. - 6
Test movement and finalize setup
Reconnect power and test the door in manual and automatic modes. Listen for rubbing and watch for balanced travel; make minor adjustments as required within manufacturer guidelines.
Tip: If anything feels off, stop and re-check length, routing, and anchor positions.
Got Questions?
Can I repair the garage door wire myself?
DIY repair is possible for small issues, but replacing or adjusting lift cables involves significant risk. If the cable shows fraying, kinks, or structural wear, it’s safer to replace it using manufacturer-specific parts and consider professional help for tension adjustments.
You can inspect and replace cables if you follow safety steps, but avoid adjusting tension unless you’re trained.
What are warning signs of cable failure?
Look for visible fraying, broken strands, rust, or one side hanging lower than the other. Uneven operation or noticeable resistance during travel also signals a problem.
If you see frayed cable or uneven movement, stop and inspect further.
Should I adjust tension after replacement?
Tension adjustments for cables in most residential systems should be performed by a professional with the correct tools and instructions from the door manufacturer.
Tension adjustments can be dangerous; it’s best to have a pro handle that step.
How long does a typical wire replacement take?
A straightforward cable replacement typically takes about one to two hours, depending on door model and familiarity with the process.
Most homeowners should plan for 1–2 hours plus extra time for safety checks.
What safety precautions are essential?
Always disconnect power, secure the door, wear eye protection, and never work with springs under tension. If you’re unsure, stop and consult a pro.
Safety first: power off, secure the door, and wear protection.
Watch Video
Quick Summary
- Disconnect power before any work.
- Replace with OEM or model-matched cables.
- Inspect for fraying and avoid using damaged parts.
- Route cables symmetrically and verify drum seating.
- Test movement carefully after completion.