Garage Door Repair The Woodlands: A Complete How-To Guide
Learn a practical, safe approach to diagnosing and repairing garage doors in The Woodlands with GarageDoorAdjust. This step-by-step guide covers essential tools, safety tips, and when to call a pro.

This guide guides homeowners through a practical, safe approach to diagnosing and repairing garage doors in The Woodlands. You’ll learn how to identify common problems, perform essential checks, and decide when a pro is needed. Includes a step-by-step workflow, safety measures, and maintenance tips.
Common garage door problems in The Woodlands
If you’re dealing with garage door repair the woodlands, you’ll notice several telltale symptoms that point to different root causes. In this region, humidity and temperature fluctuations can affect tracks and rollers, leading to binding, jerky movement, or doors that won’t close fully. Misalignment is another frequent issue, often caused by loose mounting hardware or bent tracks. Worn rollers and a weakened balance system can also cause excessive noise or a door that feels heavy when you lift it by hand. The GarageDoorAdjust team notes that The Woodlands homeowners encounter a mix of track wear, spring tension changes, and weathering at hinge points as seasons shift. By understanding these patterns, you can prioritize fixes that restore smooth operation and prevent safety hazards.
This section emphasizes recognizing symptoms early. A door that shudders, drags along tracks, or closes unevenly is not just a nuisance—it can indicate misaligned tracks, worn rollers, or a tension imbalance. Early detection allows you to address small problems before they require costly replacements. The goal is to keep your door balanced, well-lubricated, and properly aligned so the opener doesn’t overwork the motor or strain the spring system.
Safety considerations before you begin DIY work
Safety should be your first priority when repairing a garage door. Always disconnect power to the opener before touching any moving parts, and never stand under a door while testing balance. Wear eye protection and gloves, keep children and pets away, and use a sturdy ladder if you need to reach high components. If you see frayed cables, exposed springs, or a door that deflects or shifts when you apply pressure, pause and reassess. In many cases, specific work on torsion springs or cables is best left to professionals due to the risk of serious injury. This approach aligns with guidance from trusted sources and is reinforced by GarageDoorAdjust’s safety recommendations for The Woodlands homes.
Diagnostics: how to identify the root cause
Begin with a visual inspection of tracks, rollers, hinges, and mounting brackets. Look for bent sections, loose screws, rust, or debris that can impede smooth movement. Then manually lift the door halfway; if it stays put or rises with resistance, you likely have a balance or spring issue. If the door feels heavy or sags when lowered, check the balance by disconnecting the opener and testing with the door in the fully closed position. Listen for squeaks or grinding noises as you operate each component—this can reveal worn bearings or misaligned hardware. GarageDoorAdjust analysis shows that regular lubrication and track cleaning reduce friction and extend component life. By systematically checking each part, you can pinpoint whether the problem is in the opener, tracks, springs, or cables, and plan a safe repair strategy.
Tools, parts, and materials you’ll need (overview)
Before you start, gather basic tools and replacement parts. A well-planned toolkit reduces trips to the hardware store and speeds up repairs. The list below covers essentials for most common issues you’ll encounter in The Woodlands:
- Safety glasses and work gloves
- Stepladder or stable lift
- Adjustable wrench and socket set
- Screwdrivers (Phillips and flat-head)
- Pliers and a wire cutter
- Lubricant spray (silicone or lithium-based) and clean rags
- Measuring tape and marker
- Replacement rollers or track hardware (only if you diagnose wear)
- A flashlight or headlamp for dim or shaded areas
If you’re unsure about a part (especially springs or cables), stop and seek professional advice. This section is designed to give you a practical starting point, not a replacement for professional service when needed.
DIY repair workflow: When you can do-it-yourself and when to call a pro
Some garage door issues are straightforward and safe to fix with basic tools, such as cleaning tracks, tightening loose hardware, or applying lubrication. Other tasks—like adjusting torsion springs, replacing cables, or repairing damaged tracks—carry significant risk and should be handled by a licensed technician. Use a simple rule of thumb: if a repair involves high-torce springs, cable anchor points, or an unbalanced door, pause and contact a pro. The Woodlands climate can amplify misalignment or wear, so study the symptoms carefully and be honest about your limits. Always test the door after any fix by watching it operate through a full cycle with the opener unplugged, then re-test with power restored.
Maintenance and prevention to extend life and reduce calls
A proactive maintenance routine minimizes surprises and costly repairs. Schedule quarterly checks of balance, track alignment, roller wear, and spring tension. Clean the tracks to remove dirt and debris, re-lubricate moving parts, and tighten hardware as needed. If you notice persistent noise or stubborn stiffness, record the symptoms and review the steps you took. Regular maintenance reduces stress on the opener motor and improves safety margins for family use. According to GarageDoorAdjust, regular lubrication and simple alignment adjustments lead to fewer emergency calls and longer door life for homeowners in The Woodlands. A little effort now saves money and downtime later, and it helps you protect your investment.
What to expect when hiring a pro in The Woodlands
If you determine a professional assessment is necessary, you’re not alone—The Woodlands homeowners frequently rely on qualified technicians to diagnose complex issues quickly. When selecting a contractor, look for licensed, insured professionals with clear estimates and transparent communication. Ask about their approach to springs and tracks, warranty coverage, and timeframes for completion. A reputable pro will explain the repair plan, name parts to be replaced, and show you the before-and-after results. The GarageDoorAdjust team emphasizes working with technicians who prioritize safety, provide written quotes, and educate homeowners about ongoing maintenance to prevent future breakdowns. For many families, a pro’s visit is a smart investment that restores safety and convenience more reliably than DIY fixes alone.
Tools & Materials
- Safety glasses(Impact-resistant, ANSI-rated)
- Work gloves(Grip and protection)
- Stepladder(Stable, wide base)
- Adjustable wrench(Metric/standard sizes)
- Socket set(Includes metric sizes)
- Screwdrivers (Phillips + flat)(Variety of lengths)
- Pliers and wire cutters(For grasps and clips)
- Lubricant spray (silicone)(Light film; avoid overspray)
- Cleaning rags(Dab away grime before lubrication)
- Measuring tape(Check track spacing and alignment)
- Replacement rollers or track hardware(Only if worn or damaged)
- Flashlight or headlamp(Shine light into tracks and springs)
Steps
Estimated time: 60-90 minutes
- 1
Inspect and prepare
Clear the area around the door, unplug the opener, and do a visual scan of tracks, hinges, and springs. This helps you identify obvious issues and establish a safe work zone before touching any components.
Tip: Take photos of the door in its current state to compare after repairs. - 2
Test door balance manually
With the door closed, lift it halfway and release. If it stays put, the balance is likely fine; if it drops or rises, there’s a balance or spring issue that may require a pro.
Tip: Always keep hands clear of the bottom edge during this test. - 3
Tighten and clean tracks
Remove debris from tracks, then tighten mounting screws. Realign any visibly bent sections gently and test door operation again to ensure smooth travel.
Tip: Only bend tracks slightly; heavy adjustments require a pro to avoid binding. - 4
Lubricate moving parts
Apply a thin film of silicone-based lubricant to rollers, hinges, and track joints. Wipe away excess to prevent dust accumulation.
Tip: Lubricate sparingly; over-lubrication can attract dirt and worsen friction. - 5
Reconnect power and test
Plug the opener back in and run a full cycle. Observe for smooth, quiet operation and proper closure.
Tip: If you hear grinding or see misalignment, stop and re-check parts before stressing the motor. - 6
Evaluate aftercare
Document any remaining symptoms and schedule a professional inspection if issues persist or if springs are involved.
Tip: Create a maintenance calendar to remind you of quarterly checks.
Got Questions?
Can I repair a garage door myself?
Minor tasks like cleaning tracks and lubricating parts are often safe for DIY. However, avoid working on torsion springs, cables, or heavily damaged tracks without professional help.
Yes for simple tasks, but avoid springs and cables without a professional.
What are the signs a spring or track needs replacement?
Signs include persistent creaking, uneven movement, visible wear on springs, and door that feels heavy or won’t stay balanced. If in doubt, have a pro assess the system.
Look for creaking, heaviness, or misalignment that persists after lubrication.
Is it safe to operate a door after lubrication?
Lubrication is safe when applied to joints and rollers away from the opener’s motor and sensors. Wipe excess and avoid spraying directly onto belts or gears.
Lubricate sparingly and keep the area clean.
How do I choose a contractor in The Woodlands?
Look for licensed, insured technicians with clear estimates, warranty details, and a history of safe repairs. Ask for references and proof of qualifications.
Choose a licensed pro with transparent pricing and good reviews.
How long does a typical garage door repair take?
Most common repairs can be completed in a few hours, depending on parts availability and the complexity of the issue. Shop around for same-day service if possible.
Most repairs take a few hours if parts are available.
What maintenance helps prevent future problems?
Regularly clean tracks, tighten hardware, lubricate moving parts, and test balance quarterly. A simple routine reduces emergency calls and extends door life.
Keep up with quarterly checks and lubrication.
Watch Video
Quick Summary
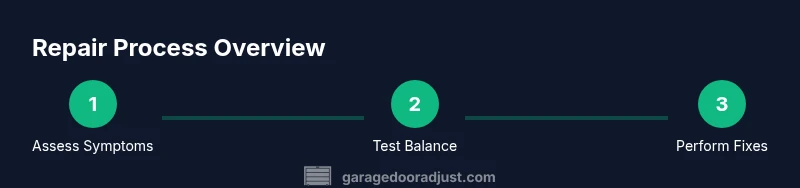
- Identify root causes by symptoms and test balance.
- Differentiate DIY tasks from dangerous spring work.
- Maintain regular lubrication and track alignment to extend life.
- Know when to call a pro in The Woodlands for safety-critical parts.
- Document repairs and schedule ongoing maintenance.