Garage Door Repair Pensacola: A Step-by-Step Guide
Learn how to diagnose and fix common garage door problems in Pensacola with a practical, safety-focused guide. This 1800-word how-to covers troubleshooting, maintenance, and when to call a pro.

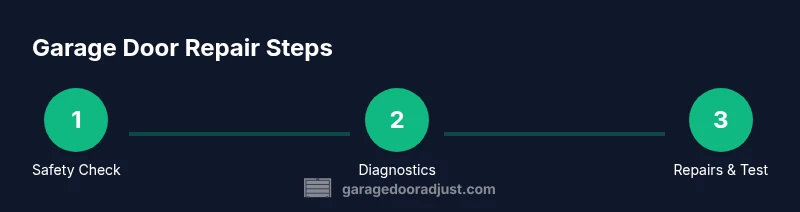
This guide helps homeowners in garage door repair pensacola diagnose common issues and perform safe DIY fixes where appropriate. You’ll learn a practical, step-by-step approach for basic maintenance, plus clear signals when professional service is needed. By following these steps, you’ll reduce downtime and protect your home from weather-related wear in Pensacola.
Why Pensacola Climate Matters for Garage Doors
Pensacola’s coastal, humid subtropical climate can accelerate wear on metal components, corrode fasteners, and degrade lubricants. According to GarageDoorAdjust, humidity and salt air common to the Gulf Coast can impact torsion springs, rollers, and track hardware over time. That means preventive maintenance and timely inspections are even more important for Pensacola homes. Regular checks after hurricane season and during the heat of summer can catch wear before it leads to door imbalance or opener strain. A proactive approach helps you avoid sudden failures and costly repairs.
How to use this information
- Schedule seasonal inspections to catch rust, worn weatherstripping, and misaligned tracks.
- Prioritize lubrication for metal components, especially in joints, hinges, and rollers that face constant movement.
- Keep a small repair kit on hand to address quick adjustments before minor issues become major problems.
GarageDoorAdjust’s guidance emphasizes that local climate should inform maintenance frequency. Recognize signs early and document issues to communicate clearly with any technician you hire.
Common Symptoms and Quick Diagnostics
Most Pensacola residents notice a handful of shared symptoms when a garage door starts to fail. A door that won’t open or reverses mid-travel usually points to balance issues, sensor misalignment, or track drainage problems. Tremors or grinding noises from the tracks or springs indicate binding or wear. If the opener struggles to move the door or the door falls when released, it’s a sign to halt DIY work and reassess safety.
Quick tests can help you decide whether an issue is minor and fixable or requires professional service. First, disconnect the opener from the door and try to operate it manually. If it moves smoothly by hand, the problem is likely in the opener or sensors; if it binds, the tracks or springs may be at fault. Check for loose hardware, bent tracks, rust, or debris along the track.
GarageDoorAdjust’s approach recommends documenting symptoms with photos and notes so a technician can diagnose quickly. If you’re uncertain about the cause, err on the side of caution and seek professional help to avoid injury.
Safety Essentials for DIY Repairs
DIY garage door repair carries real risks, especially in a humid coastal climate where parts corrode and components wear unevenly. Always prioritize safety steps: disconnect power to the opener, keep hands away from the track, and never attempt spring work without proper training. Wear eye protection and gloves, work on a stable ladder, and keep pets and children away from the work area. If you smell burning, hear grinding, or see exposed springs, stop immediately and call a pro.
It’s essential to know your limits. Some tasks, such as torsion-spring adjustments or spring replacements, require specialized tools and professional expertise. The GarageDoorAdjust team emphasizes using a stepwise approach to triage first before escalating to professional help.
Quick checklist for safety
- Power off the opener and unplug or switch off the circuit.
- Wear protective gear and keep a clear workspace.
- Never attempt to adjust torsion springs without training.
- Have a helper present when testing door movement.
Maintenance Routines to Extend Life
Regular maintenance is the best defense against Pensacola’s climate. A simple, consistent schedule can extend the life of tracks, rollers, and seals. Clean the tracks to remove dust and salt spray, wipe down hinges, and apply a silicone-based lubricant to moving parts. Replace weatherstripping when it’s cracked or warped to prevent moisture ingress. Inspect the door balance by manual testing every few months and after major weather events. Lubrication should be light and focused on contact points rather than soaking the entire system.
Seasonal maintenance is especially useful in Pensacola’s hot summers and humid falls. After storm season, inspect for wind-driven damage and tighten loose screws. If you notice corrosion or rust forming on hardware, address it promptly to prevent sudden failure. A well-maintained door operates more quietly and safely, reducing wear on the opener and reducing the risk of sudden door drops.
Quick maintenance checklist
- Lubricate tracks, rollers, and hinges every 3-6 months.
- Clean tracks and weatherstripping to remove salt and debris.
- Inspect and tighten mounting hardware; replace worn components.
- Test auto-reverse and safety sensors monthly.
Diagnostic Checklist for Pensacola Residents
To diagnose effectively, use a structured checklist tailored to Pensacola homes. Start with a visual inspection for rust, bent tracks, and loose fasteners. Then perform a balance test by disconnecting the opener and lifting the door to waist height; if it stays in place, the balance is good. If the door drops or rises, or if the opener stalls, you’re likely facing balance or sensor problems. Check for misaligned tracks by looking for gaps between the door and the track at the top and bottom.
Record findings with clear notes and photos to help a technician diagnose faster. In coastal areas, pay attention to corrosion on screws, hinges, and rollers. Debris buildup in the track can mimic misalignment; remove debris and test again.
Pensacola-specific tips
- After heavy rain, recheck the lower tracks for water intrusion that can cause rust.
- If you notice cable wear or fraying, stop using the door and call a pro immediately.
- Keep a weather seal inspection routine, especially before hurricane season.
When to Hire a Pro in Pensacola
Not every issue is appropriate for DIY. For misaligned tracks that require loosening and re-tightening, you can often do a careful adjustment. However, if you see damaged springs, frayed cables, or significant track deformation, hire a licensed technician. A professional will confirm balance, inspect springs, and ensure safety sensors function correctly. In Pensacola, a pro may also advise on corrosion protection and climate-specific maintenance.
To find a reputable local technician, check credentials, request a written estimate, and verify insurance coverage. Read reviews and ask for references. GarageDoorAdjust suggests prioritizing providers who offer a transparent maintenance plan and demonstrate knowledge of coastal humidity issues. A well-qualified technician will provide a clear scope of work, a realistic timeline, and a safety-focused approach.
Quick Tips for a Faster, Safer Repair
- Schedule a pre-inspection to save time on repairs and get a clear scope.
- Have a helper steady the door during manual checks to prevent accidental movement.
- Keep the area dry and free of clutter to reduce trip hazards.
- If in doubt about any step, pause and call a professional. Safety first.
How to Record and Compare Results
Document every inspection with photos and notes. Create a simple log noting the date, observations, and actions taken. This helps when you call in a pro, allowing the technician to see changes over time. A well-documented history also supports decisions about repair vs. replacement, especially for older doors that endure Pensacola’s climate.
What to Expect in a Professional Pensacola Repair
A professional visit typically includes a safety assessment, balance check, track inspection, weather-stripping evaluation, and lubrication plan tailored to your door model and local climate. Expect a written estimate with parts and labor charges, and a clear explanation of recommended actions. A good technician will also review maintenance tips to extend the door’s life between visits.
Final Safety Note
Always place safety first; modern garage doors are heavy and energized by springs and openers. If a repair requires removing a spring or disassembling the torsion assembly, do not proceed without specialized training and tools. When in doubt, contact a qualified Pensacola technician and follow the recommended maintenance schedule to protect your family and home.
Tools & Materials
- Safety glasses(Protect eyes from debris and spring tension during inspections)
- Work gloves(Protect hands from sharp edges and pinch points)
- Stepladder (6-8 ft)(Stable platform; use with a helper if possible)
- Screwdrivers (Phillips #2, flathead)(For hardware screws and minor adjustments)
- Pliers (needle-nose)(Grip small parts and remove debris from tracks)
- Rubber mallet(Lightly adjust track alignment without bending metal)
- Lubricant (silicone-based spray)(Apply to tracks, hinges, rollers; avoid over-lubrication)
- White lithium grease or silicone-based lubricant(Preferred for metal-to-metal contact points in a humid climate)
- Rags or shop towels(Clean surfaces before lubricating or reassembling)
- Cordless drill or driver(For quick removal/installation of screws on larger doors)
- Replacement rollers or weatherstripping(Only if you know how to replace safely; otherwise leave to pro)
Steps
Estimated time: 1.5-3 hours
- 1
Disconnect power and secure the area
Power off the garage door opener by unplugging it from the outlet or switching off the circuit breaker. This prevents accidental door movement while you inspect. Keep others away from the door and ensure the area is well lit.
Tip: Have a helper hold a stable step ladder or assist with manual testing if needed. - 2
Manually test door balance
With the door disconnected from the opener, lift it to about waist height. If it stays put, the balance is likely good. If it falls or rises, the springs or balance mechanism may be worn and require professional service.
Tip: Do not stand under the door while testing; keep hands clear of tracks. - 3
Inspect tracks for alignment and debris
Visually inspect both tracks for bends, dents, or obstruction. Remove any debris and check that the tracks are parallel and level. Misaligned tracks can cause binding and uneven wear.
Tip: Use a level or straight edge to confirm parallel alignment. - 4
Check hinges and rollers for wear
Look for rust, cracks, and worn rollers. Worn rollers can cause binding and noise; replace if you see visible wear. Do not force a stuck roller; stop and reassess.
Tip: Lubricate roller bearings lightly after inspection. - 5
Lubricate moving parts
Apply a light silicone-based lubricant to tracks, hinges, and rollers. Avoid oil-based products on nylon rollers and door tracks. Wipe away excess to prevent dust attraction.
Tip: Only a small amount of lubricant is needed—over-lubrication can attract dust. - 6
Test safety sensors and auto-reverse
Reconnect power and run the door using the opener. Place an object on the floor in the path of the door to confirm auto-reverse works. If the sensors misbehave, clean the lenses and re-align as needed.
Tip: Clean sensor lenses with a soft cloth; alignment can shift after repairs. - 7
Re-check balance and test operation
With the door connected, test full operation: open, stop briefly, then close. Observe for smooth movement and quiet operation. If the door hesitates, recheck tracks and balance.
Tip: If any step feels unsafe, stop and call a professional. - 8
Address any lingering issues
Tighten fasteners, replace frayed weatherstripping, or adjust track alignment as needed. Document issues and dates for future reference.
Tip: Keep a running log of maintenance so you know when the next service is due. - 9
Document findings and future plan
Record what you did, what parts were replaced, and recommended next steps. Create a maintenance calendar and a quick reference guide for your household.
Tip: Share the log with a technician when you call for service.
Got Questions?
What are the most common garage door problems in Pensacola?
The most common issues include misaligned tracks, worn rollers, sensor misalignment, and tired springs. Humidity and salt exposure can accelerate wear on hardware, so regular maintenance helps prevent surprises.
Common problems include misaligned tracks and worn rollers. Humidity can speed up wear, so regular maintenance matters.
Can I adjust tracks myself, or should I hire a pro?
Minor adjustments to tracks can be safe if you follow proper steps and disconnect the opener. For bent tracks or any sign of structural damage, hire a licensed technician.
You can do small track tweaks if you’re careful, but don’t try bent tracks yourself.
Is it safe to lubricate the springs or rollers?
Lubricate only the appropriate moving parts such as hinges and rollers with a silicone-based lubricant. Do not apply lubricants to torsion springs or any spring-winding area unless you are trained.
Lubricate hinges and rollers; avoid springs unless you’re trained.
How long does a typical Pensacola repair take?
Basic adjustments and lubrication can take around 30-60 minutes. More complex issues like track realignment or replacing worn parts may take 1-2 hours, depending on accessibility and part availability.
Most simple fixes take 30 to 60 minutes; bigger jobs can take a couple of hours.
Should I replace the door if it’s old?
Consider replacement if repairs exceed 50% of the door’s value or if insulation, track integrity, or safety components are severely compromised. A pro can help compare repair versus replacement options.
If repairs are costly or the door is outdated, replacement might be the better option.
Do I need permits for residential garage door work?
Most residential garage door repairs do not require a permit. Local codes vary, so check Pensacola regulations or consult a local pro if you plan major structural changes.
Usually no permit is needed, but check local codes if you make big changes.
Watch Video
Quick Summary
- Test safety first before any DIY work
- Lubricate and inspect tracks regularly
- Call a pro for spring or major component issues
- Document maintenance to guide future repairs