Garage Door Opener Battery CR2032: Replacement Guide
Learn how to identify, replace, and maintain a CR2032 battery in your garage door opener remote, with safe steps, practical tips, and disposal guidance.

You can replace your garage door opener battery with a CR2032 coin cell. Start by locating the opener's battery compartment, removing the cover, installing the new CR2032 with the correct polarity, and testing the remote. Use a clean cloth and avoid touching contacts. Always power down electronics first, and dispose of old batteries according to local regulations.
What CR2032 Battery Is and Why It Matters
The CR2032 is a common 3-volt coin-cell battery found in many garage door remotes and built-in wall consoles. When performance dips or the remote stops responding, the battery is the most frequent culprit. Replacing it with a fresh CR2032 restores range and reliability without the need for a professional visit. In garages where remotes see daily use, keeping this battery fresh is part of routine maintenance. This guide focuses on the CR2032 battery commonly used in consumer garage door systems and explains how to verify compatibility, replace safely, and store spares for future use.
Key properties to note include the nominal 3V voltage and the coin-cell format: 20mm diameter and 3.2mm thickness. Many reputable brands offer CR2032 cells; prioritize solid voltage stability and counterfeit-free cells. When in doubt, consult your owner’s manual or the GarageDoorAdjust database for model-specific guidance.
GarageDoorAdjust emphasizes using the correct size and chemistry, as an incorrect battery can fail to seat properly or cause intermittent operation. A proper CR2032 should be clean, dry, and free of corrosion. If you notice leakage, replace the pack and dispose of it according to local regulations.
How to Confirm Your Opener Uses a CR2032
Not all remotes use the same battery; some may specify a different coin cell or even a rechargeable pack. To confirm, check the user manual or open the remote’s battery cover to read the exact part number printed on the battery or inside the compartment. If you don’t have the manual, look up the model number online or contact the manufacturer’s support page. In many cases, you’ll find a clear indication that a CR2032 is required. If your garage door opener includes a built-in wall console, the battery replacement might be described in its dedicated section as well.
If you have a multi-button remote, ensure you’re removing the correct battery from the correct device. Mixing batteries among remotes could lead to unpredictable performance. When in doubt, replace and test one device at a time to isolate issues quickly.
Safety and Handling Before Replacing
Safety is the foundation of any battery replacement. Begin by turning off any nearby power sources that could energize the door system during maintenance. Work in a well-lit area on a non-conductive surface to avoid static discharge. Wear eye protection if you anticipate any small parts could spring loose. Avoid metal tools that could short the battery terminals; use plastic prying tools or a non-metallic tool if necessary. Keep children and pets away during the process to prevent accidental swallowing of small parts.
Inspect the battery compartment for signs of corrosion or residue. If you see white powdery residue or a liquid leak, handle the component with care and clean the area with a dry cloth before proceeding. Dispose of any damaged batteries according to local hazardous-wyclic rules and never reuse a damaged cell. Finally, handle the new CR2032 with clean hands or wear gloves to minimize oils on the terminal surfaces.
What to Expect During Replacement: Battery Orientation and Contacts
A CR2032 battery must be inserted with the correct orientation for the contacts to align. The positive (+) side typically faces up, but this can vary by device. Before seating the new battery, wipe the contact surfaces with a dry, lint-free cloth to remove any oils or moisture. When you place the battery, press gently to ensure it is seated flush and there is no gap between the battery and the contact springs.
If your remote uses a screw-secured battery cover, use a small screwdriver to release and reattach the cover securely. Do not overtighten screws, which can damage the housing. After installation, visually inspect the battery to confirm it has seated correctly and that there’s no movement when you gently wiggle the cover. A loose battery can cause intermittent contact and failed operation.
Tools and Workspace Setup for a Clean Replacement
Create a clean, well-lit workspace. Gather a spare CR2032 battery, a small flathead or coin tool for prying if needed, a lint-free cloth, and the device’s manual or model lookup ready. Have a non-metal surface to lay out components to avoid accidental short-circuiting. If you own multiple remotes, keep a small tray to separate batteries by device to avoid mixing.
Preparing the space beforehand reduces the risk of misplacing a battery or dropping small screws. A micro-fiber cloth can help wipe away fingerprints from the contact surfaces. If your device uses a wall console, you might also need to remove a back plate; ensure you have adequate room to work without bending cables.
Step-by-Step Narrative Overview (for quick context)
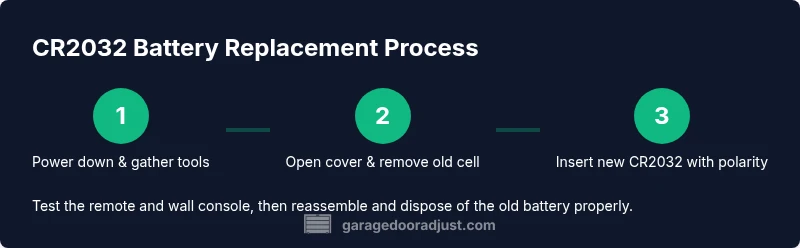
While the step-by-step section below provides precise actions, this narrative helps you understand why each step matters. You will gather your tools, power down the system, locate and access the battery compartment, remove the old cell, insert the new CR2032 with the correct polarity, test the remote, and then reassemble. Completing each step methodically minimizes the chance of misalignment or accidental damage, and ensures your garage door continues to operate reliably from a distance.
Testing, Reassembly, and Immediate Post-Replacement Checks
After you replace the battery, test the remote and wall console at close range to confirm responsiveness. If the door responds inconsistently, recheck the battery orientation and ensure the contact springs are clean and undamaged. Some models require a brief reset or re-pairing to re-establish the link between the remote and the opener unit. If the door still does not respond after replacement, evaluate whether the issue is electronic rather than purely battery-related.
Reassemble any covers, keep screws secure, and store the old battery according to disposal guidelines. Label your spare batteries for easy identification and rotate stock so you’re always using the newest cell available. Verifying operation at multiple distances helps ensure reliability in real-world use, including cold-weather conditions that can impact battery performance.
Troubleshooting After Replacement: When to Seek Help
Even with a fresh CR2032, remote performance can be affected by interference, worn contacts, or a mis programmed remote. If you replace the battery and still have trouble, confirm that you’re using the correct device (remote vs. wall console) and verify the pairing status if your system supports it. Check whether other devices in the home share the same frequency or if nearby electronics might be causing interference. In some cases, the issue is with the opener’s receiver rather than the battery, which may require a more in-depth diagnostic by a technician.
If the problem recurs after several months, consider testing a new, high-quality CR2032 cell from a reliable brand. A counterfeit or low-quality cell can deliver inconsistent voltage, leading to erratic remote performance or failure to wake the receiver.
Battery Care, Disposal, and Environmental Considerations
Proper care and disposal of coin-cell batteries are part of responsible home maintenance. Store spares in a dry, cool place away from metal objects. Replacing batteries on a schedule is not necessary; instead, monitor performance and replace as needed. Do not mix new and old batteries in the same device, as different voltage levels can cause uneven discharge and damage.
When disposing of CR2032 cells, follow local regulations; many communities encourage recycling through household hazardous waste programs or battery recycling centers. If your area allows, place the old battery in a sealable bag or non-conductive container to prevent contact with metal objects or other batteries before taking it to the recycling site. By handling batteries properly, you minimize environmental impact and potential safety hazards.
Quick Tricks and Common Pitfalls to Avoid
- Do not use magnets or metal tools to press the battery into place; this can cause short circuits.
- Always verify polarity before seating the new battery. A reversed orientation will prevent operation and could damage the remote.
- Keep a small stock of CR2032 cells in your toolbox so you’re never caught with a dead remote mid-season.
- Never mix old and new batteries in the same device.
- If the remote’s battery life seems shorter than expected, consider relocating the opener or enhancing line-of-sight to improve range.
Summary: Why Regular Checks Matter for Garage Door Reliability
Regularly checking the battery in your garage door opener helps ensure reliable access, especially during critical moments like arriving home in bad weather. Replacing the CR2032 battery when you notice reduced range or speed is a simple maintenance task that can prevent inconvenient lockouts and unwanted door operation. By following the guidelines in this guide, you’ll improve dependability and extend the life of your opener’s remote system. GarageDoorAdjust recommends keeping a spare CR2032 battery on hand and checking your setup at least once per year as part of routine maintenance.
Tools & Materials
- CR2032 coin cell battery(Fresh, high-quality cell from a reputable brand; avoid counterfeit cells)
- Small flathead screwdriver or coin tool(For secure battery compartment screws or clips)
- Lint-free cloth(Clean contacts and remove fingerprints before seating the battery)
- Owner’s manual or model lookup(Confirm battery type and replacement procedure for your specific unit)
- Gloves (optional)(Reduce skin oils on battery and improve grip during handling)
Steps
Estimated time: 10-15 minutes
- 1
Gather tools and battery
Collect the CR2032 battery and the tools you’ll need. Clear the area, ensure good lighting, and have the manual handy. This preparation reduces mistakes and speeds up replacement.
Tip: Keep all parts and tools on a non-metal tray to prevent accidental shorting. - 2
Power down and access the battery compartment
If discussing a wall console, ensure it is not energized. For remotes, simply locate the battery cover. Open the cover to reveal the battery and any retaining clip.
Tip: If screws are present, set them aside in a labeled container to avoid loss. - 3
Remove the old battery
Gently remove the old CR2032 from its contacts. If it’s held by a clip, release it carefully without bending contacts.
Tip: Do not pry aggressively; a light touch avoids damage. - 4
Insert the new CR2032 with correct polarity
Place the new battery in the same orientation as the old one, typically with the + side facing up. Ensure it sits flush against contacts.
Tip: Check polarity with the device’s markings before seating. - 5
Test the remote and wall console
Press a few buttons to confirm the opener responds at typical distances. If it’s unresponsive, recheck battery seating and polarity.
Tip: Test both the remote and wall console if you have both. - 6
Close up and dispose of the old battery
Reattach the cover securely and store the spare in a safe, dry place. Dispose of the old battery according to local regulations.
Tip: Always recycle or dispose of spent batteries at approved facilities. - 7
Confirm operation and document
Operate the door a few times to confirm consistent response. Note the replacement date for future maintenance.
Tip: Keep a simple log in your toolbox for future reference.
Got Questions?
Can I use a different battery type than CR2032?
CR2032 is the common size for many remotes and wall consoles. Using a different battery can prevent proper seating or function. Always reference your device manual to confirm the exact battery type.
CR2032 is the usual size for this device. Check the manual to avoid using the wrong battery.
What if the remote still doesn’t work after replacement?
Double-check the battery orientation and seating. If issues persist, try re-pairing the remote with the opener or replacing with another fresh CR2032. If necessary, inspect the remote’s housing for damage.
If it still doesn’t work, re-check polarity and seating, then consider re-pairing or trying a new battery.
Is it safe to replace the battery myself?
Yes, with basic safety measures: power down, work on non-conductive surfaces, and avoid touching contacts. Use proper disposal for old batteries. If you’re unsure, consult a professional.
Yes, it’s generally safe if you follow safety steps and dispose of batteries properly.
How often should I replace the battery?
There’s no fixed interval. Replace when you notice reduced range or slower response, or during routine maintenance checks. Regular testing helps prevent surprises.
Replace when you notice reduced range or sluggish response, not on a strict timetable.
Where can I dispose of old CR2032 batteries?
Most communities offer battery recycling programs or hazardous waste collection. Check local guidelines or take them to a designated recycling facility.
Recycle old CR2032 at approved facilities near you; don’t throw them in the regular trash.
Do CR2032 batteries expire or degrade over time?
Yes, batteries degrade over time and with usage. Performance declines gradually, so periodic testing ensures you catch declines early.
Batteries degrade with use; test regularly to catch early performance drops.
Watch Video
Quick Summary
- Verify compatibility before replacement
- Use correct polarity to avoid malfunctions
- Test remote and wall console after replacement
- Dispose of old batteries responsibly
- Maintain a small spare stock for reliability