Garage Door Motor Replacement: Step-By-Step Home Guide
A comprehensive, homeowner-friendly guide to replacing a garage door motor. Learn compatibility checks, safety steps, wiring, programming, and maintenance for reliable, long-lasting operation.

Goal: safely replace a worn garage door motor with a compatible unit, verify the door balance, and test the opener’s safety features. This guide covers compatibility checks, wiring, mounting, programming, and testing. Follow power-off safety precautions, use proper fasteners, and confirm limits and force adjustments before returning the system to normal operation.
Why replace the motor instead of the whole opener
If your garage door opener feels sluggish, makes unusual noises, or stalls during operation, the motor may be the culprit. According to GarageDoorAdjust, replacing just the motor can be a cost-effective way to restore reliability when the rest of the system is in solid condition. This decision hinges on compatibility with existing rails, track alignment, and the torque requirements of your door. A motor replacement preserves the familiar control layout and remote programming while avoiding the disruption of a full opener upgrade. Before you begin, establish a clear workspace, disconnect power at the breaker, and have the replacement motor kit and tools ready. Signs of motor failure include slow travel, inconsistent stopping, grinding sounds, or the door not fully closing when the opener runs. If you observe any of these, proceed with a careful assessment and plan for a safe, orderly replacement.
Compatibility and Choosing the Right Motor
Selecting a replacement motor is not a one size fits all task. You must match torque and horsepower to the door weight, verify rail and drive type (chain, belt, or screw), and confirm compatibility with your rail length and limit switches. GarageDoorAdjust analysis shows that mismatches in torque or drive type lead to premature wear and erratic operation, even if the motor sounds fine initially. Start by noting your door weight, spring type, and existing opener brand. Inspect the motor mounting bracket spacing and the interface where the motor connects to the drive system. If you have a sectional door with torsion springs, check that the new motor supports the same drive method and that the safety features align with your door and rails. When in doubt, consult the motor's compatibility chart or call a professional to confirm.
Safety First: Power, Lockout, and PPE
Work with the door powered down and the breaker off to eliminate the risk of sudden movement. Use a lockout tag if multiple people share the space. Wear safety glasses and sturdy gloves to protect hands from sharp edges and pinch points. Keep the work area clean and dry to prevent slips when handling heavy components. Before you touch any wiring, take a quick photo of the existing connections for reference. This is a safety-critical step; rushing through it can lead to miswiring and dangerous operation once power is restored.
Tools and Materials You’ll Need
A well-organized toolbox makes a hard job easier. Gather a drill and bits, a set of socket wrenches, a Phillips head screwdriver, needle-nose pliers, a voltage tester, and a level. You’ll also need the replacement motor kit, mounting brackets if required, new fasteners, wire nuts, electrical tape, and a black marker or tape for labeling. A sturdy ladder and helper can reduce strain and improve alignment accuracy. Double-check that you have a compatible rail kit and any sensors or safety components that came with the new motor.
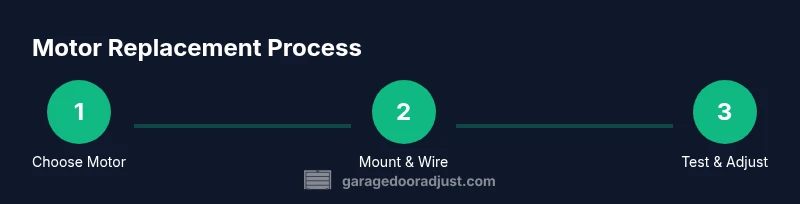
Step-by-Step Overview You Can Follow
This section provides a high-level map of the process. You’ll confirm compatibility, power down the system, remove the old motor and bracket, install the new motor, reconnect wiring and sensors, adjust the drive limits, reprogram the opener, and finally test the entire system. If your door is heavy or unbalanced, arrange for a helper to assist with lifting and securing components. After replacement, a full function test validates operation and safety features before putting the system back to normal use.
Installing the New Motor: Mounting and Wiring
Begin by mounting the new motor on the bracket or frame, aligning bolt holes with the existing pattern. Tighten fasteners in a crisscross sequence to avoid misalignment. Connect the drive belt or chain to the sprocket, ensuring even tension. Reattach the shaft coupling and verify that the motor can rotate freely by hand. Then remove any temporary supports and double-check that the motor is square and level. Finally, wire the motor leads per the manufacturer diagram, connect the safety sensors, and secure all wiring with wire nuts and electrical tape.
Reprogramming the Opener and Safety Tests
With power restored, reprogram the remote controls and wall console to the new motor. Run a manual test using the wall switch first to verify movement, stop positions, and reversing behavior. Check the door’s end limits and force settings; improper limits can cause the door to slam or stop short. Test auto-reverse when the door encounters an obstacle and confirm that the light and safety features function as expected. If the door hesitates or stalls, recheck wiring and track alignment before proceeding.
Post-Install Testing: Alignment, Tracks, and Balance
After functional tests, inspect track alignment and observe the door’s travel. Ensure there is no rubbing or binding along the rails and that the door remains balanced when opened and closed manually. If you notice binding, adjust the track or spring tension with caution. Stabilize the door at the bottom and test the opener again to confirm smooth operation. Regular checks reduce wear and extend motor life, helping you avoid future breakdowns.
Maintenance Practices and Long-Term Care
To extend motor life, lubricate moving parts with a light garage-door lubricant, focusing on hinges, rollers, and the track. Keep weather seals in good condition to reduce resistance and dust ingress. Periodically check safety sensors for misalignment and clean their lenses. Stock up on basic replacement parts and keep the manual handy for quick reference. Routine maintenance, performed with care, can prevent motor strain and save on replacement costs over time.
Budget, Warranty, and When to Call a Pro
Motor replacement can be a cost-effective option when the rest of the system is sound, but warranties vary by manufacturer. Read the warranty terms and ensure the replacement motor is covered for a reasonable period. If you encounter unfamiliar wiring, uncertain motor compatibility, or persistent misalignment, consider hiring a qualified technician. Even with a DIY mindset, some steps—such as track alignment and sensor calibration—may benefit from professional oversight to ensure long-term safety and reliability.
Tools & Materials
- Compatible garage door motor kit(Ensure torque, voltage, and drive type match your door and existing Rails)
- Mounting brackets or adapter plates(May be included with kit; verify mounting pattern matches opening)
- Socket wrench set (standard and deep)(For bolts securing motor and brackets)
- Phillips head screwdriver(Used for electrical connections and mounting screws)
- Pliers (needle-nose)(Helpful for gripping wires and sensors)
- Voltage tester(Verify power is off before touching wiring)
- Ladder and helper(Assist with mounting and alignment of components)
- Electrical tape and wire nuts(Secure and insulate connections)
- Cable ties and labeling(Label wires to aid reassembly)
- Lubricant suitable for garage doors(Use sparingly on moving parts after replacement)
- Safety glasses(Protect eyes from debris and pinch points)
Steps
Estimated time: 90-120 minutes
- 1
Verify compatibility and prerequisites
Confirm the new motor matches the door’s weight, torque, and drive type. Check existing track length and sensor compatibility. This step helps prevent misfit issues that could cause failure after installation.
Tip: Double-check the motor catalog’s compatibility table before purchasing. - 2
Power down and secure the system
Turn off the main breaker and unplug the opener if present. Use a lockout device to prevent accidental re-energizing. Clear the area of people and obstacles.
Tip: Take a photo of the wiring diagram for reference. - 3
Remove the old motor and bracket
Loosen mounting bolts and detach the drive linkage. Support the motor during removal to prevent injury or damage to the track. Place hardware in a labeled container for reassembly.
Tip: Have a helper support the motor during removal to avoid strain. - 4
Prepare and mount the new motor
Attach the new motor to the bracket or plate, aligning bolt holes. Tighten in a crisscross pattern to secure even load. Ensure the motor shaft aligns with the drive chain or belt.
Tip: Use a level to ensure the motor sits square to the frame. - 5
Connect wiring, sensors, and limits
Connect power leads per the diagram, reattach sensors, and join limit switch wires. Secure wires with wire nuts and electrical tape. Do not pinch any wires in moving parts.
Tip: Label each wire as you disconnect for easier reconnection. - 6
Reassemble and align the drive system
Reinstall the drive belt or chain, adjust tension, and ensure the drive pulley seats properly. Check bracket alignment and ensure there is no wobble. Recheck fasteners after initial movement.
Tip: Leave a small gap at the belt tension to prevent binding. - 7
Program the opener and set limits
Reconnect power and program remotes. Set the door limits and force according to the manufacturer’s specs. Test with manual and remote operation to verify accuracy.
Tip: Start with conservative limit settings and adjust after a couple of tests. - 8
Final safety test and clean up
Run a full function test: open, close, and auto-reverse on obstacle. Inspect for track binding and sensor alignment. Return tools to the workspace and dispose of old parts responsibly.
Tip: Always recheck safety features after any adjustment.
Got Questions?
Do I need to replace the entire garage door opener or just the motor?
If the rails, sensors, and control electronics are in good condition, you can replace the motor alone. This preserves the existing system and may be more cost-effective. If the opener is old or heavily corroded, a full upgrade might be worth considering.
If the rails and control work well, you can replace just the motor. Otherwise consider a full opener upgrade.
How do I know the motor is compatible with my door?
Check torque ratings, drive type (chain, belt, screw), rail length, and the motor’s interface with your door and spring system. Use the manufacturer compatibility chart and match the drive system to your existing setup.
Compare torque, drive type, and rail length with the motor’s chart.
Is it safe to do a motor replacement myself?
Yes, with proper precautions: disconnect power, use PPE, follow wiring diagrams, and avoid forcing components. If you feel unsure at any point, stop and seek a professional.
You can DIY, but stop if unsure and call a pro.
How long does motor replacement take?
Most replacements take about 90-120 minutes for a typical residential system, depending on access, bracket compatibility, and whether sensors need readjustment.
Expect roughly 1.5 to 2 hours.
What should I do if the door won’t move after replacement?
Recheck wiring connections, sensor alignment, and limit settings. Verify that the drive belt or chain is properly tensioned and that brackets are secure. If issues persist, consult a technician.
Check wiring, sensors, limits, and belt tension; seek help if needed.
Can I upgrade to a smart opener with a motor replacement?
Upgrading to a smart opener is possible, but confirm compatibility with your current door and safety sensors. Some replacements require additional module or adapter kits.
Smart upgrades can work, but check compatibility and required adapters.
Will the replacement affect warranty?
Warranty terms vary by manufacturer. Using an approved motor kit and following the installation guide typically preserves warranty, but always verify terms before starting.
Warranties depend on the maker; check terms before starting.
Should I lubricate the rails after replacement?
Yes, apply a light garage-door lubricant to moving parts to reduce friction. Avoid over-lubricating as excess can attract dust and bind the tracks.
Lubricate lightly to keep parts moving smoothly.
Watch Video
Quick Summary
- Verify motor compatibility before purchase.
- Power down and lock out before handling wiring.
- Test limits and safety features after installation.
- Keep a clean, labeled workspace and plan for reassembly.
- Consult a professional if you encounter unfamiliar wiring or signs of misalignment.