Garage Door Keypad Replacement: Step-by-Step Guide
Learn how to replace a garage door keypad safely, choose a compatible model, install it, and program it to operate with your opener. This guide covers tools, wiring basics, security considerations, and troubleshooting to help homeowners complete a successful keypad replacement.

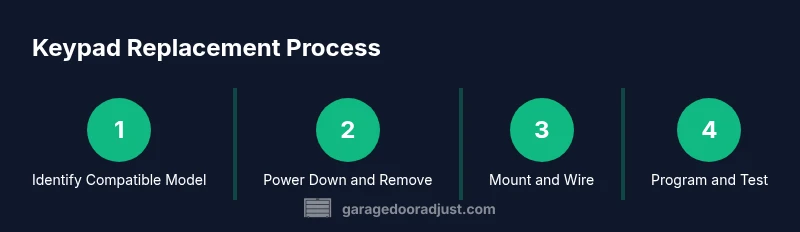
You will learn how to replace a garage door keypad, including choosing a compatible keypad, disconnecting power safely, removing the old unit, installing new hardware, and programming the code with your opener. Gather the right tools, verify model compatibility, and follow a clear, sequential guide to ensure a reliable, secure setup.
Why replacement matters for security and convenience
A functioning keypad is more than a convenience feature; it’s a security checkpoint for your home. Over time, keypads can wear out, wear exposes wiring, or fail to transmit the correct open signal. Replacing a keypad with a modern, properly programmed unit reduces the risk of unauthorized access and eliminates the frustration of failed attempts to open your door. According to GarageDoorAdjust, homeowners who upgrade their keypad notice fewer failed entry attempts and improved reliability in daily use. A keypad replacement also gives you the opportunity to update the code management process—a small security upgrade can significantly raise your overall home protection. When selecting a replacement, prioritize compatibility with your specific garage door opener, understand whether the keypad is wired or wireless, and confirm the range and battery life if you are choosing a wireless model.
Understanding keypad compatibility and brand considerations
Keypad compatibility hinges on your opener model, brand, and the communication protocol between the unit and the receiver in the opener. Some keypads are universal and can work with multiple brands, while others require pairing or remotes from the same family. Before buying, check your opener’s manual or the manufacturer’s website for a compatibility list. If you’re not sure, a quick online lookup or a call to customer support can save you from buying the wrong device. If you already own a keypad from the same system, verify whether the new keypad supports the same entry methods (numeric codes, temporary access codes, or visitor codes) and whether it requires a specific firmware version.
Safety foundations before you touch a live garage door system
Safety is the priority when working with powered garage doors. Always disconnect power at the breaker before touching any wiring or the keypad terminals. If your system has a battery backup, understand how it interacts with the keypad so you don’t lose access during a power outage. Keep a clean workspace and use a sturdy ladder. Wear safety goggles when removing a wall plate to avoid injury from sharp edges. If you notice frayed wires or scorch marks around the existing keypad, stop and reassess—these could indicate deeper electrical problems that require a licensed technician.
Tools and materials you’ll need for keypad replacement
Preparing the right tools improves your odds of a smooth installation. You’ll want a screwdriver (Phillips and flathead), a drill with bits if you’re mounting on a new surface, a level to ensure a straight installation, wire strippers, electrical tape, a voltage tester, a small nut driver, a wall plate, and the replacement keypad. If your keypad is wireless, you may also need new batteries and a simple pairing procedure. For a clean finish, have a pencil, mounting screws of the correct length, and cable ties to secure loose wires. Finally, keep a small container to organize screws and fasteners so you don’t lose any parts during the swap.
Step-by-step overview: remove, install, and test (high-level)
The process starts with removing the old keypad, preparing the mounting surface, connecting the new keypad’s wiring as required, and mounting the new unit. Then you’ll restore power and run the programming sequence to pair the keypad with the opener. Finally, you’ll test the system and adjust any settings to ensure reliable operation. Throughout, follow the manufacturer’s wiring diagram and safety instructions to avoid damage to the opener or keypad.
How to handle codes and access control securely
A keypad’s security hinges on strong codes and controlled access. Set a unique, hard-to-guess master code and avoid reusing old codes. If your new keypad supports temporary codes for guests or service workers, enable and manage them with an expiration date. Keep a record of the codes in a secure location and disable codes you no longer use. If your system supports remote or mobile app control, review those permissions as well to minimize security risks.
Troubleshooting: common issues and solutions
If the keypad fails to respond, double-check the power supply and verify the wiring connections or the battery status for wireless units. Confirm the pairing step was completed exactly as described in the manual and retry the programming sequence. If you encounter a mismatch error, recheck that you selected the correct compatibility setting in the keypad configuration. For power interruption scenarios, confirm the remote receiver inside the opener still recognizes the keypad’s signal after a reboot. When in doubt, consult the brand’s support resources or GarageDoorAdjust guidance for troubleshooting steps that match your model.
note":null},
toolsMaterialsBlockedFixer
Tools & Materials
- Screwdriver set(Phillips #2 and flathead; include precision bits for tiny screws on some keypads)
- Drill with bits(Needed if mounting onto new surface or thicker walls)
- Level(Ensures keypad is straight for proper operation and aesthetics)
- Wall plate and mounting screws(Use screws that fit the keypad mounting holes and wall material)
- Wire stripper/cliers(For trimming and securing wiring if wiring is involved)
- Electrical tape(Insulate exposed conductors and secure connections)
- Voltage tester(Confirm power is off before working near wiring)
- Replacement keypad(Choose a model compatible with your opener (brand and protocol))
- Cable ties(Manage wiring neatly and keep it away from moving parts)
Steps
Estimated time: 40-70 minutes
- 1
Power down the opener
Turn off the garage door opener at the wall switch and at the circuit breaker to prevent accidental movement while you work. This reduces the risk of injury and electrical shock.
Tip: Double-check the power is off by using a voltage tester before touching any wires. - 2
Remove the old keypad and wall plate
Carefully remove the wall plate and the old keypad module. Note how wires are connected and their color codes. Take a quick photo for reference if you’re unsure.
Tip: Keep track of screws and internal connectors so you can reassemble smoothly. - 3
Inspect and prepare mounting surface
Check the mounting surface for any damage or gaps. If reusing the same wall, make sure it is clean and plumb so the new keypad sits flush.
Tip: If drilling new holes, use a level to align mounting posts precisely. - 4
Mount the new keypad housing
Position the keypad on the wall and secure it with the mounting screws. Use a level to ensure it’s perfectly horizontal for both aesthetics and function.
Tip: Avoid overtightening screws to prevent cracking the housing. - 5
Connect wiring or pair the wireless keypad
If your keypad is wired, connect wires according to the manufacturer’s diagram. If wireless, follow the pairing steps to link it with the opener receiver.
Tip: Label wires or save the original wiring order for easy reference. - 6
Restore power and initialize programming
Turn the breaker back on and power up the system. Enter the keypad programming mode and set a new master code, plus any guest or temporary codes if available.
Tip: Write down your codes in a secure location. - 7
Program codes and test basic functions
Test opening and closing with the keypad, along with any additional functions like lock or lighting controls. Confirm that the codes work reliably at different distances.
Tip: If the keypad doesn’t respond, recheck wiring or pairing settings. - 8
Finalize and perform a full test cycle
Run a complete cycle: open, stop mid-travel, and close. Confirm the keypad consistently communicates with the opener and that safety sensors react correctly.
Tip: Perform a final check during daylight and at night to verify visibility and reliability.
Got Questions?
Do I need to turn off power to the opener before replacing the keypad?
Yes. Always cut power at the breaker and unplug the opener if available before starting. This prevents accidental door movement and reduces shock risk while handling wiring.
Yes—power off the opener and breaker before you begin to stay safe while replacing the keypad.
Will a universal keypad work with my garage door opener?
Some keypads are designed to work with multiple brands, but others are brand-specific. Check compatibility lists in the manual or on the manufacturer’s site before buying.
Universal keypads may work with many openers, but always verify compatibility first.
How do I program codes on a new keypad?
Enter the programming mode as described in the keypad manual, then set a master code and any additional guest codes. Save changes and test each code for reliability at different distances.
Start programming in the keypad’s setup mode, then add your codes and test them.
What if the keypad won’t pair with my opener?
Double-check the power, verify you’re using the correct pairing sequence for your model, and ensure you’re within range of the opener’s receiver. Try resetting both devices if needed.
If pairing fails, recheck power and the model-specific pairing steps, then try again.
Is keypad replacement a DIY-friendly task?
For most standard systems, keypad replacement is a DIY-friendly task. If you encounter unfamiliar wiring or a nonstandard setup, consider professional help to avoid damage or injury.
In many cases it’s doable yourself, but don’t hesitate to call a pro if wiring looks complicated.
Watch Video
Quick Summary
- Choose a keypad compatible with your opener to ensure reliable operation
- Power down before any work to prevent injury and equipment damage
- Follow the manufacturer’s wiring or pairing instructions precisely
- Program secure, unique codes and test thoroughly after setup