How to Replace Garage Door Keypad: A Complete DIY Guide
Learn how to replace your garage door keypad safely and efficiently. This guide covers compatibility, tools, programming, and testing to ensure reliable access and security.

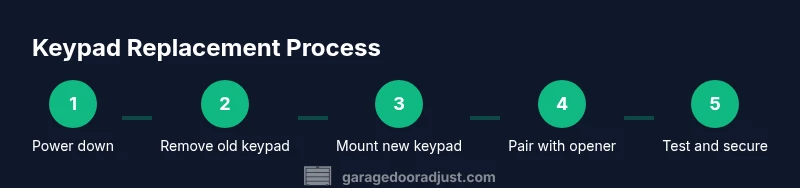
This guide shows homeowners how to replace a malfunctioning or outdated garage door keypad with a compatible model, install it correctly, and program it to the opener. You’ll verify compatibility, gather the right tools, and complete a concise, safe swap. The process includes powering down the system, mounting the new keypad, and testing the setup for secure operation.
The What and Why of Replacing a Garage Door Keypad
A garage door keypad is a convenient, secure way to operate your door without a remote. Keypads can wear out, lose pairing, or become obsolete as openers update, which reduces reliability and security. Replacing a keypad often restores quick entry, strengthens access control, and eliminates frustration from a malfunctioning unit. According to GarageDoorAdjust, staying current with a keypad reduces failed-entry attempts and ensures consistent operation, especially during emergencies or when multiple family members rely on the system. This block outlines common scenarios for replacement and what to consider when selecting a model: compatibility with your opener, compatibility with rolling-code encryption, backlit keys for night use, and durability in dusty or humid garages. You’ll also learn how to assess whether yourexisting keypad supports a straightforward learning/pairing process or requires a manual reconfiguration via the opener’s programming port. The goal is to equip you with a plan that minimizes downtime and maximizes security.
You’ll want to confirm that the new keypad is designed for your specific opener brand and model family, understand whether your unit uses batteries or a passive power source, and be prepared to follow the manufacturer’s pairing steps. If you’re unsure about any compatibility issue, consult your opener’s manual or the manufacturer’s support site before purchasing.
This section uses general guidance to illustrate the decision points homeowners face when replacing a keypad, without tying you to a single brand or SKU. The essential takeaway is to pick a keypad that matches your opener’s voltage, code method, and mounting style, and to plan for a clean, safe swap that preserves the door’s safety features.
Tools & Materials
- New keypad compatible with your garage door opener(Check model compatibility (voltage, mounting, rolling-code support))
- Flat-head screwdriver(Small screwdriver for mounting screws)
- Phillips-head screwdriver(For securing wall plate screws)
- Level and measuring tape(Ensure keypad is mounted straight and at comfortable height)
- Wall anchors and mounting screws(Provide secure wall mounting if replacing drywall or studs)
- Low-voltage wire connectors or wire nuts(Only if wiring needs re-termination)
- Batteries (if keypad is battery-powered)(Check battery type with the new keypad)
- Safety gear (gloves, safety glasses)(General safety for handling tools)
Steps
Estimated time: 20-40 minutes
- 1
Power down and verify safety
Turn off power to the garage door opener at the circuit breaker or unplug the unit. This reduces the risk of electric shock or unexpected door movement while you work. Verify the power is off by attempting to operate the wall button or remote; there should be no response.
Tip: If your opener uses a transformer, disconnect it and wait 5 minutes to discharge capacitors before touching wiring. - 2
Remove the old keypad cover and mounting screws
Use the appropriate screwdriver to remove the screws securing the keypad cover and wall plate. Gently detach the keypad from the wall, keeping track of any screws or spacers. If wires are attached, label them for easy reconnection on the new unit.
Tip: Take a photo of the wiring layout before disconnecting to simplify reassembly. - 3
Disconnect and label wires (or battery compartment)
If the keypad is wired, carefully disconnect the wires and place connectors in a labeled bag. If battery-powered, remove the batteries from the keypad to prevent short circuits. Keep track of wire colors and terminal positions for reattachment on the new keypad.
Tip: Use masking tape to label each wire terminal with its color and position. - 4
Prepare the new keypad for installation
Unbox the new keypad and confirm model compatibility. Install batteries if required, and review the installation instructions. Ensure the mounting surface is clean and dry, and pre-fit the wall plate to confirm screw placement aligns with studs or anchors.
Tip: Test-fit the wall plate without fully securing to verify alignment. - 5
Mount the keypad and reattach wiring
Position the keypad on the wall at a comfortable height, then secure the wall plate with the mounting screws. Reconnect any previously labeled wires exactly as they were, using wire connectors if necessary. If the keypad is battery-powered, insert fresh batteries and close the compartment.
Tip: Use a level to ensure the keypad sits perfectly straight before tightening screws. - 6
Program the keypad to the opener (learn mode)
Put the opener into pairing/learn mode following the manufacturer’s instructions; this often involves pressing and holding a Learn button on the opener module. Enter the default programming code on the keypad and confirm the connection. The keypad should light or indicate a successful pairing.
Tip: Hold the Learn button for a longer period (5-10 seconds) if the LED does not blink initially. - 7
Test, finalize, and secure the setup
Test by entering a PIN or code to operate the door. Check both up and down movements, then re-check after a few minutes to ensure continued reliability. Replace any covers, tidy wiring, and confirm the area is safe and free of trip hazards.
Tip: Test at different distances from the opener to confirm reliable operation across the range.
Got Questions?
Can I replace a garage door keypad myself?
Yes, most homeowners can replace a keypad with basic tools if they follow safety guidelines and the manufacturer’s instructions. Ensure compatibility and power-down the system before starting, and use the Learn button method to pair the keypad with the opener.
Yes. With proper precautions and the right keypad, you can DIY replacing it by following the manufacturer’s pairing steps.
What if the keypad won’t pair after installation?
Recheck that you are in pairing mode on the opener, confirm the keypad uses the correct code format, and verify the batteries are fresh if applicable. If needed, reset the opener’s learning memory and retry the pairing sequence.
If pairing fails, recheck pairing mode and battery status, then retry the steps.
Will replacing the keypad affect my warranty?
Replacing a keypad typically does not void the entire opener warranty, but it can affect coverage if the damage is caused by user installation errors. Always check the warranty terms from the manufacturer and retain receipts for the new keypad.
Warranty terms vary; consult the manufacturer for specifics and keep your receipt.
Do I need to reprogram remotes after keypad replacement?
Usually not. Remotes program independently from keypads, but some systems share learn modes. If you encounter issues, re-check the opener’s learning process and ensure remotes are still recognized.
Remotes usually stay the same, but recheck the learning mode if you notice issues.
How long does keypad replacement typically take?
Most homeowners complete the replacement in 20-40 minutes, depending on mounting surface, wiring length, and whether pairing is immediate. Allow extra time for testing and troubleshooting.
About 20 to 40 minutes for a typical swap, plus time for testing.
Watch Video
Quick Summary
- Verify compatibility before purchasing a keypad.
- Power down before handling any wiring or electronics.
- Follow the Learn button procedure to pair the keypad with the opener.
- Test the keypad from multiple distances to ensure reliability.