Garage Door Dent Repair: A Homeowner's Step-by-Step Guide
A comprehensive, homeowner-friendly guide to diagnosing, repairing, and preventing dents on metal garage doors. Learn safe DIY methods for shallow dents, know when to hire a pro, and maintain your door for long-lasting performance.

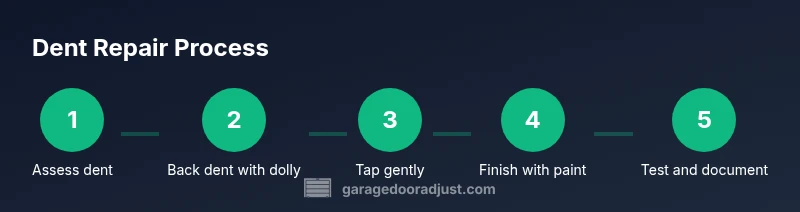
With the right approach, most homeowners can restore shallow dents on metal garage doors without replacing panels. Begin by evaluating dent depth and panel material; for aluminum or steel doors, you can often push or gently tap the dent from behind, then finish with a ride-on repair kit or paint touch-up. Safety and caution are essential.
What dent repair for a garage door entails
Dent repair for a garage door focuses on restoring a dented panel to its original shape without compromising structural integrity or safety. Most homeowners encounter shallow dents caused by accidental bumps from vehicles, hard objects in the garage, or weather-related impacts. The approach depends on panel material (aluminum, steel, or coated steel) and the location of the dent (on a flat plane vs near the edge or seam). For metal doors, dent repair typically involves assessment, careful backing, controlled tapping, and smoothing, followed by a cosmetic touch-up if needed. The goal is to flatten the impression without creating new distortions or misalignment of the track, hinges, or rollers. While many dents are cosmetic, aggressive dents that crease the panel, stretch the metal, or compromise the door’s balance should be evaluated by a professional. Before you start, ensure you have enough light, a stable stance, and a clear work area. Always disconnect any automatic opener and keep children and pets away during the process.
Safety considerations before you begin
Safety is the top priority when attempting any DIY dent repair. Garage doors are heavy and mechanical systems can cause serious injury if manipulated improperly. Start by unplugging the garage door opener and locking the door in the open position if possible to prevent accidental closure. Wear eye protection, gloves, and sturdy footwear. Inspect the track, springs, and hinges for damage; if you notice cracked springs, detached mounting points, or a door that binds or shivers when moved, stop immediately. Work in a well-lit area and avoid working on a windy day if the door is tall or overhead. Do not attempt to adjust torsion springs or cables unless you are licensed. Use only non-marring tools and place a protective backing behind the dent to distribute force. Finally, test the door operation slowly after each major adjustment and be ready to revert if you notice new creases, gaps, or binding.
Assessing the dent and panel type
Examine the panel material and the location of the dent. Aluminum doors are lighter and more forgiving for minor dents but can crease; steel doors resist denting but may show dings that rust if scratched. Fiberglass or composite panels behave differently and may respond to different techniques. Evaluate dent depth, whether the metal has stretched, and whether there are creases along the edge. Measure distance to the hinge and to the nearest seam, as repair approach can vary by location. If the dent is near a seam or frame, specialized tools or professional help may be required because improper pressure can affect alignment. If the panel shows large creases, cracks, or paint flaking, prepare for cosmetic touch-ups or panel replacement.
DIY methods for shallow dents on metal doors
DIY dent repair for shallow dents on metal doors often relies on reversing the deformation with controlled force. Start with a suction-dent puller or glue pull kit designed for metal panels. Clean the dent area and attach the puller according to instructions. Pull slowly while supporting the back with a backing block. Use light taps with a nylon mallet from behind to redistribute material. Move around the dent to avoid creating a new high spot. If the dent is near an edge, avoid applying force at the edge as it can distort the panel. Finish by smoothing with fine-grit sandpaper and applying matching touch-up paint to protect the finish. If the paint is already chipped, address rust protection before repainting.
Using backing and tapping methods with a dolly
Backing behind the dent helps control metal flow and reduce springback. Place a wooden backing block or a metal dolly behind the dent, with a soft barrier like cloth to prevent gouging. Tape the edges with painter’s tape to protect the finish. Gently tap around the dent with a nylon mallet, moving in small circular or radial motions to even out distortion. Keep the hammer angle low and use light taps; avoid striking directly on the surface. After several passes, re-check the front and adjust as needed. When you’re satisfied with the shape, remove the backing and inspect for flatness. If necessary, use a small amount of rubbing compound to reduce residual high spots before touching up paint.
When to avoid DIY and call a professional
If the dent is deep, creased, or located near mechanical components (tracks, springs, hinges), DIY repair may cause more damage. Do not attempt to repair torsion springs or cables without licensing and proper training. If the door operates unevenly, or if the track shows deformities, contact a professional to prevent misalignment that could be dangerous. Also avoid DIY repairs if the door is old or has multiple dents that suggest metal fatigue. In these cases, a technician can assess structural integrity and replace panels if needed.
Common mistakes and how to avoid them
Common mistakes include using excessive force, neglecting to back the dent, and removing protective tape too late, which can scratch the finish. Avoid grinding or sanding aggressively; this can remove protective coatings and expose bare metal. Do not ignore odd sounds or binding in operation after a repair. Recheck alignment, tracks, and springs after every major step to ensure safe operation. Always test the door slowly after repairs and before re-engaging the opener.
Finishing touches: paint, texture, and longevity
On steel or aluminum doors, finish with a color-matched paint and sealant to prevent corrosion. Lightly scuff the repaired area, apply primer if bare metal is exposed, and topcoat with a matched enamel or acrylic paint. If the door has a textured surface, you may need to mimic texture with a stippling brush or roller, but avoid over-texturing, which can create mismatch. Clear-coat or sealant can protect against weathering. Regularly inspect the repaired area for rust or chipping and touch up as needed to maintain longevity.
Maintenance to prevent future dents
Preventive maintenance reduces the likelihood of dents. Keep the garage area clear of moving objects that could hit the door. Regularly clean and lubricate tracks and rollers according to the manufacturer’s guidelines. Inspect seals at the edges to prevent door from catching on debris. Practice safe parking habits to avoid collisions. Consider applying impact-resistant protective strips on the lower door edge if parking in a tight space. Schedule professional inspections periodically to address wear and ensure proper balance and alignment.
Real-world case study: dent repair results
In a typical suburban garage, a mid-sized dent on a steel door near the hinge was resolved using a combination of backing, dolly-supported tapping, and a color-matched touch-up. After the repair, the door opened smoothly with no visible distortion, and there was no change in track alignment. The owner reported improved aesthetics and confidence in home maintenance. While results vary with panel material and dent depth, most shallow dents on metal doors can be improved without panel replacement when approached carefully and safely.
Tools & Materials
- Safety goggles(Eye protection during tapping and handling tools)
- Work gloves(Protect hands from sharp edges and tool slips)
- Nylon mallet or rubber mallet(Gently coax dent outward without marring the surface)
- Dolly or solid backing block(Provide back support to distribute impact)
- Backing cloth or barrier(Protects the door finish from backing material)
- Painter’s tape(Mask edges to prevent scratches during tapping)
- Fine-grit sandpaper (400-600 grit)(Smooth minor high spots after repairs)
- Color-matched touch-up paint(Protects against corrosion and matches finish)
Steps
Estimated time: 60-120 minutes
- 1
Prepare and safety-check the area
Clear the workspace, unplug the opener, and ensure the door is fully open. Inspect for obvious safety hazards such as damaged springs or track misalignment. This step reduces risk of injury and sets a safe baseline before work begins.
Tip: Always unplug the opener to prevent accidental movement while you’re working. - 2
Assess dent depth and material
Identify the panel material (aluminum, steel, or composite) and determine whether the dent is shallow or deep. This guides tool choice and whether DIY is appropriate.
Tip: Shallow dents on metal panels are more likely to respond to backing and tapping. - 3
Clean and mask the area
Wipe the area around the dent with a clean cloth to remove dust. Apply painter’s tape around the dent to protect adjacent paint from impact during tapping.
Tip: Masking prevents unintended scratches and keeps the finish pristine. - 4
Back the dent with a backing block
Place a wooden backing block or dolly behind the dent, using a cloth to avoid metal-to-metal contact. This spreads force and reduces the chance of creating a new deformation.
Tip: Back with a gentle, even pressure; avoid concentrated hits. - 5
Gently tap and adjust
Use a nylon mallet to lightly tap around the dent, working from the outer edges toward the center. Move in small increments and re-check front surface frequently.
Tip: Keep taps light and controlled to prevent over-correction. - 6
Check alignment and smooth
Remove the backing, assess flatness from the front, and gently rework any high spots. Use fine sandpaper or a polishing compound sparingly if needed.
Tip: Don’t over-sand; aim for a seamless transition to paint. - 7
Apply touch-up paint if needed
If bare metal is exposed, apply a primer and color-matched paint to prevent rust. Allow proper drying time between coats.
Tip: Use thin coats to avoid drips and ensure color match. - 8
Re-test door operation
Reconnect the opener and test the door’s movement slowly. Listen for binding or unusual sounds and verify the door returns to rest evenly.
Tip: If it binds, stop and reassess before continuing. - 9
Document and monitor
Photograph the repaired area and note any changes over the next few weeks. Schedule a professional check if you notice recurring dents or misalignment.
Tip: Documentation helps track wear and informs future repairs.
Got Questions?
Can I repair any dent on any garage door at home?
Not all dents are safe to repair at home. Deep creases, dents near edges, and damage to springs, tracks, or cables require professional assessment to avoid compromising safety or causing more damage.
Deep dents or damage near critical components should be handled by professionals.
What signs indicate I should stop DIY repair and call a pro?
If the dent is extensive, near the frame or rollers, or if the door operates with resistance, stop and consult a garage door technician. Safety is the priority.
If it binds or looks unsafe, get a professional.
Do I need to repaint after dent repair?
Repaint is recommended if paint is chipped or damaged. For best results, color-match the paint and apply proper primers and sealants.
Paint may be needed if the finish was damaged.
How long does DIY dent repair typically take?
Most shallow dents can be addressed in about 60-120 minutes, including prep, backing, tapping, and finishing touches.
Most fixes take under two hours.
Will DIY dent repair affect door balance?
Poorly performed repairs can affect balance; re-check spring tension and track alignment after any major adjustment.
Balance checks are crucial after repairs.
What tools are essential for dent repair?
A nylon mallet, backing block or dolly, painter’s tape, safety gear, and optional suction puller or dent kit are commonly used.
Basic tools cover most shallow dents.
Watch Video
Quick Summary
- Assess safety before starting any repair
- Back the dent to distribute force evenly
- Use light taps and check frequently for alignment
- Finish with paint touch-up to prevent corrosion
- If in doubt, stop and call a pro