Fix a Dent in Your Garage Door: A Step-by-Step Guide
Learn how to fix a dent in your garage door with a safe, step-by-step approach. Tools, techniques, safety tips, and when to call a pro from GarageDoorAdjust explained clearly.

With this guide, you will fix a dent in your garage door using safe, hands-on steps. Start by inspecting the panel, gathering non-damaging tools, and choosing a gentle approach (heat, cold, or suction). Follow a clear, step-by-step process to restore the door’s appearance and function without professional help. This method avoids costly repairs, reduces risk of further damage, and keeps you in control through careful safety checks and documentation.
Why fixing a dent safely matters
Dents on a garage door are more than cosmetic. They can hide structural weaknesses, compromise insulation, and in rare cases affect the door’s movement or safety sensors. Before you begin any repair, take a moment to plan and protect your hands, eyes, and feet. The safest approach starts with a clear assessment of the door type (steel, aluminum, or composite), the location of the dent, and how the panel is mounted. According to GarageDoorAdjust, safety and a thorough inspection should precede any dent repair, especially on insulated doors or doors with torsion springs. If the panel shows creasing, cracking paint, or signs of moisture behind the skin, stop and seek professional advice. In most cases, a small dent can be addressed with gentle methods that do not require removal of the door from its tracks.
Tools and materials you'll need
Gather tools before you start. The goal is to have non-marring, controlled tools that let you apply gentle force without stretching or bending the metal. Essential items include a rubber mallet, a wooden block to spread impact, safety gloves, and safety goggles. Optional items that can help with stubborn dents are a suction dent puller and dry ice or a can of compressed air for cold shrinking. A heat source such as a hair dryer or heat gun is useful for plastic glazing and some metals but must be used with caution. Keep painter’s tape handy to protect adjacent surfaces and a clean rag with rubbing alcohol to remove grime. Finally, ensure you have a stable ladder and a helper if the door is tall or heavy. Assemble everything on a flat, dry surface.
Understanding metal behavior and dent formation
Metal doors behave differently based on material composition, thickness, and paint finish. Steel panels can dent and spring back with gentle pressure, but aggressive tapping can leave creases or polish marks. Aluminum is lighter and more malleable, which can make initial corrections easier but may show pinholes if pushed too hard. Composite doors react differently again, so chosen methods should be compatible with the panel type. Inspect for paint cracks or heat damage along the edges, as these issues often signal a deeper problem with the skin or frame. For insulated doors, maintain temperature control to prevent sealing issues.
Prep work before dent repair
Clear the work area of people and pets, disconnect power to any nearby sensors, and protect the floor with a mat. Wipe down the door surface to remove dust and grime that could scratch during handling. If you notice any moisture behind the skin, or if the paint is bubbled, stop the repair—these signs indicate potential moisture damage or structural compromise that may require professional service. Mark the dent location with painter’s tape so you can return to it easily, and set up a stable ladder at a comfortable height. Finally, gather your PPE: gloves, eye protection, and a dust mask if sanding or scraping becomes necessary.
Step-by-step repair approach: heat, cold, and suction
Combo methods work well for many dents. Start with controlled heat from a hair dryer to warm the metal evenly, keeping the dryer at a safe distance and moving constantly to avoid overheating a small area. If the dent remains, apply a cold shrink by briefly using dry ice or compressed air on the back of the panel to encourage the metal to contract. Suction dent pullers can be used for shallow dents, but avoid pulling too hard or at an angle that could stretch the skin. Alternate between warming and cooling cycles, testing after every few minutes to gauge progress. Ensure you are standing securely and away from the door’s track path as you work.
The correct tapping technique to minimize damage
When using a mallet, tap gently with a backing block to distribute force. Position the block on the inside of the door, directly behind the dent, and strike the outside with light, even taps. Avoid striking at the edges or corners where the skin is thinnest, and never hit the door with metal tools or sharp objects. If you hear creaks or see flexing, stop and reassess. Keep your nails and jewelry away from the work area to prevent scratches. The aim is gradual alignment rather than forceful correction, so patience is essential.
Alternative dent removal methods: suction cups and cold shrinking
Suction cups can pull small, flat-backed dents back toward their original shape with gentle, steady force. Follow the device’s instructions for attachment and ensure a clean, dry surface before pulling. Cold shrinking with dry ice or compressed air can also allow the metal to rebound; use gloves and avoid prolonged exposure to the same spot. If a suction cup fails to grip or if the dent remains stubborn after several cycles, switch to a backing method or seek professional options. Remember to remove the suction cup cleanly after use to avoid scratches.
Safety and risk considerations with springs and cables
Dents near torsion springs, tracks, or safety sensors require extra caution. Springs are under tension and can cause serious injury if disturbed. Do not attempt to adjust springs yourself. If the dent is close to the spring housing or interferes with sensor alignment, stop immediately and call a professional. This is not a task for improvised tools. Always unplug any automatic opener when working near the door to prevent accidental operation.
How to evaluate success and finish cleaning up
After you finish, test the door’s balance by opening and closing it slowly with the opener disabled to ensure the door stays in position and doesn’t drift. Inspect the area for paint chips or scratches and touch up if needed with matching paint. Wipe down the surface with a mild cleaner to remove fingerprints and oils from handling. If you notice continuing issues, such as persistent sticking or misalignment, re-evaluate the repair and consider professional inspection. Keep a photo log of the dent before and after repairs for reference.
Common mistakes and how to avoid them
Avoid using metal tools that can gouge or crease the skin. Do not overheat the metal, which can warp panels or damage the finish. Don’t force the dent back into place before ensuring the surrounding door is stable. Avoid working on a dent that’s near wiring terminals, sensors, or electrical components. Finally, never operate the door while you’re adjacent to the track or near the spring assembly. These precautions reduce the risk of injury and further door damage.
When to call a professional for garage door dents
If the dent is deep, creased, or near the frame, it may require panel replacement or a more advanced repair that only a trained technician should perform. Complex dents can affect insulation seals, track alignment, and spring tension—issues best handled by pros with the right equipment. If your repairs do not restore smooth operation within a reasonable time, or if you observe unusual noises or resistance during opening, seek professional help promptly. The cost of a professional check often prevents more extensive damage and ensures safety.
Maintenance checklist after dent repair
Finish by establishing a simple maintenance routine to prevent future dents. Regularly inspect and lubricate moving parts, ensure weatherstripping is intact, and keep the door’s surface clean to protect the finish. Check the balance annually and test safety features periodically to ensure correct operation. Document any dents or repairs with photos and notes to track changes over time. A quick follow-up inspection every few months can help catch issues early and extend the life of your garage door.
Tools & Materials
- rubber mallet(soft rubber head to prevent further damage)
- wooden block(distributes tapping force)
- suction dent puller(optional for shallow dents)
- dry ice or compressed air(for temp-based metal contraction; wear gloves)
- heat source (hair dryer/heat gun)(apply heat carefully and evenly)
- safety gear (gloves, goggles)(protect hands and eyes)
- painter’s tape(protect surrounding surface)
- rubbing alcohol and soft cloth(clean surface before repair)
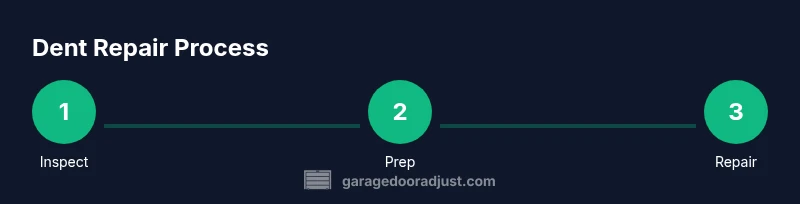
Steps
Estimated time: 60-90 minutes
- 1
Inspect the dent and prep safety gear
Begin with a visual inspection of the door, noting the dent’s size, location, and whether there are any signs of paint damage or moisture behind the skin. Put on gloves and safety goggles, and clear the area to prevent injuries or interference during the repair.
Tip: Wear PPE and keep a camera handy to document the dent. - 2
Clear area and protect surfaces
Remove objects near the door and cover adjacent areas with painter’s tape or protective cloths. Ensure the door is fully closed and supported on a stable surface before starting.
Tip: Tape acts as a reminder of the dent location and protects finishes. - 3
Choose repair approach (heat, cold, or suction)
Decide whether to start with gentle heat, cold shrinking, or a suction pull based on the dent type and door material. Begin with the least aggressive method to avoid further damage.
Tip: Test a small area first to gauge response. - 4
Apply controlled heat or cold
Warm the area evenly with a hair dryer on a low setting, then switch to cold shrinking if the metal resists. Move the heat source in small circles and avoid overheating.
Tip: Keep the dryer moving; don’t hold it in one spot. - 5
Gently tap from behind with mallet and backing block
Place the wooden backing block behind the dent and lightly tap the exterior with the rubber mallet. Use short, controlled taps and monitor the panel response.
Tip: Never strike the skin directly with a metal tool. - 6
Test door operation and adjust if needed
With the opener unplugged, manually test the door’s balance and movement. If it sticks or drifts, pause and reassess the dent position, backing support, or the need for professional help.
Tip: If the door drifts, there may be a panel misalignment. - 7
Optional suction pull or alternate method
If the dent remains, attach a suction cup and pull gently in line with the panel’s face. Repeat in small increments, stopping if the surface shows signs of strain.
Tip: Don’t overwhelm the panel—progress slowly.
Got Questions?
Can I safely fix a dent in a metal garage door myself?
Yes for small, shallow dents with caution. Always disconnect power to avoid shocks, wear PPE, and test the door slowly. Seek professional help for large or creased dents.
Yes for small shallow dents, but proceed with caution and turn off power before starting.
What tools are safest for dent repair on a garage door?
Use non-metal tools like a rubber mallet and wooden block. Suction cups can help with shallow dents. Avoid chisels or sharp metal hooks.
Use a rubber mallet and wooden block; avoid sharp tools.
Will dent repair affect insulation or seals?
Minor dent repair typically doesn’t affect insulation; overheating or aggressive tapping can loosen seals. Inspect weatherstripping afterward.
Usually not, but inspect seals after repair.
Should I repair dents on aluminum vs steel doors the same way?
The approach is similar, but aluminum dents are more malleable and may pop back; be gentler. Steel doors can warp if over-tapped.
Aluminum is more forgiving; be gentler.
When should I call a professional?
Call a pro if the dent is deep, near the frame, or if the door won’t open/close smoothly after a repair. Complex dents may require panel replacement.
Consult a pro for deep dents or alignment issues.
Watch Video
Quick Summary
- Inspect the dent thoroughly before starting.
- Use the correct tools to avoid panel damage.
- Heat or cold methods can help reset metal, safely.
- Test operation slowly after repair.
- Call a pro for complex dents or damaged panels.