Denton Garage Door Repair: A Homeowner's Guide
Learn safe, practical steps for diagnosing and repairing common garage door issues in Denton, Texas. Tools, steps, safety, and professional help explained for homeowners.

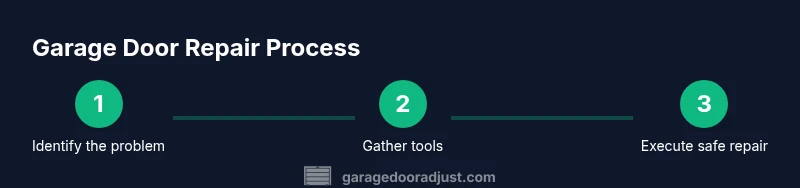
By the end of this guide you will diagnose common garage door issues in Denton, Texas, decide whether a DIY fix is safe, and follow a step-by-step repair approach. Safety comes first: disconnect the opener, secure the door, wear eye protection, and keep children away. You’ll also know when to hire a professional. This rapid quick-start highlights the tools you’ll need and how to prevent injuries.
Understanding the Denton Texas Garage Door Repair Landscape
Denton is a city with wide temperature swings and seasonal weather that can stress residential garage doors. The GarageDoorAdjust team notes that doors here endure quick shifts between hot summers and cool winters, plus occasional storms that push against unsecured panels. Because of these conditions, local repairs often involve checking balance, alignment, and safety features before addressing hardware or track issues. In this section we’ll outline how local climate and daily use influence wear patterns, so you can spot telltale signs early and plan a repair path with confidence. A solid diagnostic starts with a clean baseline: know how your door should feel when fully closed, whether it travels smoothly along tracks, and if the opener responds consistently. Keeping a simple maintenance log helps track changes over seasons and aligns with best practices recommended by GarageDoorAdjust. For Denton homeowners, understanding when to DIY and when to call a pro saves time and minimizes risk, especially for complex components like springs and cables that require specialized tools and safety procedures.
Key local considerations include ensuring that weather seals are intact to prevent drafts and moisture intrusion, and confirming that the door’s balance is appropriate for your door’s weight class. If you notice persistent sticking, uneven gaps, or unusual noises, use a methodical approach to isolate the issue rather than jumping to conclusions. This mindset reduces the chance of creating new problems while you diagnose the root cause. As you begin, remember that the goal is a safe, functional door that operates reliably under Denton’s conditions.
Common Garage Door Issues and Quick Diagnostics
Among the most frequent problems are misaligned tracks, worn rollers, loose hardware, a door that won’t stay up, and opener-related faults. A common diagnostic is to manually try lifting the door about a foot and seeing if it stays in place or drops. If the door feels heavy or drifts during the lift, it’s usually a balance or spring-related issue, which is more complex and potentially dangerous. You’ll also want to inspect the tracks for dents or bends, check the rollers for wear, and listen for grinding or squeaking that might indicate need for lubrication or replacement of hinges. Sensor misalignment is another frequent culprit for garage doors that won’t close, often solved by realigning the safety sensors. In Denton, where homes may rely on older torsion spring setups, it’s critical to recognize when components are beyond a simple adjustment and require professional service. This section will help you distinguish between safe DIY tasks and issues that merit a licensed technician to prevent personal injury and further damage to the door. Here are practical diagnostic steps you can perform:
- Check door balance by manually lifting when the opener is disengaged. If it stays put, the balance may be fine; if it drops, there’s a spring or track problem.
- Inspect tracks for curvature, kinks, or mounting screws that seem loose or missing.
- Test the safety reverse function with a small object under the door to ensure it reverses.
- Verify sensor alignment by ensuring LED indicators are steady and unobstructed.
- Listen for unusual noises during operation; squeaks usually indicate lubrication needs, while grinding may signal worn parts.
Safety First: Essential Precautions for DIY Garage Door Repair in Denton
Garage door repair can involve heavy moving parts, high tensions, and powerful springs. Prioritizing safety is non-negotiable for Denton homeowners who want to avoid injuries and costly mistakes. Always disconnect power to the opener before inspecting or adjusting any components to prevent unexpected door movement. Use a sturdy ladder and wear eye protection and gloves to shield yourself from sharp edges and debris. If a component is snug or heavy, do not attempt to force it; instead, identify proper replacement parts and consult the manufacturer’s guidelines. In particular, torsion springs and cables carry high tension and can cause severe injury if mishandled. If you’re unsure, pause and seek professional help. By establishing safe working conditions—adequate lighting, clear workspace, and a ringed toolbox—you reduce the risk of accidents and enjoy a smoother repair process. When in doubt, err on the side of professional assistance to protect your family and your investment in a reliable door.
Tools and Preparation for Denton Repairs
Preparation is half the job. Having the right tools and a clean workspace makes the repair smoother and safer. Before you start, assemble a basic toolbox with eye protection, gloves, a sturdy ladder, a set of wrenches and screwdrivers, pliers, a torque-friendly lubricant, and a few rags for cleanup. A digital camera or phone can help you document the setup for reassembly and warranty purposes. For tasks involving torsion springs or significant rebalancing, you’ll need specialized tools such as winding bars and a torque wrench—these are not universally safe for DIY use and are typically best handled by a licensed technician. In Denton homes, where weather and age can affect the door’s movement, organizing parts methodically reduces the risk of mixing fasteners and forgetting steps. Label screws and small components as you remove them, and keep replacement parts organized in a tray. Finally, confirm that you have a plan for disposal of any worn components and a backup plan if the repair takes longer than expected.
A practical preparation checklist includes:
- Safety glasses, gloves, and closed-toe shoes
- A stable ladder tall enough to reach the tracks
- A basic toolset (wrenches, screwdrivers, pliers)
- Lubricant and cleaning supplies
- A digital camera or phone for reference photos
- Replacement parts suitable for your door model
- Clear space around the door and no clutter underfoot
Step-by-Step Repair Basics for Common Problems
This section outlines a practical workflow for addressing common issues that frequently show up in Denton kitchens, garages, and driveways. While it’s structured to be accessible for homeowners, it also emphasizes when to stop and call a pro. The steps below describe a safe, repeatable process that minimizes risk and increases the likelihood of a successful repair. If you encounter any step that feels beyond your experience, stop and consult a professional. For many doors, a minor track realignment, roller replacement, or hinge tightening can restore function without expensive downtime. Regular maintenance, including lubrication of moving parts and sensor checks, helps prevent recurrent issues and extends the door’s life.
- Disconnect power and secure the door to prevent unexpected movement. This ensures you can inspect the opener and door without the risk of a powered lift.
- Manually test the door’s balance by lifting it about one foot and letting go. If it falls, there’s a balance issue requiring attention.
- Inspect tracks and rollers for damage or obstruction; clear dirt and tighten mounting screws.
- Tighten all visible hardware on hinges, brackets, and tracks; ensure no loose screws remain.
- Lubricate rollers, hinges, and track joints with a light, non-silicone lubricant designed for metal doors.
- Reconnect power and test the opener; verify automatic reversal and check the safety sensors’ alignment.
- Visually inspect springs and cables for wear or deformation; if you see gaps, breaks, or excessive gaps, stop and call a pro.
- Reassess the door’s operation over a few cycles and record any residual issues; if problems persist, plan a professional appointment with a Denton technician.
Tip: Keep a small parts tray to prevent losing screws, and photograph each step to aid reassembly. If any stubborn stiffness or unusual noises occur, consult a professional to avoid causing additional damage.
When to Hire a Professional in Denton: Licenses, Warranties, and Costs
Not every door issue is appropriate for DIY. In Denton, Texas, more complex repairs—especially those involving torsion springs, cables, or structural damage to the door frame—should be handled by licensed technicians. The potential for serious injury is high when dealing with high-tension springs and heavy panels. After performing basic diagnostic checks and simple adjustments, you should call a pro if you notice persistent binding, unusual noises, or if the door refuses to operate safely within the opener’s safety constraints. A professional can assess whether the door or opener has reached the end of its useful life, whether replacing components is more cost-effective than repair, and whether any warranty terms can be honored. They can also advise on energy efficiency and insulation improvements that fit Denton’s climate. A reputable technician will provide an upfront estimate, explain warranty coverage, and offer post-repair maintenance guidance to minimize future issues. By knowing your limits, you protect your family, your property, and your investment in a safe, reliable garage door that serves your home for years to come. GarageDoorAdjust emphasizes balancing safety with practical maintenance strategies to ensure a long-lasting door.
Final Thoughts and Local Considerations for Denton Residents
Denton homeowners should approach garage door repair with a practical, safety-first mindset and a clear plan. Regular maintenance checks—particularly balance tests, lubrication of rollers and tracks, and sensor alignment—reduce the risk of sudden door failures. If you’re ever unsure about a repair’s complexity, especially if springs or structural elements are involved, err on the side of professional service. In many cases, investing in a qualified technician saves time, prevents injury, and preserves warranties and insurance coverage. By following a structured process and staying mindful of Denton’s climate influences, you can keep your entryway secure and efficient, year after year.
Tools & Materials
- Safety glasses (ANSI Z87.1)(Protect eyes from debris and moving parts)
- Work gloves(Grip and protect hands)
- Sturdy ladder(Reach tracks and hinges safely)
- Flashlight or headlamp(Improve visibility inside tracks and hinges)
- Adjustable wrench set(Turn bolts on brackets and hinges)
- Screwdrivers (Phillips & flat)(Remove and secure fasteners)
- Pliers(Grip and manipulate small parts)
- Lubricant (white lithium grease or silicone)(Lubricate rollers, hinges, and tracks)
- Dust rag(Clean dirt and grime for better inspection)
- Penetrating oil(Loosen stubborn fasteners (optional))
- Tension winding bars(Only for torsion-spring tasks by a pro)
- Measuring tape(Check track gaps and door height)
Steps
Estimated time: 60-90 minutes
- 1
Disconnect power and secure the door
Begin by turning off the garage door opener at the wall switch and unplugging the unit or cutting power at the circuit breaker. Use a vise grip or clamps to gently secure the door in the fully closed position if you need to steady it during inspection. This prevents unexpected movement while you diagnose.
Tip: Double-check that the opener motor is completely powered off before touching any parts. - 2
Test door balance manually
Lift the door halfway by the manual grip and release. If it stays in place, balance is likely good; if it sinks or rises, there is a balance or spring issue needing attention. Do not attempt to adjust springs without proper training.
Tip: If the door doesn’t stay in place, note the direction of movement to guide the next steps. - 3
Inspect tracks, rollers, and hinges
Look for bends, dents, or obstructions in the tracks and check that rollers spin freely. Tighten loose screws and replace visibly worn rollers or hinges. A rough glide along the track can indicate dirty or dry joints.
Tip: Mark a reference point on the track to notice any new shifts after adjustments. - 4
Tighten hardware and realign if needed
Secure all visible fasteners and brackets, ensuring tracks are vertically plumb. If misalignment is apparent, gently adjust bracket positions and retighten. Do not force tracks back into place if you encounter resistance.
Tip: Work in small increments and recheck alignment after each adjustment. - 5
Lubricate moving parts
Apply a light coat of lubricant to the rollers, hinges, and track joints. Wipe away excess to prevent dust buildup. Lubrication reduces friction and extends component life.
Tip: Avoid heavy lubricants near sensors to prevent misreads. - 6
Test the safety features and opener settings
Reconnect power and run the door through its full cycle. Check that the safety reverse works by placing an object on the ground under the door. Verify that the door reverses on contact and that sensors align correctly.
Tip: If the opener behaves oddly, reset it to factory settings and reprogram remotes as needed. - 7
Assess springs and cables for damage
Visually inspect torsion springs and cables for cracks, gaps, or excessive wear. Do not adjust or attempt to wind springs unless you are trained; damaged springs require a licensed professional. Document any signs of wear for follow-up.
Tip: Never touch a spring under tension; contact a pro immediately if you notice deformation. - 8
Decide on next steps and safety plan
If issues persist after basic maintenance, schedule a professional inspection. Keep a maintenance log and photograph repairs for warranty or future references. Consider a preventive maintenance routine to reduce future problems.
Tip: Set up a yearly maintenance reminder and address small issues before they escalate.
Got Questions?
Is it safe for a homeowner to repair a garage door in Denton, Texas?
Many basic maintenance tasks are safe for homeowners when you follow safety steps, disconnect power, and avoid springs or structural work. For complex issues like torsion springs or damaged tracks, hire a licensed professional.
DIY can be safe for basics, but leave springs and structural work to pros.
What are the signs of a failing torsion spring?
Heavy door, door that won’t stay open, or a loud bang when starting or stopping can indicate a worn or broken torsion spring. Do not attempt to replace springs yourself.
Look for heaviness and instability; contact a pro for springs.
Do I need a permit for garage door repairs in Denton?
Most basic repairs do not require a permit, but major modifications or replacing structural components may. Check local codes or consult a licensed technician for guidance.
Permits aren’t common for simple fixes, but check local rules.
How long does a typical garage door repair take?
Simple alignment or sensor repairs can take 1–2 hours. More involved tasks like spring work or track replacement may take longer and require a follow-up visit.
Most fixes are completed in a few hours; springs may take longer.
When should I replace the entire door instead of repairing?
If the door is old, panels are warped, insulation is poor, or multiple components are failing, replacement may be more cost-effective than continued repairs.
If the door is aged and several parts fail, replacement may be better.
What maintenance helps prevent future problems?
Regular lubrication of moving parts, annual balance checks, and sensor alignments reduce wear and downtime. Keeping the door clean and checking weather seals also helps.
Keep it clean, lubricated, and aligned to prevent issues.
Watch Video
Quick Summary
- Act safely before any repair: disconnect power
- Assess balance and alignment to prevent repeat issues
- Reserve professional help for springs and major structural work
- Maintain a maintenance log to track wear and timing