Dallas Garage Door: Step-by-Step Troubleshooting Guide
Learn how to diagnose and repair common problems with a dallas garage door. This step-by-step guide covers safety, inspection, tools, and when to call a pro for lasting results.

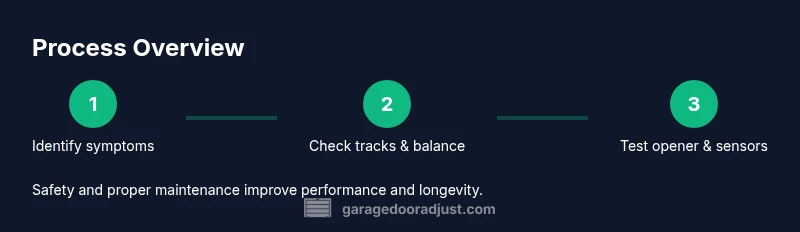
You will diagnose and fix a common garage door issue in Dallas by checking the door balance, tracks, springs, and opener settings, then apply safe, step-by-step repairs. Gather basic tools, unplug the opener for safety, and test operations after adjustments. This guide walks homeowners through a proven process today at home.
Understanding the dallas garage door system
A typical dallas garage door system consists of a few core components: the sectional door itself, torsion or extension springs, tracks and rollers, hinges, a torsion shaft or drive mechanism, an overhead opener, and safety sensors. When diagnosing issues, homeowners should think about how each part contributes to smooth operation. A door that opens and closes smoothly usually indicates healthy balance, properly aligned tracks, and a functional opener. If a component is out of specification, the entire system can behave erratically. In this guide, we’ll walk through practical checks and safe adjustments that align with GarageDoorAdjust principles. By understanding how each piece fits together, you can quickly identify whether the problem is mechanical (springs, cables, tracks) or electrical (opener settings, safety sensors). The keyword here is awareness—knowing what to look for helps you decide on a DIY fix or when to call a pro for a dallas garage door.
Before you begin, ensure you have adequate lighting and a clear workspace. If your door is unusually heavy, sticks in one area, or sounds like grinding, these are red flags that require careful handling. Take notes as you inspect each part and compare what you find with the symptoms you’re experiencing. This systematic approach reduces guesswork and increases the odds of a successful repair on your dallas garage door.
Safety First: Protect Yourself and Your Family
Safety is non-negotiable when working on a garage door. Always unplug the automatic opener and lock the door in the closed position before you start any inspection or adjustment. Wear eye protection and sturdy gloves, and keep children and pets clear of the work area. Use a solid ladder and avoid standing under a door that is supported only by springs or cables. If you notice exposed or frayed wires, corroded tracks, or damaged springs, stop immediately and call a professional—especially in a situation involving torsion springs, which can cause serious injury. For a dallas garage door, following a conservative, safety-first mindset protects you and your family while you determine whether the issue is DIY-friendly or needs expert attention. As you proceed, document any changes you make so you can revert if needed and share your observations with a professional if you decide to escalate the repair.
Common Symptoms and What They Mean
Garage doors in Dallas homes typically exhibit a handful of telltale symptoms. A door that refuses to stay open might indicate weak or imbalanced springs, or a misadjusted opener. A door that stops and reverses when it should close often points to misaligned safety sensors or an obstruction in the track. Noises such as grinding, squeaking, or banging may signal worn rollers, dry hinges, or loose hardware. In some cases, a door that opens partially and then stalls could be a sign of weak springs or insufficient track clearance. By categorizing symptoms, you can narrow down the probable causes. GarageDoorAdjust observations emphasize that symptoms rarely point to a single issue; more commonly, several components are contributing to the problem. Start by testing the door manually (with the opener disconnected) to assess balance, then verify the opener’s behavior with it reconnected. Having a clear symptom map makes the diagnostic process faster and safer for a dallas garage door.
Step-by-Step Diagnostic Framework (Symptom-to-Cause Mapping)
A structured diagnostic framework helps you connect what you observe with likely root causes. Begin by listing symptoms: speed, noise, balance, stops, or reverse behavior. Next, test balance by unplugging the opener and raising the door halfway; if it falls or drifts, springs or balance issues are likely. Check the tracks for alignment by looking for gaps between the door and the track, and listen for rubbing sounds when moving. Inspect rollers and hinges for wear or binding. If the door sounds rough or sticks in one area, measure track clearance with a level and compare with manufacturer guidance. Finally, check the opener settings (force, travel limits, reverse safety). In Dallas homes, weather and dust accumulation can exacerbate track binding, so wipe tracks and lubricate moving parts as part of routine maintenance. This framework helps you triage quickly and decide whether a DIY repair is feasible or a pro is needed.
Inspecting Tracks, Rollers, and Hardware
Track inspection should focus on straightness and secure mounting. Look for obvious gaps, dents, or bowing; tighten any loose screws or bolts carefully. Misaligned tracks can cause the door to bind or rub corners, leading to accelerated wear. Check the rollers for flat spots or cracking; worn rollers should be replaced, preferably with ball-bearing rollers for smoother, quieter operation. Inspect hinges for looseness and replace or tighten as needed. Lubricate metal-to-metal contact points sparingly with a light garage-door-spec lubricant. If you notice persistent rubbing on the track, back off and realign the track gently using a level; misalignment can typically be corrected with careful adjustments to the track brackets. In a dallas garage door, humidity and temperature changes can affect the metal frame and hardware, so seasonal checks are a smart habit.
Evaluating the Opener and Safety Features
Identify whether the problem lies with the opener by testing it with the manual disconnect engaged. Reconnect power and test the remote and wall switch. If the door responds inconsistently, adjust the opener limit screws or programming as described in the manufacturer’s manual. Check the safety sensors: align and clean the photo-eye lenses, ensure nothing obstructs them, and verify the red indicator light on each sensor. A misaligned sensor can prevent the door from closing fully. If the door reverses too quickly or won’t close, recheck the safety edge and sensor alignment steps. For a dallas garage door, follow a strict sequence: disconnect power, perform a manual test, inspect the sensors, then perform the electrical tests with the opener connected. This helps isolate whether the root cause is mechanical or electrical.
When Springs or Cables Need Attention (Hire a Pro)
Springs and cables bear the heavy load of lifting a garage door and carry serious risk when adjusted or replaced. If you notice broken strands, excessive gaps, distortion, or a door that won’t stay in place, stop immediately. Do not attempt spring replacement unless you are trained and equipped with the proper safety equipment. In most cases, an experienced technician should handle torsion springs or extension springs due to the high tension involved. For a dallas garage door, it’s important to respect local safety standards and codes, and know when to call a pro. While minor adjustments to alignment and balance can be DIY-friendly, springs require specialized tools and expertise to avoid serious injury.
GarageDoorAdjust emphasizes caution: when in doubt, defer to professional service. A failed spring could pose a safety hazard, so prioritize safety and quality over a quick fix.
Maintenance, Lubrication, and Preventive Care
Preventive care is the best way to extend the life of your dallas garage door. After any inspection and adjustment, clean tracks and inspect weather seals. Lubricate the moving parts (hinges, rollers, and the ends of tracks) with a garage-door-approved lubricant. Do not grease the tracks themselves; instead, apply to hinges, springs if accessible, and roller bushings. Wipe away excess lubricant to prevent dust buildup. Check seals at the bottom of the door for wear; replace worn weatherstripping to keep energy efficient and dust-free. Schedule seasonal inspections and address small issues before they grow into costly repairs. Regular maintenance reduces noise, extends component life, and improves safety for your family and home in the Dallas climate.
Making a Safe DIY Plan or When to Call a Pro
If you’ve followed the diagnostic steps and the door’s issues persist, it’s time to create a professional plan. Document symptoms, photos of tracks and hardware, and any test results you performed. Use this information to get accurate quotes and service timelines from local technicians. In many cases, professional inspection can reveal hidden wear, misalignment, or a failing internal component that DIY fixes can miss. The GarageDoorAdjust team recommends scheduling a professional check if you notice persistent binding, unusual noises, dramatic changes in balance, or a door that won’t stay put in the open position. A well-planned service visit avoids unnecessary repairs and ensures your dallas garage door safely returns to reliable operation.
Tools & Materials
- Phillips and flat-head screwdrivers(Varied sizes; use precision bits for small screws)
- Wrench set (including crescent wrench)(For bracket bolts and fasteners)
- Ladder stable enough to reach tracks(Non-slip feet; safe height for access)
- Gloves and safety glasses(Protect hands and eyes during inspections)
- Lubricant approved for metal-on-metal (garage-door)(Apply sparingly to hinges, rollers, and springs if accessible)
- Rags or shop towels(Clean old lubricant and debris from tracks)
- Torpedo level or straight edge(Useful for track alignment checks)
- Masking tape and marker(Label components during disassembly)
- Replacement rollers or hinges (optional)(Only if you confirm wear or damage)
- Voltage tester (if working near electrical)(Safety check before reconnecting power)
Steps
Estimated time: 45-90 minutes
- 1
Power down and secure the door
Unplug the opener and secure the door in the closed position. This prevents unexpected movement while inspecting tracks, springs, and hardware. Use a temporary door brace if needed to keep it safely in place.
Tip: Always start with power off; it eliminates accidental activation. - 2
Test manual balance
With the opener disconnected, raise the door halfway and hold. If it stays, balance is likely adequate; if it falls or rises, springs or balance needs adjustment. Do not force the door beyond its natural range.
Tip: If the door feels heavy, expect spring-related issues. - 3
Inspect tracks for alignment
Look along the length of each track for bends, gaps, or loose screws. Tighten brackets and gently straighten any misalignment with a level. Ensure tracks are parallel and evenly spaced.
Tip: Small misalignments can cause binding; address them before testing the opener. - 4
Check rollers and hinges
Inspect rollers for flat spots or cracks; replace worn rollers. Tighten loose hinges and ensure rollers rotate freely without wobble. Lubricate hinges lightly.
Tip: Replace worn rollers in pairs when possible for even operation. - 5
Test the safety sensors
Reattach the opener power and test the safety sensors by crossing the beam with an item. They should detect the obstacle and reverse the door. Clean the sensor lenses if needed.
Tip: A dirty lens can mimic an obstruction and stop door closure. - 6
Adjust opener limits and force
If the door doesn’t travel fully or stops short, adjust travel limits and force according to the manual. Test in small increments until the door operates smoothly.
Tip: Make conservative adjustments and retest to avoid over-travel. - 7
Inspect springs and cables
Visually inspect torsion springs or extension springs for wear or gap; do not attempt to adjust tension without proper training. If you see damage or a gap, stop and call a pro.
Tip: Springs are under high tension—only trained professionals should handle replacements. - 8
Reassemble and test cycle
Reconnect power, re-test open/close cycles, listen for smooth operation, and confirm the door stays balanced in the open position. Run several cycles to ensure consistency.
Tip: Document changes and observe for any abnormal noises. - 9
Plan ongoing maintenance
Create a maintenance schedule: lubrication every 3-6 months, track inspections seasonally, and check weather seals annually. Small preventive care pays off in fewer major repairs.
Tip: Keep a maintenance log to track when parts were serviced.
Got Questions?
What are common signs of a failing torsion spring in a dallas garage door?
Common signs include a door that is heavy to lift, uneven movement, loud banging, or door that won’t stay open. If you notice broken or frayed springs, stop and call a pro. Do not attempt to adjust or replace springs yourself.
Common signs are a heavy door, uneven movement, and loud noises. If you see damaged springs, call a professional for safety.
Is it safe to adjust tracks myself?
Minor track adjustments can be done with care, but significant misalignment or bent tracks should be handled by a technician. Always support the door and use a level to verify alignment before testing the door with power.
Small adjustments are okay if you’re careful, but major misalignment needs a pro. Support the door and check with a level.
How do I reset the opener after sensor misalignment?
First ensure the sensors are aligned and clean. Reprogram the opener if your model requires it, then test using the remote and wall switch. If issues persist, consult the model manual or a technician.
Make sure sensors are clean and aligned, then reprogram if needed and test with a remote.
Do I need to replace both springs at once?
If one spring shows wear or damage, it’s common to replace both to maintain balanced operation. However, torsion springs carry high risk; a professional should perform replacements to ensure safety and proper tension.
If one spring is worn, replacing both is often recommended, but springs require a pro for safety.
How long does a typical garage door repair take?
A straightforward inspection and minor adjustment can take 30-60 minutes. More complex issues involving springs or sensor replacement may require 1-2 hours and a follow-up visit.
Most simple fixes take about 30 to 60 minutes; more complex spring work may take longer.
What regular maintenance should I perform monthly?
Wipe tracks, lubricate moving parts, inspect weather seals, and check for loose hardware. Regular visual checks can catch issues early and extend the door’s life.
Do a quick monthly check: wipe tracks, lubricate, inspect seals, and tighten any loose screws.
Watch Video
Quick Summary
- Inspect balance and tracks before testing the opener
- Prioritize safety; never bypass safety sensors
- Torsion springs require professional handling
- Document findings and maintain a routine schedule