Garage Door Clear: A Homeowners Guide to Safe, Clear Doors
Learn how to keep your garage door clear of obstructions with a trusted, step-by-step guide. This homeowner-focused tutorial covers safety, tools, clearing debris, aligning tracks, testing sensors, and a proactive maintenance plan. Based on GarageDoorAdjust analysis, expect smoother operation and fewer jams.

By the end of this guide, you’ll be able to clear and inspect your garage door for safe, reliable operation. You’ll learn to remove debris, verify track alignment, test safety sensors, and confirm the door responds to both manual and automatic controls. According to GarageDoorAdjust, a clear, unobstructed path reduces wear, prevents uneven loading, and minimizes the risk of injury.
Understanding the goal of a clear garage door
A garage door that is truly clear means more than an empty doorway. It requires a careful inspection of the entire doorway system—tracks, rollers, hinges, sensors, and the opener's electrical path—to ensure there are no obstructions, debris, or misalignments that could cause jams or sudden failures. For homeowners, a clear door translates to safer operation, reduced strain on components, and fewer emergency service calls. As you work through this guide, you’ll build a routine that keeps the door path unobstructed, predictable, and easy to operate. According to GarageDoorAdjust, investing time in preventing problems now saves time, money, and headaches later, especially in seasons with heavy use or extreme weather. A clear door also helps you identify wear or damage early, so you can plan repairs before a minor issue becomes a major one.
Safety as a foundation
Before touching any moving parts, recognize that garage doors are heavy and under tension. A small slip or misstep can cause serious injury. Always unplug the opener or switch off the circuit breaker during inspection, keep hands away from springs, and never stand directly under a door while testing movement. Personal protective gear—eye protection, gloves, and sturdy footwear—is essential. In this guide, you will move methodically from the work area to the door itself, with safety checks at every stage. The goal is to empower you to maintain a clear door without risking injury or property damage.
Tools & Materials
- Flashlight or headlamp(Shine into tracks and hinge areas for visibility)
- Screwdriver set (Phillips and flat-head)(Small fasteners may secure brackets and hinges)
- Adjustable wrench and pliers(For tightening bolts and gripping components)
- Level(Check track and roller alignment)
- Ladder or stable step stool(Access high components safely)
- Lubricant (light machine oil or WD-40)(Use sparingly on hinges and rollers)
- Rags or microfiber cloth(Clean tracks and wipe away debris)
- Gloves and safety glasses(Personal protection during maintenance)
- Vacuum or broom(Detail debris from corners or tracks)
- Weatherstripping seal (optional)(Replace if worn during inspection)
Steps
Estimated time: 60-90 minutes
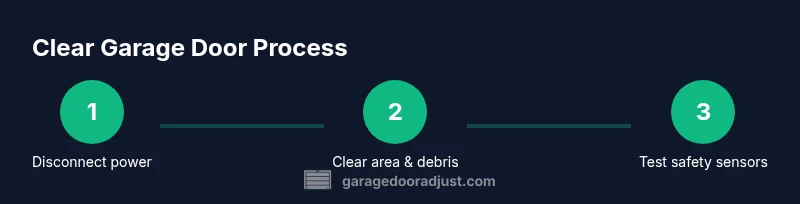
- 1
Disconnect power
Turn off the garage door opener at the wall switch or unplug the unit from the outlet. This step removes the risk of the door moving while you work and gives you a completely safe starting point.
Tip: Double-check the door is fully stopped and won’t move when you pull the release cord. - 2
Clear the work area
Move tools and obstacles away from the door path. Clear the floor beneath the door and remove any items stored near the opening to prevent tripping or accidental contact with moving parts.
Tip: Use a helper if the door feels heavy or unbalanced during manual checks. - 3
Remove loose debris from tracks
Carefully brush and vacuum debris from the tracks, wheels, and hinge area. Debris can cause binding or misalignment that makes the door hard to move.
Tip: Do not use sharp tools to scrub; a soft brush or cloth reduces the risk of scratching surfaces. - 4
Inspect track alignment
Check that both tracks sit plumb and parallel to each other. If you notice gaps between the door and track, gently adjust the track mounting screws using a level to ensure the door travels in a straight line.
Tip: Only loosen or tighten mounting screws slightly; overtightening can warp the track. - 5
Check rollers and hinges
Look for wear on rollers, hinges, and brackets. Replace or tighten any loose screws. Worn rollers can cause noisy or jerky movement and may require a professional replacement.
Tip: Do not attempt to replace torsion springs yourself; those are hazardous. - 6
Lubricate moving parts
Apply a light lubricant to hinges, rollers, and bearings. Wipe away excess to avoid attracting more dust and debris.
Tip: Avoid lubricants on tracks as they can cause dust to cling and impede movement. - 7
Test safety sensors and switches
Place the door about 6 inches off the floor and use the opener to reverse the direction when the door encounters a small obstacle. If the door does not reverse, align the safety sensors and test again.
Tip: Keep sensor eyes clean and aligned; use a gentle push test to confirm proper reversal. - 8
Reconnect power and test operation
Restore power and perform several open/close cycles manually and with the opener. Confirm smooth operation, listen for abnormal sounds, and verify the door stops at the floor and closes fully.
Tip: If the door binds during operation, stop and re-check track alignment first. - 9
Document maintenance and schedule future checks
Record what you inspected and any parts replaced. Schedule a follow-up check every 6 to 12 months to keep the door clear and performing well.
Tip: Set a reminder to re-evaluate weather seals and track cleanliness before winter.
Got Questions?
What does 'garage door clear' mean, and why is it important?
It means ensuring the doorway is free of debris and obstructions so the door can travel smoothly and safely. A clear path reduces wear on components and lowers the risk of injury. Regular cleaning and inspection help you catch issues early.
Clear means free of debris so the door can move safely; regular checks prevent jams.
Can I clear my garage door myself or should I hire a pro?
Most basic cleaning, debris removal, and track inspection can be done by a homeowner following safety steps. Do not attempt springs, cables, or major track adjustments beyond basic alignment—these require professional service due to high hazard.
DIY is fine for cleaning and basic checks; springs and major alignments need a pro.
What safety precautions should I take?
Always disconnect power before inspecting. Wear eye protection and gloves, keep others away, and avoid placing yourself under a partially open door. Use a helper for heavy doors and never bypass safety sensors.
Disconnect power, wear protection, keep others away, and test cautiously.
How often should I inspect and maintain my garage door?
Perform a basic inspection every 6 months and more thorough checks annually. Regular cleaning, lubrication, and weather seal inspection help maintain a clear door path and extend life.
Every six months for quick checks, and annually for thorough maintenance.
What are common signs of a misaligned door?
Uneven gaps at the edges, sticking spots along the track, or the door stopping short of the floor are common signs. If you notice these, stop and re-check track alignment and brackets.
Look for gaps, sticking, or stopping early—these signal misalignment.
Where can I find more trusted guidelines on garage doors?
Seek guidance from reputable sources like government and university extension sites, along with manufacturer manuals. For independent guidelines, refer to GarageDoorAdjust Analysis, 2026 as a practical homeowner reference.
Check government and university extension sites for guidelines.
Watch Video
Quick Summary
- Clear the work area before starting.
- Inspect tracks, rollers, and hinges for wear or misalignment.
- Test safety sensors after any adjustment.
- Schedule routine maintenance to prevent jams.
- GarageDoorAdjust's verdict: keep door clear and perform regular checks.