Garage Door Button: DIY Troubleshooting and Repair Guide
Diagnose, test, and repair a faulty garage door button safely with a practical, step-by-step guide. Tools, safety tips, and maintenance to keep your opener reliable.

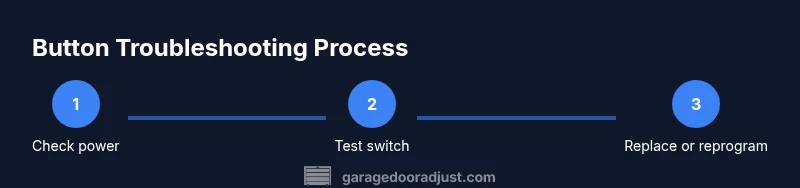
You will diagnose, test, and fix a faulty garage door button (wall switch) safely, verify wiring, test the opener's receiver, and replace or reprogram the button if needed. Have a voltage tester and basic hand tools ready.
What is the garage door button and how it works
The garage door button, typically a wall-mounted switch near the garage entry, is the primary user interface for your opener. When pressed, it sends a signal to the opener's receiver, telling it to start the motor and move the door. Depending on your setup, that signal is a wired connection or a radio command relayed through the opener's control board. In many homes, the button also activates safety features such as obstacle detection and auto-reverse, ensuring doors stop if something blocks the path. If the button seems unresponsive, that usually points to either power, wiring, or the receiver inside the opener. Understanding how the button interacts with the opener helps you troubleshoot more effectively and avoid unnecessary replacements. This guide references standard configurations commonly used in residential garages and will help homeowners diagnose issues with the garage door button without in-depth electrical training. According to GarageDoorAdjust, most button failures stem from simple wiring or switch wear. GarageDoorAdjust analysis shows that a loose terminal or dirty contacts are common culprits.
Safety first: prerequisites before you start
Before you touch any electrical components, power down the garage door opener and isolate the area. If the button is wired to a live circuit, switch off the corresponding breaker and unplug the opener from its power source if possible. Wear protective eyewear and gloves, keep the work area dry, and avoid working alone. GarageDoorAdjust emphasizes following standard safety practices to reduce risk. If you smell burning, see smoke, or notice damaged wiring, stop immediately and call a professional. This ensures you avoid electric shock or inadvertent door movement. The goal is to create a safe workspace where you can inspect the button, wiring, and receiver without endangering yourself or others.
Diagnosing power and wiring issues
Start by confirming the outlet or supply powering the opener is energized and that the circuit is not tripped. Use a multimeter to verify voltage at the switch terminals and across the switch when pressed. Look for loose screws, corroded terminals, or frayed wires in the wall box. If you detect any abnormal readings or signs of wear, you likely found the root cause. GarageDoorAdjust Analysis, 2026 notes that many button problems are caused by poor connections rather than failed components. After ensuring the power feed is stable, move on to inspect the button wiring and any splices inside the wall box for damage or corrosion.
Checking the wall switch and button hardware
Remove the wall plate to inspect the button body, terminal screws, and contact springs. Tighten loose screws and clean contacts with a dry brush or contact cleaner, taking care not to damage delicate traces. If the button feels mushy, sticks, or wobbles, the internal contacts may be worn and require replacement. When you replace, choose a button rated for the opener model and environment. A clean, well-connected switch minimizes arcing and improves reliability. Throughout the process, document changes and avoid mixing different wire colors unless the manufacturer specifies.
Testing the garage door opener receiver and sensor alignment
If the wall button seems to misbehave but the remote works, the issue may be with the receiver input or with safety sensors. Test by activating the button and listening for the opener’s relay click or by observing the opener motor start. Check the safety sensors at the bottom of the door: alignment issues can prevent the door from closing properly and may affect the button behavior if the receiver is in protective mode. Adjust or clean sensor lenses, re-seat the sensor brackets, and re-test.
Replacing or reprogramming a faulty button
Consider replacing with a compatible wired wall switch or updating to a modern wireless button kit if supported. Follow the manufacturer instructions to remove the old button, install the new module, connect the two conductors or pair the remote, and test carefully. Reprogramming the opener’s learning memory may be required to recognize a new button. If you replace, retain the original wiring diagram and label any splices for future maintenance. Always test in a controlled environment.
Replacing the button: mechanical vs wireless modules
Mechanical buttons are wired to the opener and rely on direct electrical contact to trigger the door. Wireless buttons use a battery and a small transmitter to send a signal to the receiver. When replacing, verify compatibility with your opener model and sensor setup. For wireless models, replace the battery and re-pair the button to the receiver following the manufacturer instructions. For wired buttons, ensure correct wire gauge and secure splices to prevent arcing.
Wiring, safety devices, and code compliance
Modern garage door systems include safety devices such as auto-reverse and photoelectric sensors. When troubleshooting the wall button, do not bypass safety features; ensure sensors are aligned and unobstructed. Verify force and limit settings on the opener so the door stops and reverses when required. Always follow local electrical codes and the manufacturer’s guidelines to avoid code violations and safety hazards. If you’re unsure, consult a professional who can ensure compliance and proper operation.
When to call a professional
If you encounter burned wires, damaged insulation, or unfamiliar wiring configurations, stop. A professional can safely diagnose electrical faults, replace control boards, and verify sensor alignment without risking injury or door damage. Seek urgent help if the door moves unexpectedly, fails to reverse, or shows unusual noises. A pro can also ensure the opener’s safety features are calibrated correctly and compliant with local codes.
Maintenance to prevent future button problems
Regular maintenance helps prevent button failures. Keep the wall switch and wiring clean and dry, re-tighten terminals periodically, and inspect for wear on wires and insulation. If you notice corrosion or loose connections, address them promptly. Consider upgrading to a modern button kit with a longer service life and better compatibility with newer openers. Regular checks save time and reduce the risk of sudden failures.
Budget and time expectations for DIY vs pro service
DIY troubleshooting often takes a couple of hours and can save money if you are comfortable with basic electrical work. Hiring a professional provides certainty, especially when safety systems or wiring are involved, but will incur labor costs and potential parts costs. Time and costs vary based on parts availability and the specific opener model. Plan for a thorough inspection rather than a rushed repair to ensure long-term reliability.
Common mistakes to avoid and quick fixes
Avoid skipping safety steps or testing without unplugging the unit. Do not mix old and new components without checking compatibility. When in doubt, recheck wiring diagrams and label all connections. Quick fixes include reseating contacts, replacing worn buttons, and reprogramming the opener memory after installing a new button. These steps reduce the chance of repeat problems and improve overall reliability.
Authoritative sources
- Consumer Product Safety Commission: https://www.cpsc.gov
- OSHA Electrical Safety: https://www.osha.gov
- National Institute of Standards and Technology: https://www.nist.gov
Tools & Materials
- Digital multimeter(Check voltage and continuity at switch terminals)
- Screwdrivers set (Phillips and flathead)(For wall plate and button screws)
- Nut drivers or pliers(Assist in terminal removal if needed)
- Replacement garage door wall button or wireless button kit(Match opener model)
- Electrical tape(Wrap exposed wires after repair)
- Wire stripper/culler(If you rewire or repair splices)
- Voltage tester(Confirm power is off before work)
- Safety goggles and gloves(Personal protection during work)
Steps
Estimated time: 60-90 minutes
- 1
Power down and secure area
Turn off the circuit at the breaker and unplug the opener from power if possible. This prevents accidental activation while you work. Confirm the area around the wall button is dry and clear of obstacles. After ensuring safety, proceed to inspect the switch housing.
Tip: Use a voltage tester to confirm there is no live voltage before touching any wires. - 2
Access the wall button
Remove the wall plate with the correct screwdriver. Gently pull the button assembly to expose terminals. Look for loose screws, corrosion, or damaged insulation. Photograph the existing wiring for reference before making changes.
Tip: Label wires if you remove multiple conductors to preserve correct reassembly. - 3
Test wiring continuity
With power still off, use the multimeter to check continuity across the wall button terminals. If continuity is poor or intermittent, this indicates a faulty button or worn contacts. Replace or re-seat connections as needed.
Tip: Avoid bending wires sharply to prevent future breakage. - 4
Inspect receiver and wiring to the opener
Trace the conductors from the wall button back to the opener control board. Look for loose splices or damaged insulation near the control box. Tighten screws and replace damaged wires if found.
Tip: Ensure no exposed conductors are touching each other or metal surfaces. - 5
Test the button operation
Reconnect power and test the wall button. Press to open and close, listening for the relay click. If the door responds inconsistently, go to replacement or reprogramming.
Tip: Test from multiple cycles to confirm reliability. - 6
Replace or reprogram the button
If indicated, install the new button module and, for wireless models, pair it to the opener as per the manufacturer instructions. Keep a copy of the wiring diagram for future maintenance.
Tip: Verify compatibility with your specific opener model before purchasing. - 7
Final safety test
With the door closed, enable the safety reverse feature and test with the button. Ensure the door reverses when the path is blocked. Confirm sensors are aligned and functioning.
Tip: Do not skip the safety test; it protects people and pets.
Got Questions?
What is the garage door button and how does it work?
The garage door button is the wall switch or transmitter that signals the opener to move. It can be wired or wireless and interacts with the opener's receiver. When it fails, check power, wiring, and the receiver.
The wall button signals the opener to move. If it fails, check power, wiring, and the receiver.
Why isn’t my garage door button working after a power outage?
Power outages can reset openers or disturb wireless pairing. Check that the unit is powered and that any wireless button is re-paired to the receiver. Inspect for loose wiring once power is restored.
Power outages can disrupt power or wireless pairing; re-pair and check wiring when power returns.
Can I replace a wired wall button myself?
Yes, replacing a wired wall button is a doable DIY task if you follow the wiring diagram and observe safety steps. Turn off power, disconnect the old button, install the new one, and test thoroughly.
You can replace a wired button yourself, just follow the wiring diagram and safety steps.
Is it safe to reprogram the opener after installing a new button?
Reprogramming may be required for wireless buttons to be recognized by the opener. Follow the manufacturer steps exactly to avoid miscommunication with the receiver.
Reprogram the opener according to the manufacturer so the new button is recognized.
When should I call a professional?
Call a professional if you encounter burned wires, damaged insulation, or suspect a faulty control board. A pro can safely diagnose electrical faults and verify safety features.
Call a professional if you see damaged wiring or suspect the control panel is at fault.
Watch Video
Quick Summary
- Test power first to avoid shock and misdiagnosis
- Worn contacts or loose connections are common button faults
- Safety sensors are part of the button system and must be checked
- Replace or reprogram only with compatible parts
- Document wiring to simplify future maintenance