Garage Door Bottom Brackets: Inspect and Replace Guide
Learn how to inspect, diagnose wear, and safely replace garage door bottom brackets. This step-by-step guide from GarageDoorAdjust covers tools, safety, and maintenance to keep doors balanced and quiet.

You will learn how to inspect and, if needed, safely replace garage door bottom brackets to restore balance and smooth operation. This guide covers essential safety steps, the right tools, and how to choose compatible replacement brackets. According to GarageDoorAdjust, regular checks of bottom brackets help prevent binding and excessive wear on tracks and hinges.
What bottom brackets are and why they matter
Bottom brackets are the small but crucial supports at the bottom corners of a sectional garage door. They anchor the door’s weight and help keep the door square as it moves along the track. When these brackets wear, loosen, or bend, the door can become unbalanced, resulting in binding, uneven gaps, and accelerated wear on rollers and tracks. Regular inspection of bottom brackets is a cornerstone of reliable maintenance, and it directly affects overall door performance, safety, and noise levels. GarageDoorAdjust emphasizes that even a minor tilt at the bottom can cascade into misalignment across the entire system, so addressing brackets early protects the rest of the hardware.
How bottom brackets interact with the rest of the door system
Bottom brackets do more than hold the door in place; they influence how weight transfers to the track, how the door seals against the floor, and how the hinge points pivot. When brackets are misaligned, the bottom edge can drift in or out, causing rubbing on weatherstripping or hardware. The brackets also impact how evenly the door distributes load when the opener or manual operation lifts the panel. If you replace brackets, always inspect adjacent components (hinges, tracks, and screws) because wear is often shared, and a fresh bracket cannot compensate for a bent track or loose fasteners.
Signs of wear or failure you can spot
Look for visible cracks or bends in the bracket arms, rust on screws, or mounting holes that no longer bite. A bracket that is loose or wobbly is a red flag, as is unequal gaps along the bottom of the door when closed. Listen for grinding noises or binding as the door moves, especially near the bottom edge. If you notice the door pulling to one side, dragging, or needing extra effort to lift, the bottom brackets may be the culprit. Early signs are often subtle: a slightly higher bottom on one side or a tired-looking rubber bushing around the hinge.
How to assess wear without disassembly
Begin with a ground-level visual check for loose screws, rust, or obvious misalignment. Use a level to verify the bottom edge sits parallel to the floor; any tilt indicates mounting or bracket issues. Gently push the bracket with your hand to test for wobble; noticeable movement means the fasteners or the bracket itself should be inspected more closely. Measure the distance from the bottom bracket to the track on both sides to confirm symmetrical spacing. Document any deviations with photos before taking action.
Common causes of damage and misalignment
Common causes include loose mounting screws, rusted fasteners, impact from garage equipment, and repeated cycling that wears the mounting holes. Track misalignment or bent hinges can mimic bracket issues, so it’s important to differentiate the root cause. Temperature changes and humidity can also loosen fasteners or corrode brackets, especially in outdoor installations. By understanding these causes, you can decide whether to tighten, realign, or replace the bracket, and plan for any related repairs.
Safety considerations and when to call a pro
Garage doors are heavy and often under spring tension. Do not attempt to adjust springs or cables unless you are trained and equipped for it. Always disconnect power to the opener and secure the door with clamps or locking pliers before touching bottom brackets. If you encounter exposed springs, frayed cables, or frame damage, contact a licensed technician immediately. Work on an even surface and use a sturdy ladder to avoid slips or falls.
Replacements vs repair: making the right choice
If you see cracks, severe deformation, or mounting holes that are enlarged, replacement is typically safer and more reliable than a repair. In some cases, a bracket can be reused if the bend is minor and mounting holes remain intact, but persistent issues usually point to broader wear along the edge and adjacent components. Installing brackets in pairs ensures balanced operation, and you should inspect nearby hardware for wear as well. Weigh the door’s age, the cost of parts, and whether professional labor is advisable.
How to prepare for a replacement
Prepare your workspace by turning off power to the opener, clearing the area, and gathering the necessary tools and replacement brackets that match the mounting pattern. Take photos of the existing setup, including screw positions and bracket angle, to guide reassembly. Clear debris from the floor and set a stable ladder. If the door has sensors or safety devices, note their wiring or operation so you can reconnect safely after installation. A clean, organized workspace reduces mistakes and speeds up the project.
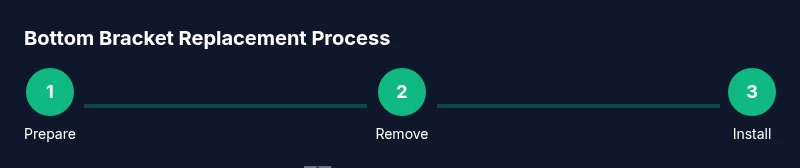
How to install or replace bottom brackets (overview)
Begin by removing bottom screws and gently detaching the old bracket. Support the door to prevent weight shifts, then align the new bracket with the mounting holes. Tighten screws evenly to avoid warping, and reattach any safety hardware. Reassemble affected hardware, then test the door with the opener unplugged to observe balance and track alignment. If there is any rubbing, readjust the bracket angle slightly and retest until movement is smooth.
Authority sources and safety guidelines
For homeowners tackling bracket work, rely on established safety guidelines and recognized sources for general home repair practices. The Consumer Product Safety Commission and OSHA provide broad safety warnings relevant to working near garage components, while major home improvement outlets and publications offer practical how-to guidance. Always validate your approach with credible sources and never bypass essential safety steps when dealing with springs or cables. This section provides context for safe, informed decision-making and links to reputable references to broaden your understanding.
Tools & Materials
- Replacement bottom brackets compatible with door type(Confirm pattern, length, and mounting holes match existing setup)
- Socket wrench set(Includes metric and standard sizes)
- Screwdrivers (Phillips and flat)(For drive screws and brackets)
- Pliers(Grip and manipulate small components)
- Level(Check square alignment at bottom edge)
- Measuring tape(Ensure consistent spacing from track to bracket)
- Safety glasses(Eye protection during work)
- Work gloves(Protect hands from sharp metal)
- Clamp or locking pliers(Secure door during bracket removal)
- Lubricant spray (silicone or lightweight)(Ease reassembly and reduce squeak)
- Step ladder(Stable access to bottom brackets)
Steps
Estimated time: 1-2 hours
- 1
Power down and secure
Disconnect the garage door opener to prevent any automatic movements. If the door is manually operated, engage the door stop and verify the door cannot rise unexpectedly. This first step prevents accidental injury during bracket work.
Tip: Double-check the disconnect switch or remove the battery-powered remote to eliminate any chance of remote operation. - 2
Support the door
With the door closed or partially raised, use clamps or locking pliers to secure the door. This holds weight off the bottom brackets and reduces the risk of sudden weight shift while you remove fasteners.
Tip: Place a sturdy block beneath the door to cushion any accidental drop if weight shifts. - 3
Remove old screws
Carefully loosen and remove the mounting screws that attach the bottom brackets. Do not force; if a screw binds, back it out a little, apply lubrication, and try again to avoid stripping holes.
Tip: Keep screws organized by side and label any bracket orientation to aid reinstallation. - 4
Detach the bottom bracket
Gently separate the old bracket from its mounting. If the bracket is stubborn, use a pry bar with a thin edge—careful not to damage the door or frame. Inspect mounting holes for wear.
Tip: Take photos of the bracket orientation for reference during installation. - 5
Install the new bracket
Align the new bracket with mounting holes. Start all screws by hand to ensure threads engage correctly, then tighten gradually in a crisscross pattern to avoid warping.
Tip: Check bracket angle against the bottom of the door for square alignment before final tightening. - 6
Tighten to spec
Tighten screws evenly to the manufacturer’s torque guidelines if available. Use a torque wrench for consistent results and avoid overtightening that could crack or pull threads.
Tip: If you don’t have torque specs, snug without stripping and verify with a test by gently moving the door. - 7
Recheck alignment
Lower the door and recheck the bottom bracket’s alignment with the track. Look for even gaps and ensure there’s no rubbing when the door operates in manual mode.
Tip: Use a level to confirm the bottom edge remains parallel to the floor. - 8
Reconnect and test
Reconnect the opener power and run several test cycles. Listen for unusual noises, watch the door’s vertical travel, and observe whether the door tracks smoothly without jamming.
Tip: Test with and without load (have someone gently push the door while testing to simulate weight).
Got Questions?
What are garage door bottom brackets?
Bottom brackets are the metal supports at the bottom corners of a garage door that anchor the hinges and help maintain alignment as the door moves along the track.
Bottom brackets are the metal supports at the door’s bottom corners that keep it aligned as it moves.
How do I know if bottom brackets need replacement?
Look for visible cracks, bends, rusted screws, excessive wobble, or uneven gaps at the bottom of the door. If the door binds or pulls to one side, replacement is often warranted.
Signs include cracks, bending, wobble, or uneven gaps and door binding.
Can I replace bottom brackets myself?
Yes, homeowners can replace bottom brackets if they follow safety guidelines and isolate the spring system. If you’re unsure about springs or cables, hire a pro.
DIY is possible if you avoid springs and cables; otherwise call a pro.
Are bottom brackets the same as track brackets?
No. Bottom brackets connect to the door corners and hinge area, while track brackets attach the track to the frame. They work together but are not interchangeable.
Bottom brackets connect to door corners; track brackets attach to the frame.
What tools do I need for replacement?
You’ll typically need a replacement bracket, a screwdriver, a wrench, a level, measuring tape, and safety gear. Having a torque wrench helps to avoid over-tightening.
Tools include a screwdriver, wrench, level, tape, and proper safety gear.
How long does replacement take?
Most replacements take 60 to 120 minutes depending on door type and access; more complex setups may require additional time.
Expect about one to two hours for a standard door.
Watch Video
Quick Summary
- Inspect bottom brackets regularly to prevent misalignment.
- Replace worn brackets in pairs when possible to maintain balance.
- Follow safety steps and isolate springs/cables before work.
- Document orientation and take photos to guide reassembly.
- Test door balance after installation and re-tighten as needed.