How to Fix a Garage Door Track: A Homeowner's Guide
Learn how to fix a garage door track safely with a homeowner-friendly, step-by-step guide. Diagnose misalignment, straighten bent tracks, replace damaged sections, and test operation with safety tips for a durable, quiet door.

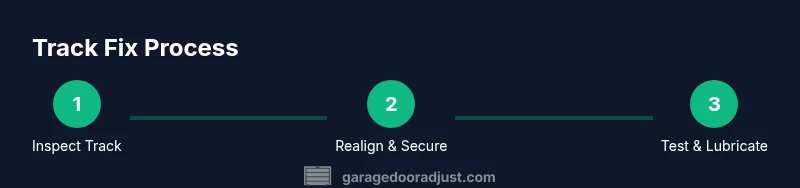
In this guide you will learn how to fix a garage door track by inspecting for dents or loose screws, realigning the track, and securing it back in place. You’ll identify damage, choose between tightening, straightening, or replacing sections, and test the door for smooth operation. This plan helps homeowners decide whether to DIY or call a pro.
Why the Garage Door Track Matters
A straight, securely mounted track is essential for safe, reliable operation. A misaligned or damaged track can cause the door to bind, rub on rollers, or derail from the track. When you fix a garage door track, you improve balance, reduce noise, and extend the life of the rollers and springs. According to GarageDoorAdjust, most track issues stem from loose fasteners, impact damage from a vehicle, or normal wear over time. Remember: the track is part of a larger system; improper adjustment can create additional problems. In this guide, we’ll walk through how to inspect, straighten, and re-secure the track, plus when to replace sections. This approach is practical for DIY enthusiasts, but always respect safety concerns and know your limits. The GarageDoorAdjust team emphasizes careful checks and proper testing to prevent reoccurrence of misalignment.
Common Causes of Track Misalignment
Track misalignment happens for several reasons. Loose mounting brackets are the most common culprit, allowing the vertical rails to tilt. Impact damage from a bumped vehicle can bend the track and misalign the rollers. Worn or damaged rollers, or a door that is out of balance, can cause the track to tilt over time. Temperature fluctuations and age also contribute to metal fatigue, especially in older doors. Understanding these causes helps you target the right fix rather than guessing. Regular maintenance, including tightening hardware and lubricating tracks, reduces the chance of future misalignment. As you diagnose, note where the track is most off-plumb and which brackets show looseness or damage. This information guides safe, effective repairs.
Tools You Need and Safety First
Before touching any moving parts, gather your essential tools and safety gear. You’ll need: a sturdy ladder, safety glasses, work gloves, a Phillips and flat-head screwdriver, a socket/wrench set, a level, pliers, and silicone lubricant. Optional but helpful items include a rubber mallet, a straightedge, and replacement track or brackets if you find damaged components. Safety is non-negotiable when working with heavy doors and springs. Always unplug the garage door opener or switch off the circuit breaker before starting. Keep a second person handy to prevent accidental movement and assist with lifting or re-seating components. Take photos of bracket positions before disassembly to guide reassembly.
How to Verify Track Straightness and Alignment
Check that the vertical tracks are perfectly plumb using a level held against the face of each track. Look for gaps between the roller carriage and the track—consistent contact across the length indicates proper alignment. Inspect mounting brackets for even spacing and tightness; loosen and reposition if needed, then re-tighten in a star pattern to avoid uneven stress. Run a slow manual test of the door, stopping at several points to observe any binding or rubbing. If you hear grinding or feel resistance, stop and reassess the track’s straightness and the rollers’ condition. Recording measurements at multiple points helps you determine whether a full replacement is necessary.
When to Call a Pro
If you encounter severe bending, any structural damage to the track, cracked brackets, or broken rollers, professional repair is recommended. A warped track or damaged torsion spring can pose serious safety risks if not handled correctly. If you’re unsure about the track’s condition after an initial inspection or if the door feels unbalanced even after adjustment, contact a qualified technician. A missed issue can lead to further misalignment or spring failure, increasing both the risk and cost of repair. The decision to DIY vs. pro assistance should prioritize safety and the door’s continued safe operation.
Tools & Materials
- Safety glasses(Clear side shields; keep debris out of eyes)
- Work gloves(Grip and hand protection)
- Stable ladder(Wide base; avoid overreaching)
- Phillips and flathead screwdrivers(For bracket screws)
- Socket wrench set(For mounting bracket bolts)
- Pliers(Grip and maneuver small parts)
- Level(Check track plumb)
- Rubber mallet(Gentle taps to realign track)
- Silicone lubricant(Lightly lubricate moving parts)
- Replacement track section(Only if the track is severely damaged)
- Camera or phone(Document alignment and positions)
Steps
Estimated time: 60-120 minutes
- 1
Stop the door and disconnect power
Power off the garage door opener by unplugging it or switching off the circuit breaker. If possible, place a temporary block under the door to prevent it from moving. This keeps you safe while you inspect and work on the track.
Tip: Always ensure the door cannot move while you work; use a helper if available. - 2
Inspect the track and mounting brackets
Visually check for bends, dents, or gaps along the entire length of the track. Look for loose or missing screws in the brackets and any signs of wear on the rollers.
Tip: Take photos before loosening any fasteners to guide reassembly. - 3
Realign the track if it’s just off-plumb
Loosen the mounting bolts slightly and gently tap the track with the rubber mallet to bring it back to square. Recheck with a level, then tighten bolts in a star pattern to avoid warping.
Tip: Make small adjustments and re-test frequently to prevent over-correction. - 4
Tighten and secure brackets
Ensure all brackets are evenly spaced and snug. Replace any damaged brackets and replace missing hardware as needed. The track should sit flush with the door’s edge.
Tip: Avoid overtightening; this can strip the bracket or warp the track. - 5
Lubricate moving parts
Apply a light coat of silicone lubricant to the rollers, hinges, and track where metal contacts metal. Wipe away excess to prevent dust buildup.
Tip: Use minimal lubricant; excessive oil can attract dirt and cause slipping. - 6
Test the door and assess next steps
Return power, manually operate the door to ensure smooth movement. Listen for rubbing or binding and observe the door’s balance. If the door remains noisy or misaligned, consider replacing the track or calling a pro.
Tip: Test several times in both directions to confirm consistent performance.
Got Questions?
Can I fix a garage door track myself?
Basic inspection and alignment can be DIY if you follow safety steps and stay within your skill level. Avoid intense repairs if the track or springs show damage. When in doubt, consult a professional.
Basic alignment is doable, but stop if you see severe damage or feel uncertain. It’s safer to hire a pro.
What are signs that the track is bent?
Visible bends, uneven gaps, grinding noises, or the door binding or jerking during operation indicate a bent or misaligned track. Inspect both sides for symmetrical wear.
Look for bends or binding; if you hear grinding, that’s a red flag.
Do I need to replace both tracks?
If both tracks show damage or misalignment, replacing both helps ensure balanced operation. If only one track is damaged, you can replace just that side, but evaluate overall door balance afterward.
Replace both if both sides are damaged; otherwise, fix the affected side and test.
How long does a track repair take?
DIY track alignment typically takes about 60-90 minutes, depending on damage and your comfort level. Replacement work may take longer and usually requires more setup.
Most DIY fixes take under two hours; full replacement can take longer.
Is it dangerous to fix a garage door track?
There is a safety risk due to the door’s weight and tension in springs. Power down, use protective gear, and work with a partner. Stop if you feel uncertain or encounter heavy damage.
Yes, there’s a real risk; follow safety steps or call a pro if unsure.
What should I do if the door doesn’t stay balanced after adjustment?
If the door pulls to one side or feels unbalanced after adjustment, recheck the track alignment, bracket tightness, and roller condition. An imbalanced door often signals a need for a professional assessment.
Recheck alignment and consider a pro if the door remains unbalanced.
Watch Video
Quick Summary
- Identify bent or loose tracks early to prevent further damage.
- Keep power off and use proper safety gear at all times.
- Realign and secure with the correct tools; replace damaged sections when needed.
- Test operation slowly and thoroughly after any adjustment.