D & D Garage Door: A Practical Step-by-Step Repair Guide
Comprehensive, expert-guided repair and maintenance for a D & D garage door. Diagnose common problems, safely perform DIY fixes, and know when to call a professional. Includes tools, step-by-step actions, maintenance tips, and safety precautions.

By following this guide, you will diagnose and repair common D&D garage door issues—such as worn springs, misaligned tracks, frayed cables, or a malfunctioning opener. You’ll learn safe inspection techniques, basic lubrication, gear-tightening, and how to decide when professional help is needed. Gather the listed tools and safety gear before you begin.
What is a D & D Garage Door and How It Works
A D & D garage door represents a typical sectional door system installed on many homes. It consists of panels, tracks, rollers, hinges, springs, cables, and an electric opener (or a manual lift). The door moves along vertical tracks, rotating on hinges as it rises and lowers. Proper alignment, balanced springs, and smooth rollers ensure quiet operation and reduce wear on every component. The GarageDoorAdjust team often sees doors suffer from misalignment, worn rollers, or loose hardware, all of which degrade balance and safety. Understanding each component helps you diagnose issues quickly and plan the right fix, whether it’s a simple lubricant application or a more involved track adjustment.
Key takeaways:
- The door’s balance hinges on springs and proper track alignment.
- Worn rollers or loose hardware are common culprits.
- The opener handles remote signals and safety sensors; failures may be electrical rather than mechanical.
In this guide, we’ll walk through safe diagnostics, essential tools, and step-by-step actions to bring your D & D garage door back to smooth operation.
Common Symptoms and What They Indicate
Recognizing symptoms early can prevent bigger problems and costly repairs. Common signs include:
- The door reverses suddenly or won’t open fully, suggesting opener or sensor issues.
- The door is heavy or sticks during travel, indicating balance problems or worn springs.
- Noise such as grinding or creaking points to worn rollers, hinges, or dry lubrication needs.
- The door sits unevenly or drifts when open, signaling misalignment or loose mounting.
Pro tip: Start with the simplest explanations (dusty tracks, lack of lubrication, loose mounting) before assuming a major component failure. When symptoms persist after basic checks, proceed to a formal diagnostic following this guide. GarageDoorAdjust observations show that many issues are addressable with a careful inspection and proper lubrication.
Essential Tools and Safety Gear for DIY Garage Door Fixes
Before you lift a tool, assemble the essentials and wear safety gear. This minimizes risk and speeds up the process:
- Safety glasses and work gloves to shield eyes and hands.
- A sturdy step ladder to reach the door safely.
- Wrench set, socket set, and screwdrivers (Phillips and flat-head).
- A torque or adjustable wrench for bolt tightening.
- Lubricant (silicone-based or lithium grease) for moving parts.
- A level to check track alignment and a tape measure for precise adjustments.
- Optional: Rubber mallet, pliers, and a cordless drill for stubborn fasteners.
Safety note: Never attempt to adjust torsion springs or replace them yourself; these components store high tension and can cause severe injury. If you suspect a spring issue, call a licensed professional.
Step-By-Step Overview for Basic Diagnostics
This section outlines a practical diagnostic flow to identify the root cause of common problems. Each step is designed to be done safely and methodically:
- Disconnect power to the opener to avoid accidental movement while inspecting.
- Inspect the door for binding: manually move it up and down to feel for sticking points.
- Check balance by disconnecting the opener and pulling the door up halfway; if it stays put, balance is good. If not, springs or tracks may be off.
- Inspect tracks, rollers, and hinges for wear or obstruction; remove debris and clean.
- Verify safety sensors align and are unobstructed; misalignment triggers the reversal safety.
- Test the door with lubrication on moving parts and confirm smooth operation.
- Reconnect power and test cycle with the opener, observing for any abnormal noises or resistance.
If any step reveals a significant problem (springs, misalignment beyond basic adjustment, or damaged tracks), plan the appropriate fix or call a pro. This approach helps you differentiate minor maintenance from critical repairs.
Maintenance Routine to Prolong Life and Improve Efficiency
Regular maintenance reduces the likelihood of sudden breakdowns and minimizes repair costs over time. Follow a simple schedule:
- Monthly: Wipe tracks clean, lubricate rollers, hinges, and hinges with a silicone-based lubricant; wipe away excess to avoid attracting dust.
- Quarterly: Tighten mounting bolts and inspect weatherstripping; replace worn weather seals to improve insulation and reduce drafts.
- Semiannually: Check balance by performing the manual test (door should stay in place if balanced); adjust tracks if necessary.
- Annually: Inspect the opener mounting, measure track gaps, and clean or replace any worn components such as rollers or hinges.
A proactive approach keeps doors functioning smoothly and reduces energy loss due to poor insulation. GarageDoorAdjust analysis shows that routine lubrication and alignment checks deliver the most tangible benefits in quiet operation and longevity.
When to Call a Pro and What to Expect
DIY fixes are appropriate for many routine issues, but some problems require professional expertise. Call a pro when:
- You suspect a torsion spring issue or any component under tension.
- The door is unbalanced after attempting basic adjustments.
- The opener fails to respond to remote controls or wall switches after initial checks.
- There are visible signs of damaged tracks, sagging mount points, or frayed cables.
What to expect from a pro visit:
- A thorough safety assessment and a test of door balance and spring function.
- Replacement of worn parts with manufacturer-approved components.
- A written estimate and a clear explanation of the repairs needed and expected lifespan.
Pro tip: If you are uncertain about the safety of any operation, pause and call a professional to avoid injury. The GarageDoorAdjust team emphasizes safety first when working with high-tension components.
Insulation and Weatherstripping for Energy Efficiency
A well-sealed garage reduces heat loss and protects interior storage. Focus on insulation and weatherstripping:
- Check bottom seals for cracks or tears; replace with a proper garage door seal kit.
- Inspect jambs and weatherstripping around the perimeter; ensure a tight seal when the door is closed.
- Consider insulating the door panels if your garage lacks insulation; this can lower heating costs and improve comfort.
Small upgrades have a compounding effect on energy savings. A properly insulated door reduces drafts and helps maintain stable temperatures, which is especially helpful in garages used as workshops or living spaces.
Safety Protocols and Best Practices
Safety is non-negotiable when working on garage doors. Follow these guidelines:
- Always unplug the opener and lock it out before performing inspections.
- Use a sturdy ladder rated for your height and keep the work area dry to prevent slips.
- Do not attempt to re-tension torsion springs or replace tracks while the door is under tension.
- Keep children and pets away from the work zone; doors can move suddenly during testing.
- If a part is damaged or work is beyond your comfort level, contact a licensed technician promptly.
A methodical approach reduces the risk of injury and ensures your fixes last longer. The GarageDoorAdjust team recommends documenting all findings and parts replaced for future reference.
Tools & Materials
- Safety glasses(Eye protection against debris and high-tension parts)
- Work gloves(Grip and protection during handling)
- Sturdy step ladder(Stable platform to reach the door safely)
- Adjustable wrench(For bolts and hardware adjustments)
- Socket set(Tightening and loosening fasteners)
- Screwdrivers (Phillips & flat)(General fastener work)
- Tape measure(Check track and alignment distances)
- Level(Confirm tracks are plumb and balanced)
- Lubricant (silicone-based or lithium grease)(Lubricate moving parts; avoid over-application)
- Rags/cloth(Clean spills and wipe excess lubricant)
- Pliers(Grip and manipulate small parts)
- Rubber mallet(Use gently for stubborn fittings)
- Cordless drill (optional)(Fasten or loosen screws as needed)
- Replacement rollers or hinges (optional)(Only if worn; springs never DIY-replaced)
Steps
Estimated time: 30-60 minutes
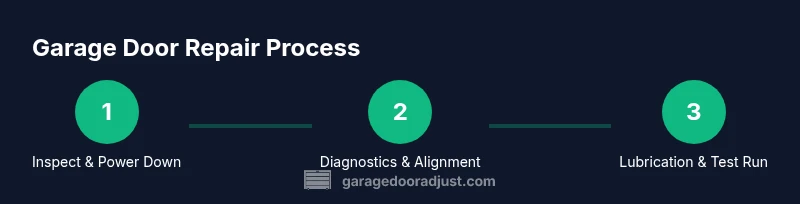
- 1
Power down and prep
Disconnect the opener from power and clear the area. This prevents accidental movement while you inspect the door and ensures your safety during testing.
Tip: Lock out the opener using the wall switch or disconnect cord before starting. - 2
Check manual operation
With the door closed, lift manually to feel for resistance and observe if it stays in place or returns. A balanced door should stay put when lifted halfway.
Tip: If the door drops or rises on its own, the springs or tracks may need adjustment by a pro. - 3
Inspect tracks and alignment
Look for dents, bends, or debris in the vertical tracks. Tracks should be parallel and plumb; adjust with caution.
Tip: Use a level to confirm plumb and adjust mounting screws gradually. - 4
Examine springs and cables
Check for visible wear or gaps in springs and frayed cables. Do not attempt to unwind or replace springs yourself.
Tip: If you see gaps or suspect tension issues, stop and call a pro. - 5
Check rollers and hinges
Inspect rollers for wear; replace worn wheels. Lubricate hinges and rollers to reduce friction.
Tip: Avoid over-greasing as excess can attract dust. - 6
Test safety sensors
Ensure sensors are aligned and not blocked. A misaligned sensor might cause automatic reversal.
Tip: Clean sensor lenses gently if dusty. - 7
Lubricate moving parts
Apply lubricant to bearings, hinges, rollers, and track joints. Wipe away any excess to prevent drips.
Tip: Only a light coat is needed; too much lubricant can attract grime. - 8
Test run and observe
Reconnect power and cycle the door multiple times. Listen for odd noises and verify smooth, quiet operation.
Tip: If any abnormal behavior persists, re-check each component or contact a pro.
Got Questions?
What is the first sign my garage door needs maintenance?
Common early signs include unusual noises, resistance when opening or closing, or the door creeping rather than moving smoothly. Address these issues promptly to prevent further wear.
Look for grinding noises, sticking, or doors that don’t move smoothly. Address early signs to avoid bigger repairs.
Can I adjust torsion springs myself?
No. Torsion springs are under high tension and can cause serious injury if mishandled. Always call a licensed technician for spring work.
Spring work is dangerous; contact a professional for safety.
What lubricant should I use on garage doors?
Use a silicone-based lubricant or lithium grease on moving metal parts. Avoid petroleum-based products that can attract dust and degrade plastic parts.
Silicone or lithium grease works best for door parts.
How often should I lubricate tracks and hinges?
Lubricate every 6-12 months, or more often if you use the door heavily or notice squeaks. Always wipe away excess after application.
Lubricate about once or twice a year, or when you hear squeaks.
When should weatherstripping be replaced?
Replace weatherstripping whenever you notice cracks, light leaks, or visible wear along the bottom edge of the door to improve insulation.
If you see cracks or leaks, replace the weatherstripping.
What safety features should modern doors have?
Modern doors include automatic reversal sensors, manual release, and sturdy tracking. Regular checks ensure these features work correctly.
Modern doors have safety sensors and a manual release for emergencies.
Watch Video
Quick Summary
- Inspect safety features before work
- Identify wear and misalignment early
- Lubricate moving parts to reduce friction
- Know when to call a pro