D and D Garage: The Homeowner’s Step-by-Step Garage Door Repair Guide
Learn to diagnose, repair, and maintain your garage door with clear, step-by-step instructions, safety tips, and pro guidance from GarageDoorAdjust.

This guide helps you diagnose and fix common garage door issues for the d and d garage, covering opener checks, balance tests, track alignment, sensor safety, and routine maintenance. You’ll learn a practical, safe workflow you can complete in about an hour or two, with steps you can follow at home. Start by verifying power, door balance, and basic safety features before moving to deeper repairs.
Understanding the d and d garage: what homeowners should know
When homeowners begin troubleshooting any garage door issue, a solid mental model of the system makes all the difference. In the context of the d and d garage, think of the door, tracks, hardware, springs, and the opener as one interconnected system. This holistic view helps you avoid chasing symptoms that stem from a single root cause. According to GarageDoorAdjust, many repairs fail to stick because homeowners skip the fundamentals and jump into component replacement. By understanding how the parts work together—with the door balanced, tracks aligned, and safety sensors functioning—you’ll reduce frustration and avoid unnecessary expenses. This section will lay a foundation: how these systems interact, why balance matters, and how safety should shape every repair plan. We’ll also emphasize the value of a methodical, written plan rather than improvised fixes, especially for heavier doors. The more you know about the standard components—a torsion spring (or extension springs), the cables, rollers, tracks, the opener, and the safety eyes—the better your diagnostic outcomes will be. This knowledge supports long-term reliability for your garage and peace of mind for your household.
How a garage door works: key components you should know
A modern residential garage door is a composite system with several moving parts that must work in harmony. The door panels, hinges, rollers, tracks, and springs provide the mechanical balance that keeps the door stable as it moves. The opener supplies the drive, whether it’s via chain, belt, or screw technology, and it includes limit switches that tell it when to stop. Safety sensors (photo eyes) detect obstructions in the path of the closing door. If misaligned, they can prevent the door from closing. In the d and d garage framework, these components are treated as a single ecosystem: if one part underperforms, others compensate imperfectly, leading to noisy operation, misalignment, or a door that won’t stay balanced. Regular inspection of tracks for curvature, ensuring rollers rotate smoothly, and testing the balance by disconnecting the opener are essential habits. By keeping these parts in good condition, you minimize sudden failures and prolong life while maintaining home safety.
Diagnosing common issues in your garage door system
Common garage door problems usually fall into a few recognizable categories: opener failures, imbalance, misaligned tracks, sensor issues, noisy operation, and spring concerns. Start with the least invasive checks: verify power to the opener, inspect for loose hardware, and listen for odd noises during operation. If the door moves creakily, there may be lack of lubrication or worn rollers. If the door feels heavy or won’t stay up, it could indicate a balance issue or tired springs. Sensor problems commonly arise from misalignment or dirty eyes; realigning and cleaning the sensor lenses can restore safe operation. In the d and d garage approach, you document symptoms and test one component at a time to isolate the root cause. Remember that springs carry significant tension and should only be handled by qualified professionals; never attempt to adjust or replace torsion springs unless you are fully trained and equipped. This section provides practical checks you can perform safely before calling a pro.
Safety-first practices when repairing garage doors
Garage door repair can be hazardous because doors are heavy and springs store substantial energy. Prioritize safety by disconnecting the opener from power before any inspection, ensuring the door is secured in a mid-range position with a sturdy prop or locking plier, and keeping children and pets away from the work area. Wear protective eyewear and gloves, and use a level when assessing track alignment to spot subtle deviations. If your door is off-balance, springs or mounts may be under excessive tension—treat these as high-risk tasks. Treat any found damage as a signal to pause and reassess or contact a professional. The GarageDoorAdjust team emphasizes safety as the foundation of any DIY repair plan; rushing a fix can lead to rollbacks, pinch injuries, or a door that suddenly drops. When in doubt, stop, reassess, and seek qualified help.
Tools and materials you should have on hand
Having the right tools and materials ready saves time and reduces risk when working on a garage door. Assemble a basic, high-quality toolkit: safety glasses, work gloves, a sturdy ladder, a set of wrenches and screwdrivers, a drill with driver bits, a tape measure, and a can of silicone-based lubricant for hinges and rollers. A CAR jack with wooden blocks can help lift and support heavy doors, but never rely on it as a primary lifting device. Extra items include a flashlight, a rag for wiping dust and grime, and penetrating oil for rusted fasteners. Keep a small notebook or your phone notes to log what you find during inspection and the steps you take. This preparation aligns with GarageDoorAdjust’s guidance for efficient, safe DIY work, reducing the chance of missteps and damaged components.
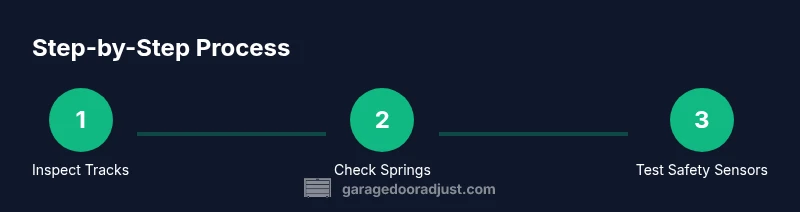
Step-by-step diagnostic flow you can follow at home
This section outlines a practical flow to diagnose common garage door issues without guessing. Begin by powering down and manually testing the door to verify weight and balance. Check the tracks for obstructions and ensure they are plumb; misaligned tracks are a frequent cause of binding and noisy operation. Test the opener by reapplying power and using the wall control; listen for unusual sounds that may indicate gear wear or belt slippage. Inspect safety sensors for alignment and cleanliness; even a small smear can block the safety feature. Finally, assess the torsion or extension springs for wear—visible gaps, rust, or stretching are definite red flags. If the door is not balancing well after manual testing, this often signals that a spring or mounting component is near the end of its life. Throughout this process, document observations and timestamp tests so you and any technician have a clear history of what happened and when.
Maintenance tasks to prevent future problems
The best way to minimize surprising failures is a regular maintenance routine. Schedule two comprehensive checks per year: spring and fall, when temperatures change and doors are used more frequently. Lubricate the moving parts—hinges, rollers, and track rails—with a silicone-based lubricant; avoid oil-based products that can attract dust and create sludge on moving parts. Tighten loose bolts and screws; everyday use can loosen hardware gradually. Clean the track surfaces to remove dirt and debris that can cause binding. Inspect seals and weatherstripping for cracks and replace them as needed to preserve energy efficiency. Finally, test the balance by disconnecting the opener and lifting the door manually to the halfway point; if it doesn’t hold position, there may be a balance problem requiring a professional assessment. Regular maintenance reduces wear, extends life, and keeps your d and d garage running smoothly.
How to decide when to call a pro and what to expect
Not every garage door issue is a DIY project. When springs are involved, doors are heavy, or you notice structural damage, it’s prudent to call a licensed technician. If you are unsure about the door’s balance, hear grinding noises from the springs, or see frayed cables, professional help is the safest option. A qualified technician will test safety systems, inspect torsion hardware, measure spring tension, and verify system alignment; they may also adjust or replace components with the correct torque and lubrication. Expect a diagnostic visit to include a safety assessment, a written estimate, and a timeline for repair. The GarageDoorAdjust team notes that timely professional intervention reduces the risk of injuries and prevents long-term damage, especially when springs or cables show signs of wear. If you choose DIY for non-spring tasks, proceed with caution and document every step for future reference.
Express checklist for a quick home repair
This final block offers a concise, actionable checklist you can use when time is tight. Verify power to the opener and confirm manual door balance. Inspect tracks for obstructions and ensure they are vertical. Check rollers and hinges for wear and lubricate moving parts. Ensure safety sensors align and are unobstructed. Tighten all fasteners and replace weatherstripping if needed. If anything looks worn, schedule professional help, especially for springs or structural mounts. With this checklist, you can quickly triage most common issues and decide whether a DIY fix is appropriate or if a pro is necessary.
Tools & Materials
- Safety glasses(Impact-resistant lenses; keep on during any intervention)
- Work gloves(Protect hands from sharp edges and pinch points)
- Sturdy ladder(Reach tracks and hardware safely; avoid overreach)
- Wrench set(Open-ended and adjustable for bolts and adjusters)
- Screwdrivers (Phillips & flathead)(For hinge plates and electrical components)
- Cordless drill/driver(Drill and drive fasteners; use low torque setting)
- Tape measure(Check track alignment and spring lengths)
- Silicone-based lubricant(Lubricate hinges, rollers, and tracks)
- Penetrating oil(Loosen rusted fasteners if needed)
- Car jack and wood blocks(For supporting heavy doors when necessary)
- Rags or shop towels(Clean parts before lubrication and inspection)
- Level(Check track plumb alignment)
Steps
Estimated time: 60-90 minutes
- 1
Power down and secure the door
Disable the opener by unplugging or switching off the breaker. Manually secure the door in a mid-level position using a sturdy prop. This prevents unexpected movement while you inspect components.
Tip: Secure with a second prop or a wooden wheel chock on either side for safety. - 2
Check balance with the door open
With the opener disengaged, lift the door halfway and release. If it falls or rises, the balance or spring tension is off and needs professional adjustment. If it stays put, balance is likely okay.
Tip: If the door feels heavy to lift or doesn’t stay in place, stop and call a pro. - 3
Inspect tracks and rollers
Look for bends, dents, or obstructions in the tracks. Rollers should spin smoothly without rough spots. Clean tracks and lubricate with silicone lubricant to reduce friction.
Tip: Use a level to confirm tracks are vertical and aligned; small misalignments can cause binding. - 4
Test the safety sensors
Place objects in the door path and close the door from the wall control. If the door doesn’t reverse or stops properly, clean or re-align sensors.
Tip: Clean lens surfaces with a soft cloth; misalignment is a common cause of false closures. - 5
Check springs and cables visually
Look for gaps, rust, or fraying in springs and cables. Do not touch or attempt to adjust springs; damaged springs require a licensed technician.
Tip: If you see any deformation, schedule service immediately. - 6
Reconnect power and test
Reconnect the opener and perform a few cycles. Listen for unusual noises and watch for the door’s travel and stopping points to ensure proper operation.
Tip: Keep hands away from moving parts during tests.
Got Questions?
What is the most common problem with garage doors?
Most common issues involve opener failure, misaligned tracks, or sensor problems. Start with power checks, then inspect sensors and tracks before considering more invasive repairs.
The most common problems are opener failures, misaligned tracks, and sensor issues. Start with power checks, then inspect sensors and tracks.
How long does a typical garage door repair take?
Simple, non-spring repairs can often be completed in 1-2 hours if you have the right tools. More complex work or spring-related issues may require a professional visit and longer timelines.
Simple repairs may take 1-2 hours; springs or major issues will need a professional visit and extra time.
Is it safe to lubricate garage door springs?
No. Do not lubricate torsion springs or extension springs yourself. Lubrication on springs can mask wear or create dangerous conditions; consult a licensed technician for spring work.
Lubricating springs is not safe. Get a licensed technician for any spring work.
Can I replace a damaged panel myself?
Panel replacement is possible but can be tricky depending on door type. If you’re not confident in matching panel types and securing new panels safely, hire a pro.
Panel replacement can be done, but if you’re unsure about compatibility or mounting, hire a professional.
What maintenance should I perform annually?
Inspect balance, tracks, and hardware; lubricate moving parts; test safety sensors; and replace weatherstripping if worn. A yearly check keeps door performance steady.
Do an annual balance check, lubrication, sensor test, and weatherstripping replacement as needed.
What should I do if the door opens but feels unstable?
Unstable movement often signals balance or springs wear. Stop using the door and seek a professional evaluation to avoid injury or further damage.
If it feels unstable, stop using the door and get a professional evaluation.
Watch Video
Quick Summary
- Identify and document symptoms before starting repairs
- Balance and track alignment are essential for safe operation
- Springs and cables are high-risk; call a pro when in doubt
- Keep safety sensors clean and correctly aligned
- Regular maintenance reduces emergency repairs