Chandler Garage Door Repair: A Step-by-Step Guide
Chandler garage door repair guide for homeowners: diagnose common problems, perform safe maintenance, and follow step-by-step process to fix doors and openers.

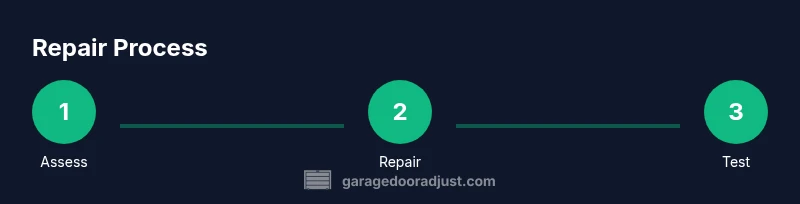
With this guide, you will diagnose and repair common issues in Chandler garage doors and openers, including misaligned tracks, broken springs, and faulty sensors. Gather basic tools, disconnect power for safety, and follow a clear sequence to restore smooth operation and secure lifting. This approach emphasizes safety, lubrication, and testing after each step to prevent recurrence.
Why Chandler garage door repair demands a deliberate approach
For homeowners facing chandler garage door repair, the work can be rewarding yet risky if rushed. According to GarageDoorAdjust, success starts with a clear plan, the right tools, and an understanding of local door designs common in Arizona's climate. In Chandler, garages often experience heat-related wear, track misalignment from shifting foundations, and sensor misreads after power restoration. A proactive mindset—diagnose first, then repair—minimizes risk to you and your family while extending the life of the door system. This section will outline a practical, home-friendly approach that keeps safety at the forefront and helps you decide when to seek professional help.
The phrase Chandler garage door repair captures a broad range of tasks, from minor lubrication to major component replacement. The goal is not to replace everything at once but to identify the root causes and address only what is necessary. By sticking to a structured plan, you reduce guesswork and increase the likelihood of a durable fix. GarageDoorAdjust emphasizes relying on high-quality parts, following manufacturer guidelines, and testing operations slowly after each adjustment. This approach also aligns with best practices you’ll see in public safety resources and training materials from reputable sources.
In practice, you’ll start with the simplest, least invasive adjustments and move toward more involved repairs only if needed. That means checking lubrication, tracking alignment, and sensor functionality before deciding to replace springs or other critical components. Keeping notes helps you track what you did and what remains to be tested. If you ever feel unsure, the safest course is to pause and call a qualified technician.
note
Tools & Materials
- Safety glasses(Protect eyes from spring energy and metal shards)
- Gloves(Grip and hand protection during lifting and handling parts)
- Stable ladder(Use a 6-8 ft ladder on level ground; secure before climbing)
- Adjustable wrench(Metric or SAE as needed for hardware on brackets and hinges)
- Phillips screwdriver(Use for screws on track brackets and hinge plates)
- Flathead screwdriver(Useful for prying in tight spots, not mandatory)
- Lubricant (silicone-based)(Lightly oil tracks, rollers, hinges; avoid lithium grease on nylon rollers)
- Socket set(For nuts on hardware and mounting bolts)
- C-clamp or locking pliers(To secure components during adjustment)
- Replacement parts (optional)(Only if you know what to replace: rollers, hinges, weather stripping)
- Voltage tester(Confirm power is off to the opener before work)
- Helper(Assists with heavy components and positioning)
Steps
Estimated time: 60-90 minutes
- 1
Power down and secure area
Unplug the garage door opener at the outlet and disconnect any battery backup if present. Confirm the door is fully stationary before you touch any moving parts. Keep children and pets away, and set a clear work zone.
Tip: Test the opener’s PVC safety sensor LED to ensure it’s not active during manual checks. - 2
Inspect tracks and rollers
Look for dents, bends, rust, or loose brackets. Spin drums manually if possible to feel rough spots. Make a note of any misalignment and which side looks higher.
Tip: Use a level to verify vertical tracks; even slight tilt will affect door balance. - 3
Check door balance and springs
Manually lift the door halfway up and release. If it stays put, balance is likely good; if it drifts up or down, springs or balance components may be worn.
Tip: Do not attempt torsion-spring adjustments yourself; springs can snap with dangerous force. - 4
Lubricate moving parts
Apply silicone-based lubricant to tracks, rollers, hinges, and pulleys. Wipe away excess to prevent debris attraction.
Tip: Avoid getting lubricant on belts or sensors to prevent slippage or false readings. - 5
Tighten hardware and align tracks
Tighten loose brackets and bolts; gently coax bent tracks back toward vertical with a rubber mallet. Re-check alignment with a level.
Tip: Work gradually; overtightening can strip threads or warp brackets. - 6
Test manual release and re-engage
Disengage the opener using the manual release to test door movement by hand. Reattach the opener’s trolley so it resumes automatic function.
Tip: Keep hands clear of the door path during testing. - 7
Run functional tests
Power the unit back on and run a few opening/closing cycles. Check safety sensors, auto-reverse, and door speed. Listen for unusual noises.
Tip: If you hear grinding or grinding-squeal, pause and re-check parts before proceeding. - 8
Maintenance plan and know-your-limit
Record what was repaired and schedule preventive maintenance every 6–12 months. If you encounter frayed cables, frayed tracks, or persistent binding, call a professional.
Tip: Set a reminder for lubrication and balance checks to extend door life.
Got Questions?
What are common signs that a Chandler home garage door needs repair?
Look for slow movement, unusual grinding, door off track, sensor issues, or door that won’t stay balanced. These symptoms indicate misalignment, worn components, or sensor faults that deserve a closer look.
Common signs include slow movement, grinding noises, and a door that won’t stay balanced.
Is DIY repair safe for torsion springs?
Torsion springs can cause serious injury. Do not attempt to replace or adjust torsion springs yourself. Contact a licensed professional for spring work.
No—torsion springs are dangerous and should be handled by a pro.
How long does a typical garage door repair take?
Most common repairs take a few hours, depending on parts availability and the extent of track or sensor work. If springs or cables are involved, it may take longer.
Most repairs take a few hours, but springs or cables can add time.
How often should I lubricate tracks and rollers?
Lubricate every 3–6 months or after heavy use or extreme weather. Keep it light and wipe away excess to avoid debris buildup.
Lubricate every few months, or after heavy use.
When should I replace my garage door opener?
Replace the opener if it’s unreliable, lacks safety features, or is too noisy. Assess compatibility with your door and consider an upgrade for better energy efficiency.
If the opener is unreliable or outdated, consider replacement for safety and efficiency.
Watch Video
Quick Summary
- Diagnose before you repair to avoid unnecessary parts.
- Keep safety first—power off, protect eyes, and avoid spring work.
- Balance and lubrication prevent common failures and extend life.
- Call a pro for springs, cables, or persistent misalignment.