Chamberlain 953estd: The Complete Step-by-Step Guide for Homeowners
A comprehensive how-to for diagnosing, repairing, and programming the Chamberlain 953estd garage door opener. Learn safety checks, step-by-step tasks, maintenance, and troubleshooting to restore reliable operation.

By following this step-by-step guide, you will diagnose common Chamberlain 953estd issues, reset the opener, re-link remotes, verify safety sensors, adjust travel limits, and perform routine maintenance. The process covers tool lists, safety checks, troubleshooting tips, and when to call a pro. This guide helps homeowners troubleshoot confidently and restore reliable garage door operation with the Chamberlain 953estd model.
What is the Chamberlain 953estd?
The Chamberlain 953estd is a mid-range residential garage door opener designed to balance quiet operation with dependable performance. When homeowners troubleshoot, common issues often stem from sensor misalignment, worn drive components, or programming glitches rather than a defective unit. Since the 953estd uses a belt/chain drive and modern safety features, basic maintenance is accessible to most DIY enthusiasts. According to GarageDoorAdjust, consistent checks of power, sensors, and limits dramatically reduce unexpected door closures and safety faults on this model. This guide clarifies how the pieces work together and how to verify each part is functioning correctly.
In practical terms, you should know where to locate the main components: the motor housing mounted above your garage door, the rail and trolley that travel with the door, the safety sensors mounted near the floor on each side of the opening, and the wall console or remote controls that trigger the lift. The 953estd typically features a simple control panel with teach-in remotes and a modern sensor array. A well-tuned opener will start smoothly, stop accurately, and respond promptly to remotes and wall controls. If you notice strange noises, erratic stopping, or a door that stalls, you’ll be checking for misalignment, wear, or a need for basic calibration.
GarageDoorAdjust's analysis shows that the most reliable operation comes from a routine maintenance plan that combines sensor checks, lubrication, and correct programming, especially after power interruptions or battery changes. Readers who follow these steps will gain confidence diagnosing issues without guessing, preserve safety, and extend the life of the Chamberlain 953estd.
Symptoms and quick fixes for the Chamberlain 953estd
Doors that open slowly, stop mid-travel, or reverse unexpectedly are common symptoms. If the opener runs but the door remains in a neutral position, you might have misaligned safety sensors, worn track rollers, or a binding track. A door that hums but does not move can indicate a drive belt or chain slip or a jam somewhere in the trolley. If the remote or wall control only works sporadically, the issue is often programming, a weak battery, or signal interference.
To address these, start with the simplest checks: verify the power indicator is lit, move the door manually to ensure it’s balanced, and inspect the sensor eyes for misalignment or dirt. Clean the photo-eye lenses with a soft, dry cloth and ensure the LEDs line up. Check the track for obstructions and ensure it sits plumb and well-supported. If you find a loose bracket or a bent track, stop and secure the area before continuing. Finally, test by triggering the opener from the wall control and then from the remote; if the remote fails, re-pair it with the control board following the manufacturer’s teach-in sequence.
Remember, persistent issues may trace back to the logic board or safety circuit, which should be diagnosed with care. As part of the maintenance routine, keep a log of symptoms and actions taken to help identify patterns. The Chamberlain 953estd can perform reliably for many years when you stay on top of lubrication, sensor alignment, and switch calibration. GarageDoorAdjust emphasizes that documenting symptoms helps pinpoint recurring problems and reduces guesswork during repairs.
Safety, tools, and prep before you start
Safety first: always power down the opener and secure the area before any inspection or adjustment. Use a sturdy ladder and work with adequate lighting. Wear eye protection and gloves if you’ll touch metal parts or operate under load. This phase also sets expectations about the scope of work and whether you’ll call a pro for any electrical or structural concerns.
Before you touch the unit, gather the tools you’ll need and confirm the area around you is clear of people and pets. Use a helper if you need to manually move the door during the process, especially if the door feels heavy or unbalanced. Make a quick plan for the sequence of checks so you don’t miss a critical safety step.
In this guide you’ll work with the Chamberlain 953estd’s belts, rails, sensors, and control board. Regular maintenance here pays off in quieter operation and fewer false sensor alarms. Remember: small misalignments compound over time, so address them early rather than letting them accumulate. As you prepare, review the steps and ensure you have a way to document your results for future reference.
Diagnosis workflow: sensors, limits, drive, and tension
A systematic approach helps you isolate problems without guesswork. Start with the safety sensors: ensure they face each other, are clean, and correctly aligned. If the indicator LED on either eye blinks or remains off, adjust until both LEDs are solid. Next, verify the travel limits and force settings in the opener’s programming menu; a mis-set limit can cause doors to stop early or over-travel, risking damage to the door or opener.
Inspect the drive mechanism for wear: check the belt or chain for cracks, fraying, or slack. A loose belt may slip under load and produce a grinding sound without lifting the door; a stretched chain can produce similar symptoms. Check the trolley’s track alignment and ensure the rollers rotate freely without binding. If you observe wear, replace worn components following the manufacturer’s guidance or consult a pro.
Finally, test the system by running the door through a few cycles with the door in manual and automatic modes. If it hesitates, listen for grinding, and inspect for debris or misaligned hardware. Document each finding and compare against your earlier notes; this makes recurring issues easier to track and resolve. GarageDoorAdjust guidance underscores staying methodical and careful with electrical components.
Remotes, wall console, and pairing tips for Chamberlain 953estd
Pairing remotes and the wall console with the 953estd requires using the teach-in button sequence described in the manual. Begin with a power-off, then re-enable power once you’re close to the opener. Press and hold the teach-in button until the LED on the unit blinks, then trigger the remote within 30 seconds. If pairing fails, reset the opener’s memory and repeat the sequence, ensuring you’re using fresh batteries in the remotes.
For best results, keep remotes and the wall console in a consistent environment away from strong radio signals or metal surfaces that could reflect the signal. If you’re upgrading to MyQ compatibility, consult the latest Chamberlain guidelines and verify compatibility with your specific model revision. Documentation of button presses and codes can help if you need to re-pair remotes in the future.
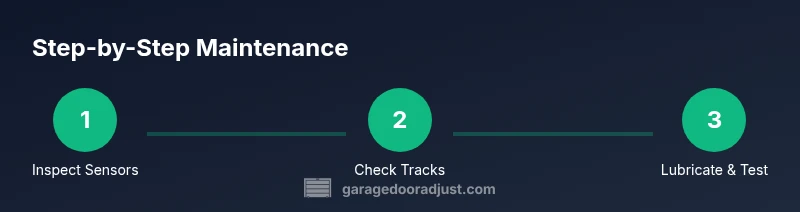
Maintenance, lubrication, belt/chain care, and preventive care
Lubricate moving parts on a routine schedule using a silicone-based spray for rails and hinge areas, and white lithium grease for metal-to-metal contact points on rollers and gears. Avoid petroleum-based lubricants that can attract dust. Regular lubrication reduces friction, noise, and wear and extends the life of the 953estd’s drive system. Check the belt or chain for signs of wear, replace as needed, and adjust tension if the belt appears slack or the chain is noisy during operation.
Preventive care also includes keeping electrical connections clean, ensuring weather seals aren’t degraded, and inspecting the mounting hardware for looseness. Periodic sensor cleaning and track alignment checks help prevent nuisance alarms and operational hiccups. Consider scheduling a quarterly quick-check to catch small issues before they escalate into failures.
When to call a professional and what you should know
If you encounter electrical faults, persistent misalignment after adjustments, or you notice unusual noises that don’t resolve after a thorough inspection, it’s wise to call a licensed technician. Problems with the internal logic board, safety circuits, or a failing motor may require specialized tools and certifications. Before you call, document the symptoms, attempted fixes, and any error codes from the opener’s display to share with the technician. This helps reduce diagnostic time and ensures you receive accurate, safe service. The GarageDoorAdjust team recommends prioritizing safety and knowing your limits when dealing with electrical components and heavy doors.
Tools & Materials
- Flat-head screwdriver(for terminal screws on the control board)
- Phillips-head screwdriver(panel screws and small mounting screws)
- Voltage tester / multimeter(to verify line power and control wiring)
- Allen wrench set(optional for rail bracket adjustments)
- Ladder(stable, tall enough to comfortably reach the opener)
- Safety glasses(eye protection during testing and adjustments)
- Lubricant spray (silicone/white lithium)(for rails, pulleys, hinges, and rollers)
- Cloth rags(for cleaning lenses and metal surfaces)
- Smartphone or camera(to document sensor alignment and repairs)
Steps
Estimated time: 60-90 minutes
- 1
Power down and secure the area
Unplug the opener or switch off the circuit at the main breaker. Clear the workspace and lower the door to its closed position if safe to do so, using the manual release only if the door is safely supported. This prevents accidental movement during inspection.
Tip: Always verify power is off at the source before touching any wiring. - 2
Check safety sensors alignment
Inspect the photo-eye sensors on both sides of the door opening. Clean lenses with a soft dry cloth and align them so the indicator LEDs are solid when properly aimed at each other. Misaligned eyes will prevent the door from closing fully.
Tip: If the LEDs blink, adjust alignment in small increments and retest. - 3
Inspect tracks and rollers
Examine the tracks for dents, debris, or binding. Ensure tracks are plumb and brackets are tight. Spin the rollers by hand with the door supported to confirm smooth movement.
Tip: Clear debris and lubricate sliding surfaces after alignment checks. - 4
Evaluate the drive system
Check the belt or chain for wear, cracks, or slack. A loose belt or stretched chain can slip under load and fail to lift the door. If worn, replace according to manufacturer specs.
Tip: Never operate a visibly damaged belt/chain; replace before testing again. - 5
Test wall control and remotes
With power restored, test the wall control first. If the door responds inconsistently, re-pair or re-teach-in remotes following the manual’s sequence. Verify each remote triggers the door reliably.
Tip: Use fresh batteries in remotes during re-pairing for best results. - 6
Reset limits and force settings
Access the opener’s programming menu and reset travel limits and door force. Start with the default settings and adjust until the door reaches the closed position smoothly and stops at the floor without rebounding.
Tip: Document the final limit values for future reference. - 7
Lubricate and wipe down
Apply a light coat of silicone spray to the rails, hinges, and pulley areas. Wipe away excess to prevent dust accumulation. Lubrication reduces wear and noise and improves overall performance.
Tip: Avoid over-lubricating near sensors to prevent drift in optical alignment. - 8
Run multiple cycles and observe
Operate the door in both directions for several cycles. Listen for unusual noises, check alignment, and confirm the door stops at the correct positions. If issues persist, revisit earlier steps and adjust as needed.
Tip: Record cycle times and any anomalies to track improvements. - 9
Finalize safety checks
Recheck that the door reverses properly when the safety beam or test object is detected. Ensure the LED indicators for sensors are stable and the opener responds reliably to both wall controls and remotes.
Tip: Safety testing is non-negotiable; misalignment is a common cause of injury.
Got Questions?
Is the Chamberlain 953estd compatible with MyQ or smart home hubs?
Many Chamberlain models support MyQ with your existing setup. Check the specific model revision and the MyQ app requirements to confirm compatibility before purchasing a hub or sensors.
Chamberlain models often support MyQ, but verify compatibility for your exact revision before buying.
How do I reset the safety sensors on the Chamberlain 953estd?
Clean both sensor lenses, realign so the LEDs face each other with stable illumination, and retest. If misalignment persists, adjust brackets slightly and retest until the door closes normally.
Clean and realign the sensors, then test until they function reliably.
How do I re-pair remotes with the Chamberlain 953estd?
Power on the opener, press and hold the teach-in button until the LED blinks, then press the button on the remote within 30 seconds. Repeat for additional remotes as needed.
Enter teach-in mode on the opener, then press the remote to pair.
What maintenance does a Chamberlain 953estd require?
Regular lubrication of rails and pulleys, periodic track alignment checks, sensor cleaning, and occasional drive-belt or chain inspection help maintain reliability and extend life.
Lubricate rails, check tracks, clean sensors, inspect the drive belt or chain.
When should I call a professional?
If you encounter electrical faults, persistent misalignment after adjustments, or signs of motor or control-board failure, seek a licensed technician. This protects you from injury and ensures proper operation.
Call a professional if electrical issues or persistent misalignment remain after your checks.
How do I reset the travel limits on the 953estd?
Access the opener’s programming menu, reset travel limits, and adjust until the door closes smoothly and sits fully on the floor. Test several cycles to confirm stability.
Reset and re-calibrate travel limits, then test multiple cycles.
Watch Video
Quick Summary
- Power off before touching electrical parts
- Align safety sensors to ensure proper closing
- Test remotes and wall controls after programming
- Lubricate rails and pulleys for quieter operation
- Document steps and settings for future maintenance