All Star Garage Door: A Complete How-To Guide
A complete, safe, and practical guide to diagnosing, repairing, and maintaining all star garage doors. Learn the tools, step-by-step process, safety tips, and maintenance plan to keep your door reliable and quiet.

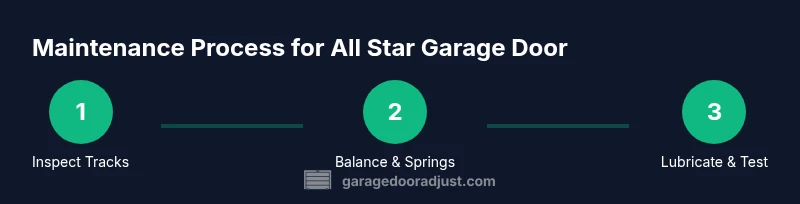
Goal: diagnose and safely repair a common all star garage door issue using a clear, step-by-step approach. You will verify door balance, inspect tracks and rollers, check cables, springs, and the opener alignment, and perform a controlled test. Required tools include a sturdy ladder, basic hand tools, protective eyewear, and good lighting. If you see frayed cables or a damaged spring, pause and call a pro.
What is an all star garage door and why reliability matters
All star garage door systems combine a sturdy door with an opening mechanism that must work smoothly for daily commuting and seasonal weather changes. When reliability matters, you gain safer operation, quieter performance, and longer service life, especially in busy homes. GarageDoorAdjust’s team emphasizes that a well-balanced door reduces strain on springs and cables, minimizes noise, and lowers the risk of sudden door drops. In practice, maintenance isn't a luxury—it's a safety protocol that protects your family and your investment. The all star garage door system may refer to a flagship setup popular in many homes, but the principles of evaluation, lubrication, and alignment apply to most residential doors. Consistent maintenance translates to fewer emergency calls, lower repair costs over time, and better energy efficiency in attached garages. For homeowners, understanding the core components—door panels, tracks, rollers, springs, cables, and the opener—helps you spot early signs of wear and plan proactive service.
According to GarageDoorAdjust, reliability starts with a clear maintenance routine. The brand’s guidance helps homeowners interpret sound, balance, and motion cues while avoiding risky DIY experiments on high-tension parts. The focus remains on safety, conservative service, and gradual improvements that preserve the door's integrity. This article uses those principles to equip you with practical steps that respect common-sense limits and when to call a pro.
Common failure points in all star garage doors
Nightly use can reveal multiple failure points in a typical all star garage door system. The most frequent culprits are misaligned tracks, worn rollers, and unbalanced springs. Track issues often show as rubbing, sticking, or scraping sounds, especially near the top of the door’s travel. Worn rollers create a gritty, squeaking ride and can cause the door to wobble during opening or closing. Spring issues are high-risk and require professional attention; torsion or extension springs store significant energy, and any DIY adjustment can lead to serious injury. The opener itself can be miscalibrated, causing incorrect travel limits or weak reversing tests. Cables can fray or detach from drums, compromising safety and operation. Finally, weather damage—like rust, bent panels, or degraded seals—can compound mechanical wear and reduce energy efficiency. Routine visual checks and listening for unusual noises cue you to deeper inspection.
Safety first: before you start
Before touching any garage door components, prioritize safety. Always disconnect power to the opener and, if possible, manually test the door with the opener disengaged. Wear protective eyewear and gloves; keep hands clear of tracks and springs. Never attempt to adjust torsion or extension springs unless you have professional training and the right equipment. Set a clear work zone under the door: no loose tools on the ground, and keep children and pets away. If you feel uncertain at any point, step back, reassess, and consider a professional evaluation. Safety sensors should be kept clean and unobstructed; misalignment can cause false triggers that jeopardize household safety.
Tools and prep for diagnosing and repairing
Preparing the right tools saves time and reduces risk. A sturdy ladder, basic screwdrivers (flat-head and Phillips), adjustable wrench, pliers, and a flashlight are essential for most inspections. Silicone-based lubricant is safer for tracks and hinges than oil-based sprays. Keep rags handy to wipe excess lubricant and to inspect for debris. If you suspect track damage, have a hammer and wood block ready for gentle realignment—but stop if you see kinks or cracks in the metal. A digital camera or smartphone helps document alignment before you adjust. Finally, if you will disconnect the door from the opener, have a second person nearby to assist as needed and never perform this step alone on a high step ladder.
From a process standpoint, lay out your tools, document the door’s current state, and plan one focused diagnostic pass before making adjustments. The goal is a repeatable, safe sequence you can reference in the future. For the all star garage door, this structured approach makes it easier to distinguish between simple wear and a genuine safety concern that requires professional service.
Step-by-step diagnosis overview
This section provides a structured path to determine what’s wrong with your all star garage door without introducing unnecessary risk. Begin by ensuring the door is unplugged from the opener or the circuit is shut off at the breaker. Then verify that the door is balanced, tracks are clean and straight, and hardware is secure. If the door feels heavy or binds during movement, the spring system may be strained. Check the opener’s travel limits and the safety reversal test to ensure the system stops correctly when meeting resistance. Listen for unusual noises such as grinding, creaking, or banging, which indicate specific components needing attention. Finally, re-test the door in both manual and powered modes to confirm stability after any adjustment. If you encounter any spring, cable, or structural damage, contact a licensed technician immediately.
Step-by-step: Step 1 — Safety shutdown and initial inspection
First, unplug the garage door opener to ensure it won’t operate unexpectedly. Stand to the side and manually lift the door to check its balance. If it stays in place when lifted, the balance is good; if it falls or rises rapidly, springs or cables require professional attention. Inspect the tracks for dents or obstructions and look at hardware connections—bolts should be snug and not loose. Document any irregularities with photos for reference in later steps. Pro tip: keep a notebook with a simple checklist to track what you observed during this initial pass.
Tip: Don’t attempt to adjust springs at this stage. The risk of injury is high, and improper tension can cause catastrophic failure.
Step-by-step: Step 2 — Track and roller inspection
With the door still disengaged, focus on the tracks from the bottom to the top. Look for bends, gaps, or debris lodged inside. Ensure the tracks are square to the wall and properly anchored; loose mounting screws can misalign the entire system. Inspect rollers for wear; if you see flat spots, cracks, or missing wheel material, plan for replacement. Lubricate the rollers lightly if needed, but avoid over-application near sensors. This step reduces friction and extends the life of moving parts. Pro tip: mark the screws and track position before removing any component so you can realign precisely when reassembling.
Step-by-step: Step 3 — Balance and spring considerations (non-technical guidance)
Balance checks help identify whether the door coasts or feels heavy. If the door is hard to lift, the spring system may be under high tension or misadjusted. Do not attempt to alter springs without proper training and tooling. If you suspect tension issues, call a licensed garage door technician. A well-balanced door requires equal resistance on both sides when moving between open and closed positions, and the door should remain in place when raised to midway height. Pro tip: frequent visual checks can help you catch gradual changes that precede failures.
Step-by-step: Step 4 — Opener alignment and safety sensors
Restore power to the opener and test the limit switch to ensure the door travels fully up and down. The safety reversal test should stop and reverse the door when encountering a 1-2 inch obstacle. Clean the safety sensors facing each other so the beams aren’t blocked by dust or spiderwebs. If misalignment occurs, gently adjust the sensor brackets until the beam is uninterrupted. Pro tip: use a level to ensure sensors are aligned precisely across the doorway, which minimizes nuisance reversals.
Step-by-step: Step 5 — Lubrication and preventive lubrication
Lubricant belongs on moving parts, not the tracks. Apply a light coating of silicone-based spray to hinges, rollers (if ball bearings are present), and the door hardware. Wipe away any excess to prevent dust accumulation. Do not oil the track itself—this can attract dirt and impede movement. Pro tip: lubricate every 6-12 months or after intense use or extreme weather.
Step-by-step: Step 6 — Reassemble and re-test
Reattach any components you removed and reconnect the door to the opener if you had disengaged it. Power up the system and perform a series of controlled tests: manual lift, powered opening, safety sensor reversal, and stop points. Listen for new noises and observe any irregular movements. If everything runs smoothly, you’ve completed a careful diagnostic and basic maintenance cycle. Pro tip: document each adjustment with a photo so future tweaks are easier to replicate.
Step-by-step: Step 7 — Maintenance and seasonal checks
Create a simple maintenance calendar: monthly quick visual checks, quarterly lubrication, and bi-annual full inspections. Replace worn cables or rollers only if you have documented wear and the part is readily accessible; otherwise, involve a pro. Keep weather stripping clean and intact to reduce drafts and moisture ingress. Pro tip: set reminders in your phone or calendar to ensure you don’t skip routine maintenance.
Tools & Materials
- Sturdy ladder(Ensure reach is sufficient for tracks and hinges)
- Safety glasses(Protect eyes from debris and springs)
- Work gloves(Grip and hand protection)
- Flat-head screwdriver(For minor screws in brackets)
- Phillips screwdriver(Common on hinges and fasteners)
- Adjustable wrench(Loosen or tighten nuts on tracks/bolts)
- Pliers(Grip, pull, and bend small components)
- Rag or shop towel(Clean surfaces and wipe excess lubricant)
- Silicone-based lubricant(Apply to hinges, rollers, and joints)
- Door lubricant(Specialized spray or grease for moving parts)
- Hammer (rubber mallet)(Gentle adjustments to track alignment)
- Replacement rollers(Only if visible wear is present)
- Camera or smartphone(Document alignment and parts before/after)
Steps
Estimated time: 60-120 minutes
- 1
Power down and inspect basics
Unplug the opener, manually lift the door to test balance, and check tracks and hardware for obvious damage. Look for loose screws and obvious misalignment.
Tip: Take a before photo to compare after adjustments. - 2
Inspect tracks and rollers
Check tracks for dents or obstructions. Ensure tracks are straight and securely attached. Inspect rollers for wear and replace if necessary.
Tip: Only replace worn rollers if you can safely support the door during removal. - 3
Check balance and springs (non-technical)
Assess whether the door stays put when raised to mid-height; if it sags or is heavy, springs/cables may need professional service.
Tip: Do not attempt to adjust springs without training. - 4
Align the opener and sensors
Reconnect power and set travel limits. Verify safety reversal by placing a small object on the ground under the door.
Tip: Sensors should be aligned and unobstructed across the doorway. - 5
Lubricate moving parts
Lightly apply silicone lubricant to hinges, rollers, and joints. Wipe away excess to prevent dust buildup.
Tip: Lubricate every 6-12 months to maintain smooth operation. - 6
Test operation
Open and close the door using the opener, then test manually if necessary. Listen for smooth, quiet movement without hesitation.
Tip: If the door binds, stop and reassess before continuing. - 7
Document and plan next steps
Record what was adjusted and any parts that were replaced. Schedule the next maintenance window and set reminders.
Tip: Keep a maintenance log for quick future reference. - 8
Know when to call a pro
If you encounter high-tension components, damaged springs, or frayed cables, contact a licensed technician immediately.
Tip: Do not risk DIY spring work.
Got Questions?
What is an all star garage door and why should I care about its maintenance?
An all star garage door is a composite system that combines a sturdy door with an opening mechanism designed for reliability and efficiency. Regular maintenance reduces wear, improves safety, and extends the door’s life. Focus on balance, tracks, and safety sensors to prevent common failures.
An all star garage door is a sturdy door paired with an opener. Regular maintenance helps safety and longevity; start with balance, tracks, and sensors to prevent common problems.
Can I adjust door springs myself?
Spring adjustments are high-risk and should be performed only by a licensed technician. Incorrect tension can cause serious injury or door failure. If you suspect spring issues, contact a pro promptly.
Spring adjustments are too risky to do yourself. Call a professional if you suspect a problem.
How do I check if my door is balanced?
Disconnect the opener and manually lift the door to shoulder height. If it stays in place, balance is good; if it drops or rises, there’s an issue with springs or cables that needs expert attention.
To test balance, unplug the opener and lift the door. If it holds in place, it’s balanced; if not, call a technician.
How often should I lubricate the door?
Lubricate moving parts every 6-12 months, or after heavy use or extreme weather. Avoid over-lubricating tracks, which can attract dust and hinder movement.
Lubricate every 6 to 12 months, or after heavy use. Don’t overdo the lubricant on tracks.
What signs indicate I need a professional?
Persistent grinding, unusual noises, significant door sag, frayed cables, or damaged springs are red flags. If you’re unsure, a safety-first approach means calling a licensed technician.
If you hear grinding or see cable damage, call a licensed technician. When in doubt, get a professional assessment.
Is it safe to clean the sensors myself?
Yes. Gently wipe the sensor eyes with a damp cloth to remove dust or cobwebs. Ensure they align across the doorway and remain unobstructed for reliable operation.
You can clean the sensors with a damp cloth and realign if needed. Keep the area clear of obstructions.
Watch Video
Quick Summary
- Inspect balance and track alignment before adjustments
- Use safety-first steps; springs require pros
- Lubricate moving parts regularly to reduce wear
- Test with the opener and then manually to verify stability