Supreme Garage Door Repair: The Ultimate Step-by-Step Guide for Homeowners
Master supreme garage door repair with a safety-first, step-by-step approach. This guide covers balance, tracks, opener safety, lubrication, troubleshooting, and budgeting for parts or professional help. Learn practical, homeowner-friendly techniques to restore smooth, quiet operation.

By following this guide, you will diagnose and repair common garage door issues and improve opener performance. You'll check balance, inspect tracks, test safety sensors, re-lubricate moving parts, and safely adjust springs or limits when needed. The steps are designed for homeowners with basic tools and emphasize safety. This approach minimizes risk and avoids unnecessary part replacement.
Safety First: Supreme Garage Door Repair Starts with You
Safety is the foundation of any supreme garage door repair. Before you touch any components, disconnect power to the opener, stabilize the door, and wear eye protection and gloves. According to GarageDoorAdjust, the first rule of any repair is to prioritize safety and never attempt to release spring tension without proper training. If you feel unsure about any step, stop and seek professional guidance. This guide emphasizes non-destructive checks you can perform without removing hardware from its mounting. In addition, keep a clear workspace free of clutter and ensure children and pets stay away during testing. For anyone tackling this project, document your steps and take photos before you adjust any fasteners so you can reverse changes if needed. Understanding the door’s weight and spring type informs every decision; torsion springs, for example, store dangerous energy and require specialized tools and procedures. Always plan your work in daylight or well-lit conditions and never attempt to test a door with the spring under tension. By following these safety guardrails, you reduce risk and create a reliable baseline for the rest of the repair.
Diagnosing Door Balance and Track Alignment
A door that is properly balanced opens with minimal effort and stays in place when raised halfway. If you notice sagging on one side or the door drifts as it travels, balance and track alignment likely need attention. Start by unplugging the opener and lifting the door manually to about waist height; it should hold its position without heavy drift. If it falls or flies up, springs or balance components may be under-tension or worn. Inspect vertical tracks for dents, loose bolts, or misaligned mounting brackets; tighten and realign as needed. When tracks are out of plumb, use a level to verify; adjust where the track meets the jamb and ensure both sides are parallel. Check rollers for wear, flat spots, or binding; replace worn rollers if needed and lubricate axles lightly with silicone-safe lubricant. Look for gaps between rollers and tracks, and inspect the hinges for excessive looseness. If the door pulls to one side during travel, the hinge or track on that side may be damaged. Do not force the door to move through an obstacle; instead, correct the underlying misalignment and re-test. These checks catch the majority of misalignment issues before you touch the opener or springs, reducing risk and improving quiet operation.
Inspecting the Opener and Safety Features
The garage door opener is a separate system from the door itself, but it governs how the door moves. Begin by disconnecting the operator and testing the door manually to determine whether the issue lies with the door or the opener. Inspect the reversing safety sensor at the bottom of the track; ensure the red indicator light is steady when aligned and that the sensor faces are clean. If the light blinks or the door reverses unexpectedly, re-align or replace the sensor and re-test. Check the opener’s limit switches and force settings; incorrect limits can make the door fail to close fully or travel too far. If you own a smart opener, verify Wi-Fi connectivity and remote pairing, and reset codes if necessary. Listen for grinding or squealing noises from the motor housing, which can indicate worn gears or rough bearings, requiring professional service. Remember that the opener is designed to assist the door, not to bear the full load of balance and tracking; treating it as a balancing tool can mask underlying issues. Follow these steps to isolate alternate causes and protect your safety.
Lubrication, Cleaning, and Preventive Maintenance
Regular lubrication and cleaning are key to a long-lasting, quiet operation. Use silicone-based lubricant on hinges, rollers, and track joints; avoid petroleum-based products near nylon components or plastic tracks. Wipe away old grease and debris before reapplying a light coat. Clean the weatherstripping along the door bottom to maintain a proper seal and prevent debris from entering the track area. Periodically inspect the track joints and hardware for corrosion or looseness, tightening screws as needed. Adhere to a simple maintenance cadence: inspect every 3–6 months, lubricate moving parts every 6–12 months, and replace worn rollers or hinges as soon as you notice excessive play or noise. GarageDoorAdjust recommends sticking to silicone lubrication for longevity and to protect rubber seals. A well-lubricated system not only reduces noise but also reduces wear on bearings and gears over time.
Troubleshooting Common Symptoms
If the door is slow to respond or drags during travel, the issue could be balance, track alignment, or sensor interference. A door that won’t stay open or closes too quickly may indicate misadjusted spring tension or opener settings. If you hear grinding or squealing when the door moves, inspect the tracks for dents or obstructions and check that rollers turn freely. A door that reverses before closing might have misaligned safety sensors or mis-set limit switches. For a door that operates smoothly manually but stalls when the opener runs, test the opener’s power, remote controls, and safety features, then re-test after reassembly. When the door makes erratic noises, isolate the source: hinge wear, track binding, or warped panels. In many cases, addressing balance, track alignment, and lubrication resolves the majority of symptoms without expensive replacements. Maintaining a calm, systematic approach helps you identify root causes and avoid unnecessary repairs.
Safe Adjustments and Small Repairs Homeowners Can Do
Small, safe adjustments can improve performance without involving dangerous components. Tighten loose mounting screws on tracks and hinges, adjust the door’s balance by repositioning springs only if you have the right training, and recalibrate the opener limits according to the manufacturer’s instructions. Do not attempt to unwind torsion springs or replace them yourself; these parts store high-energy and require professional handling. Replace worn rollers and hinges when you notice rough movement or visible wear, and use silicone lubricant on moving metal parts. If you must adjust cables, tighten only the non-load-bearing sections and avoid altering the spring system. When in doubt, pause the work and consult a pro. Remember that safety gear, a steady ladder, and a clean workspace are essential; never work under a door supported only by a hand or a single support.
When to Replace Components and Budgeting Considerations
Major repairs often depend on component age, wear, and performance. If multiple parts show wear—such as sagging springs, worn rollers, and frequent sensor misalignments—evaluate whether repair costs justify replacement. The GarageDoorAdjust Team notes that comprehensive replacement can be more cost-effective and safer in long run than repeated small repairs. Consider the door’s age, structural integrity, insulation, and energy efficiency when deciding. Budget for parts, labor (if you hire a pro), and potential upgrades like better insulation or a quieter opener. Keep in mind that warranties may cover certain components; check terms before purchasing. A strategic approach—prioritizing safety, reliability, and energy efficiency—helps you allocate resources effectively and extend the life of your system.
Create a Simple, Repeatable Troubleshooting Routine
End each session with a quick, repeatable routine to prevent recurring issues. Start by testing balance, then inspect tracks and rollers for wear. Verify safety sensors are clean and properly aligned, followed by lubrication of moving parts. Re-test the door manually, then re-connect power and run a full cycle with the opener. Document adjustments, label screws and bolts, and photograph before/after states so you can revert if needed. This routine builds a reliable checklist you can reuse, reduces guesswork, and helps you spot patterns over time. By adopting a consistent process, you can address problems quickly and keep your system running smoothly.
Tools & Materials
- Ladder or sturdy stool(Use a stable platform at a safe height.)
- Work gloves(Leather preferred for grip and protection.)
- Safety goggles(Protect eyes from debris.)
- Screwdrivers (Philips & flat-head)(Varied sizes for screws and brackets.)
- Socket wrench set / adjustable wrench(Common bolt sizes for tracks & hinges.)
- Pliers & wire cutters(Cutting or gripping cables safely.)
- Tape measure(Measure gaps and track alignment.)
- Silicone-based garage door lubricant(Use on metal moving parts; avoid bearings with oil.)
- Rubber mallet(Gentle realignment without damage.)
- Level(Verify track plumb and alignment.)
- Clean rags(Wipe away old lubricant and debris.)
- Pen/marker & notebook(Label parts and record observations.)
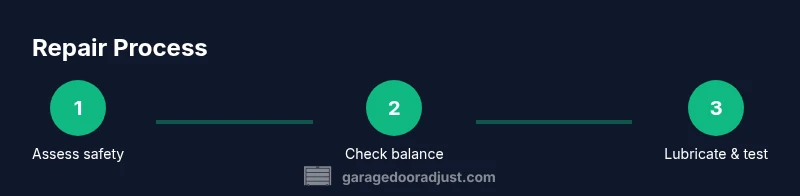
Steps
Estimated time: 2-4 hours
- 1
Power down and secure
Turn off the opener at the wall switch and unplug the unit. This prevents accidental movement while you inspect components. Verify the door cannot move if you gently test with a hand while supported on a stable surface.
Tip: Double-check that the door cannot travel before starting work; keep hands clear of hinges. - 2
Check manual balance
With the door closed, lift manually to mid-height. A balanced door should stay put. If it drops or rises, balance or spring components may be out of spec.
Tip: Do not tug with excess force; if movement is heavy, stop and assess springs or balance. - 3
Inspect tracks and fasteners
Examine vertical and horizontal tracks for dents, rust, or loose bolts. Tighten mounting screws and gently realign any misaligned sections using a level as a guide.
Tip: Only loosen a fastener slightly to realign; overtightening can kink the channel. - 4
Test safety sensors
Wave an object in front of the lower sensors to ensure the door reverses. If not, clean sensor faces and re-align. Replace if necessary.
Tip: Keep sensor lenses clean; even dust can trigger false reversals. - 5
Lubricate moving parts
Apply silicone lubricant to hinges, rollers, and track joints. Wipe away excess and avoid over-lubricating the springs unless directed by a professional.
Tip: Lubricate evenly; clumps can attract dirt and cause stickiness. - 6
Re-test operation with opener
Reconnect power and run a full cycle by hand and with the opener. Note any sticking points and confirm the door returns to level when released.
Tip: Observe from the side to spot lateral drift that a visual check might miss. - 7
Adjust limits and force
If the door stops short or travels past the floor, adjust the opener’s limits per the manual. Do not set too aggressively; test gradually.
Tip: Make small changes and test; multiple large adjustments can complicate operation. - 8
Decide on next steps
If issues persist after these steps, evaluate component wear and consider professional service, especially for springs or cables.
Tip: Document observations and plan any professional consultation with photos.
Got Questions?
Is DIY garage door repair safe for beginners?
DIY repair can be safe for non-spring tasks when you follow strict safety rules and use proper tools. Do not attempt spring work or component replacement beyond your skill level. If you’re unsure, consult a professional.
DIY repair can be safe for simple tasks, but never attempt spring work if you’re not trained. When in doubt, contact a professional.
Should I replace springs myself?
Springs store high energy and require specialized equipment. Replacing them without training can cause serious injury. Hire a licensed technician for torsion or extension spring work.
Springs are dangerous. Don’t replace them yourself; get a professional.
How can I tell if my door is balanced?
Elevate the door manually to mid-height; it should stay put. If it drops or rises, balance or spring components are off and need adjustment by a professional if you’re unsure.
If the door doesn’t stay in place when you lift it, it isn’t balanced properly.
What lubricants should I use around a garage door?
Use silicone-based lubricant on metal moving parts. Avoid petroleum-based products near nylon components and plastic tracks to prevent damage.
Stick with silicone lubricants for moving metal parts.
How long does a typical repair take?
A simple inspection and maintenance can take under an hour, while comprehensive balance or opener recalibration may take a couple of hours.
Most repairs take from 1 to 3 hours, depending on complexity.
When should I replace the whole door versus parts?
If the door shows extensive wear, warped panels, or energy efficiency loss, replacement may be more cost-effective than multiple part repairs. Consider age, warranty, and performance.
If the door is worn out or very old, replacement may be the better option.
What warranties should I look for?
Look for manufacturer warranties on parts and service warranties from installers. Read coverage details for springs, tracks, and electronics.
Check what’s covered by the manufacturer and installer warranties.
Watch Video
Quick Summary
- Balance and tracks first, then the opener
- Safety features must function before tests
- Use silicone lubricant for longevity
- Call a pro for springs or major components
- Document changes for future maintenance