How to adjust distance garage door to wall gap
A homeowner-friendly, safety-first guide to adjust the distance between your garage door and the wall gap. Learn measurement techniques, tools, step-by-step actions, and verification to achieve an even seal and smooth operation.

This guide shows you how to adjust the distance between your garage door and the wall gap, ensuring an even seal and smooth operation. You’ll learn how to assess the current gap, plan adjustments, and verify results safely, with a clear, homeowner-friendly process. Follow the steps to avoid damaging hardware and improve energy efficiency.
Understanding the gap between garage door and wall
The distance between a garage door and the adjacent wall forms a critical seal that influences energy efficiency, weather protection, and long-term door health. A consistent gap along the door edges helps the weatherstripping compress evenly when the door is closed and reduces wind-lift during storms. Conversely, a gap that is too wide or irregular on one side can cause the door to rub, wear away seals, and strain hinges. For homeowners tackling distance issues, the goal is not to force contact or create a crush; the aim is a small, uniform reserve of clearance that still allows the door to close fully without binding. The GarageDoorAdjust team emphasizes that smaller, consistent gaps usually deliver better performance than a perfectly closed door with high variation along the bottom or sides.
To begin, take measurements at several points along the door edge (top, middle, and bottom) and compare them to one another. If you notice a significant difference between points, plan to adjust the corresponding bracket or track. Always ensure the door is fully closed and supported before measuring, and keep fingers clear of moving parts. Before adjusting anything, disconnect the opener and test manually to confirm you have manual control and no risk of unexpected movement. Document your baseline readings with photos; this makes it easier to evaluate progress after each adjustment.
Assessing the wall gap and door condition
Next, inspect the wall gap at several heights and locations along the door edge. Look for signs of wear on weatherstripping, bottom seals, and door panels. A worn seal or damaged gasket can exaggerate the perceived gap and give a false sense of misalignment. Check the vertical tracks for bending or loosened screws, and verify hinge connections are secure. If the wall gap varies dramatically from top to bottom or if the door drags against the wall at any point, you’ll need to adjust the corresponding area of the track or hinge. Use masking tape to mark measurements while you work so you can compare before and after. Remember: accuracy in this step will pay off in smoother operation later.
If you discover damaged components (cracked weatherstripping, bent tracks, or loose brackets), replace or tighten them before continuing. Do not attempt to force a poor fit; instead, address wear and structural issues first to ensure that any gap adjustment is meaningful and durable.
Safety first: do you need a pro?
Garage doors can be heavy and are controlled by springs and tracks. If your system uses torsion springs or you encounter persistent, unusual noise, it’s safest to involve a professional. Do not attempt to modify spring tension or any component that carries load beyond basic bracket and track alignment. If you’re unsure about your door’s balance or the path of travel, consult a qualified technician. The GarageDoorAdjust team recommends erring on the side of safety and prioritizing a known-good baseline before attempting refinements. When in doubt, get a professional inspection to prevent injury or property damage.
Tools, materials, and workspace setup
Prepare a clean, well-lit workspace with a sturdy ladder if needed. Gather the following essentials:
- Tape measure: for precise gap measurements at multiple points
- Chalk or pencil: to mark reference points on tracks or brackets
- Level: to verify tracks stay plumb during adjustments
- Wedge shims: to fine-tune track height or door edge alignment
- Adjustable wrench and screwdrivers: to loosen/tighten bracket screws and track bolts
- Safety glasses: to protect eyes from debris during adjustment
- Lubricant (silicone spray or lithium grease): to keep moving parts smooth
- Optional weatherstripping: for replacing worn seals if needed This setup supports accurate measurement and controlled adjustments while minimizing safety risks.
Measuring and planning your adjustment
Before touching hardware, establish a clear baseline: measure the gap at three or more points along the door edge (top, middle, bottom) and record each reading. Compare side-to-side and top-to-bottom to identify which area is most out of alignment. Plan adjustments in small increments—especially if you’re new to door work. Start with the side that has the larger gap and adjust by loosening the mounting bolts slightly, then shifting the track or hinge bracket away from that side to reduce the gap. Re-check with the level to ensure tracks remain vertical and plumb. Re-tighten once the desired alignment is achieved, then re-measure. This staged approach minimizes risk and helps you track progress accurately.
After adjustment: testing the seal and adjusting hardware
With the adjustment complete, gradually cycle the door by hand (and with the opener disconnected) to test the transition through the full travel. Look for even contact along the door edge and a consistent seal along the bottom of the door. If you notice new rub points or if the door still sits unevenly, repeat the measurement and adjustment steps, focusing on the area showing the largest deviation. Finally, inspect weatherstripping and bottom seals. If the seal is worn, replace it to improve insulation and reduce drafts. Document your final measurements and photos for future maintenance.
Authority sources
- Official safety guidelines: https://www.osha.gov
- Consumer safety information: https://www.cpsc.gov
- Home improvement guidance: https://www.familyhandyman.com
Tools & Materials
- Tape measure(Flexible 5-8 meters; metric conversions handy.)
- Pencil or chalk(For marking measurements on tracks or brackets.)
- Level(Keep tracks plumb during adjustments.)
- Wedge shims(For height/edge alignment adjustments.)
- Adjustable wrench(Loosen/tighten bracket screws and bolts.)
- Screwdrivers (Phillips and flathead)(Screw and bracket adjustments.)
- Safety glasses(Protect eyes from debris.)
- Step ladder(For reaching higher sections if needed.)
- Weatherstripping(Replace if worn or damaged.)
- Lubricant (silicone spray or lithium grease)(Keep moving parts smooth; avoid over-lubricating.)
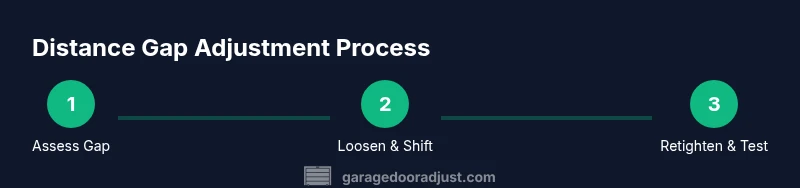
Steps
Estimated time: 30-60 minutes
- 1
Power down and secure the door
Unplug the garage door opener and physically lockout the door in the closed position if possible. This ensures there is no unexpected movement while you inspect and adjust. Safety is the top priority because a misbehaving door can cause pinch injuries or mechanical damage.
Tip: Double-check that the emergency release is disengaged so the door cannot move while you work. - 2
Baseline gap measurements
With the door closed, measure the gap at top, middle, and bottom along both sides. Record the readings and compare for consistency. A significant variation indicates where to focus your adjustments.
Tip: Mark the points with chalk so you can easily verify progress after each tweak. - 3
Loosen the mounting points slightly
Gently loosen the screws/bolts holding the track or hinge closest to the larger gap. Do not remove hardware completely. The aim is to allow small shifts without compromising safety or structural integrity.
Tip: Make very small, incremental adjustments—tiny changes yield big results. - 4
Shift the track or bracket
Move the track or hinge bracket toward the wall on the side with the larger gap to reduce contact, or away from the wall if the gap is too small. Re-check plumb with the level as you adjust.
Tip: Keep the movement smooth; avoid bending the track during adjustments. - 5
Re-tighten fasteners
Once you achieve the target alignment, re-tighten bolts and screws to secure the new position. Re-check the gap after tightening to confirm it remains consistent.
Tip: Avoid over-tightening; overtightening can warp tracks and cause binding. - 6
Assess bottom seal and weatherstripping
Inspect the bottom seal and side weatherstrips for wear. Replace any damaged seals to ensure the newly adjusted gap seals properly against drafts and debris.
Tip: If you replace weatherstripping, test the door to ensure proper sealing without sticking. - 7
Functional test of travel
Reconnect power (or re-engage the opener) and run the door through a few cycles by hand and with the opener. Look for even contact along the edge and listen for any rubbing or binding.
Tip: If you hear rubbing, pause and re-check alignment before continuing. - 8
Fine-tune if needed
If there is still an uneven gap, repeat steps 3-7 focusing on the section showing the largest variation. Small iterative adjustments reduce risk of overcorrection.
Tip: Document each iteration with photos for reference. - 9
Final assessment and documentation
Record the final gap measurements, hardware positions, and weatherstripping status. Take a finishing photo set for future maintenance and note any parts you may need to replace later.
Tip: Keep a maintenance log to simplify future repairs.
Got Questions?
What is the ideal distance between a garage door and the wall gap?
The goal is a small, even gap along the door edge that allows the weatherstripping to seal without binding. Avoid a wide, uneven gap that causes rubbing or draft leaks.
Aim for a small, even gap along the door edge to seal properly; if you notice rubbing, recheck the track alignment.
Can I adjust the wall gap myself if my garage uses torsion springs?
Torsion springs store a lot of energy and should not be adjusted by homeowners. If you suspect spring-related issues, contact a qualified technician.
If you have torsion springs, don’t try to adjust them yourself—call a pro.
Why does my door rub against the wall after adjustment?
Rubbing typically indicates an out-of-plumb track, misaligned hinge, or the need to reseat the bottom seal. Recheck track level and hinge fasteners.
Rubbing means something isn’t aligned right—check the tracks and hinges again.
Is it safe to test the door with the opener after adjustments?
Yes, but unplug the opener first to perform a manual check. Reconnect and test with caution, watching for any unexpected movement.
Make sure the opener is off during initial checks, then test slowly after you’re sure it’s stable.
How long should this process take for a typical door?
Most homeowners complete the adjustments in 30-60 minutes, depending on the door’s condition and how many areas require realignment.
Most people finish in half an hour to an hour, depending on how many areas need adjusting.
When should I call a professional?
If you encounter persistent misalignment, damaged tracks, bent brackets, or uncertain about spring safety, stop and contact a garage door professional.
If you’re unsure at any point, it’s safer to call a pro for a thorough inspection.
Watch Video
Quick Summary
- Measure gaps at multiple points for accuracy
- Only adjust non-spring hardware unless you’re trained
- Verify safety by testing travel slowly after each adjustment
- Replace worn weatherstripping to maintain a good seal