Distance Between Garage Door and Ceiling: A Practical Guide
Learn how to accurately measure the distance between your garage door and the ceiling, why clearance matters for safe operation, and practical steps to maintain proper headroom for tracks, springs, and maintenance.

By the end of this quick check, you will know the exact vertical clearance between your garage door and the ceiling, confirm adequate headroom for tracks and springs, and identify any obstructions. You’ll need a tape measure, level, and a ladder. The goal is safe, smooth operation and enough room for maintenance work.
What the distance between garage door and ceiling represents
The distance between the garage door and the ceiling, often referred to as vertical clearance, defines how much headroom you have above the closed door. This space matters for the smooth travel of tracks, rollers, and the torsion or extension spring system. A lack of clearance can cause components to ride high, bind, or wear unevenly over time. For homeowners, understanding this distance helps prevent costly repairs and ensures safe, dependable operation. According to GarageDoorAdjust, proper clearance reduces risk of track misalignment and spring wear, which translates to fewer trips to the repair shop and longer door life. Measuring this distance accurately is the first step in a proactive maintenance routine.
Why clearance matters for safety and operation
Clearance isn’t just about fitting a door inside a doorway. It affects how the door engages with tracks, how much space the header requires, and whether there’s room to maneuver tools for maintenance. If the ceiling is too close, you may experience rubbing, increased abrasion on hardware, and difficulty aligning tracks after adjustments. Conversely, excessive clearance can indicate misaligned tracks or an oversized ceiling space that invites wasteful airflow or insulation gaps. The GarageDoorAdjust Team emphasizes that balanced clearance supports reliable opening and closing cycles and reduces the risk of sudden jams during operation.
Common scenarios and how to assess your space
Most homes vary widely in ceiling height and wall-to-door geometry. Some garages have shallow ceilings, others feature tall spaces above the door opening. In tight spaces, even small changes in the ceiling height or track mounting angle can have outsized effects on clearance. Begin by identifying the fixed reference points: the top of the door, the ceiling, and the nearest obstruction (lighting, HVAC ducts, or joists). If you notice contact points during operation or large gaps above the door, you may need to re-evaluate the mounting height of tracks or adjust accessories. GarageDoorAdjust analysis shows many households overlook ceiling clearance, leading to unnecessary wear and repairs.
Tools and prep you’ll need before measuring
Before you measure, gather a tape measure, a sturdy ladder, a level, a pencil, and a notepad for recording data. Ensure the opener is unplugged if you’ll be near the motor or safety sensors, and confirm the door is fully closed before taking central measurements. A helper can hold the ladder steady and assist with taking measurements at different points. Mark the ceiling height with a piece of painter’s tape to create a clear reference point. Clear the area of any loose objects that might skew your measurements or create hazards during the test. This prep time saves you from re-checks later.
How to interpret your measurements and plan adjustments
Take measurements at the center of the door and at both sides where tracks meet the door. Compare the numbers you record to your door type and hardware specifications (which you can find in the manual or by contacting the manufacturer). If the measurements are consistently tight in one area, you may need to adjust track mounting, re-seat rollers, or re-level the header. If you see generous clearance in one zone but not the others, focus on the tight zones first. Remember that small changes can make a big difference in performance. The key is consistency across the width of the door and ensuring there’s room for any seasonal maintenance tasks.
When to consider professional help
If you observe persistent rubbing, unusual noises, or if any measurement falls outside typical operating ranges for your model, consult a qualified technician. A professional can verify whether ceiling height, track alignment, or spring tension is within safe limits and whether any components require replacement. The GarageDoorAdjust Team recommends annual checks of clearance as part of routine maintenance, especially after renovations or ceiling height changes. Do not attempt spring adjustments unless you are trained and equipped for it.
Quick checklist you can reuse for future measurements
- Door fully closed and tracks visible
- Ceiling reference point clearly marked
- Measurements taken at center and both track sides
- Obstructions cleared from door path
- All measurements recorded and compared to guidelines
Maintaining consistent clearance over time helps prevent misalignment, reduces wear, and supports safer operation. Regular checks also simplify DIY maintenance and late-night door tests when you’re juggling tools and lighting.
Final takeaway: keep clearance in mind during every repair
Understanding and maintaining the distance between the garage door and the ceiling is a simple but powerful way to extend door life and ensure dependable performance. Regular checks catch issues before they escalate, and small adjustments can restore proper clearances. The GarageDoorAdjust team believes that proactive measurement is a foundation of safe, long-lasting operation.
Tools & Materials
- Tape measure(At least 25 ft. for long garages; metric equivalents allowed)
- Sturdy ladder(Stable, tall enough to reach the center of the door height)
- Pencil(For marking ceiling height with painter's tape)
- Notepad or clipboard(Record multiple measurements and notes)
- Level(Helps verify track level during setup)
- Flashlight(Illumination for shaded corners along the tracks)
Steps
Estimated time: 20-40 minutes
- 1
Prepare the area and safety checks
Clear the doorway and surrounding area. Unplug the opener if accessible and ensure helpers are present to steady the ladder. Confirm the door is fully closed before taking measurements to avoid skewed results.
Tip: A helper keeps the ladder steady and helps you reach higher points safely. - 2
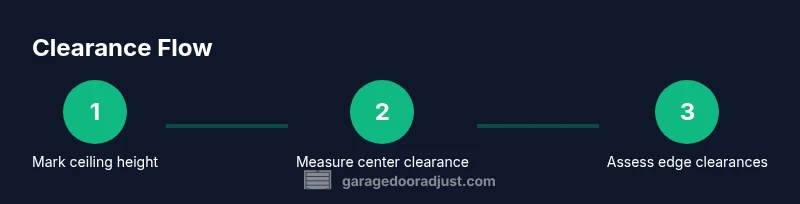
Mark the ceiling height at the door center
Stand under the door center with the ladder in a stable position. Use painter's tape to mark the point on the ceiling that aligns with the top edge of the closed door.
Tip: Mark both vertical reference lines at the door center and near the tracks. - 3
Take center clearance measurement
Extend the tape measure from the top of the closed door to the ceiling reference mark. Record the measurement precisely in inches or millimeters.
Tip: Take two measurements and average them for accuracy. - 4
Measure edge clearances
Repeat measurements at the left and right edges where the door meets the tracks. Compare with the center measurement to detect taper or misalignment.
Tip: If there is a significant difference between center and edges, inspect track mounting. - 5
Record, compare, and plan adjustments
Document all results and compare with your door’s guidelines. If clearance is tight, plan adjustments to tracks or header height with proper safety protocols.
Tip: Do not force components; small, measured changes are safer and more effective.
Got Questions?
What is considered adequate clearance between a garage door and the ceiling?
Adequate clearance varies by door type and hardware. In general, you want enough headroom to avoid contact with tracks, springs, and any maintenance tools. If you notice rubbing, binding, or unexpected sounds, recheck alignment and spacing before operating the door.
Clearance varies by door type; ensure there’s no contact with tracks or springs, and check for rubbing if you hear unusual noises.
Should I measure with the door closed or open?
Measurements are most accurate with the door fully closed, as that represents the actual headroom available during normal operation. Measuring with the door partially open can distort results because the geometry changes as the door moves.
Measure with the door fully closed to get a true clearance.
What if I don’t have enough clearance?
If clearance is tight, you may need to adjust track mounting height, realign tracks, or check the header. Do not attempt to modify springs or worn components without professional training. A professional can determine if a part replacement or ceiling modification is required.
If clearance is tight, adjust tracks or header; don’t modify springs yourself—call a pro if needed.
Can ceiling height changes impact garage door performance?
Yes. Changes to ceiling height or obstructions above the door can alter clearance and cause track misalignment. Re-evaluate after any renovation and ensure there’s still safe headroom for operation.
Yes, ceiling height changes can affect clearance; recheck after renovations.
How often should I recheck clearance?
Schedule a clearance check at least once a year, or anytime you notice a change in operation, noise, or if you’ve completed a ceiling upgrade. Regular checks catch issues early and extend door life.
Check clearance annually or after ceiling changes to protect performance.
Do I need to hire a professional for this work?
If you’re unsure about track alignment or spring tension, hire a licensed technician. Measuring clearance is straightforward, but adjusting heavy hardware and springs requires expertise for safety.
Consider a professional for anything involving springs or track adjustment.
Watch Video
Quick Summary
- Measure clearance with the door closed for baseline accuracy
- Record center and edge clearances to spot misalignment
- Keep a consistent headroom margin for maintenance and safety
- Call a professional if measurements indicate potential safety concerns