888lm Garage Door Diagnostics: Step-by-Step Home Guide
Learn to diagnose and repair your garage door with 888lm guidance. This step-by-step home guide covers common issues, safety tips, and practical troubleshooting.

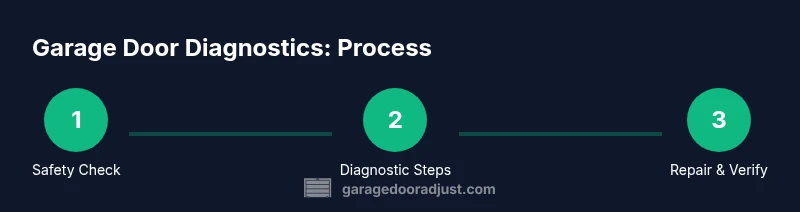
Using 888lm guidance, you will diagnose common garage door issues and verify safe operation without unnecessary guesswork. This quick-answer overview outlines the goal, essential safety steps, and the basic tools you need to start troubleshooting. By following the step-by-step process, homeowners can identify root causes, prioritize repairs, and decide when to call a professional for complex tasks.
Diagnostic Foundations for Garage Door Health
A solid diagnostic plan starts with understanding how your garage door should operate under normal conditions. With 888lm as your guide, you’ll learn to distinguish between symptoms caused by misalignment, worn rollers, dry hinges, or a tired opener. Begin by ensuring power is safely disconnected when you inspect exposed components, and only apply force in controlled directions to avoid stressing springs or tracks. A baseline understanding of door balance, track alignment, and spring health helps you prioritize repairs rather than guessing at root causes. This foundation also emphasizes safety first: never place yourself under a door that could drop unexpectedly, and always use a brace or brace system when testing manual operation. By documenting what you observe with clear notes, you’ll create a trail that makes future maintenance easier and safer.
Symptoms as Signals: What Your Door is Trying to Tell You
Doors give telltale signals when parts wear or misalign. A door that hesitates mid-travel may indicate binding rollers or track obstructions. A door that feels heavy or sticks during opening or closing suggests springs or balance problems. Clicking, grinding, or loud banging often points to worn hinges, loose hardware, or dry components. With 888lm, you’ll learn to categorize symptoms by probable causes, which streamlines your next steps. Keep a simple symptom log, capture photos of misaligned tracks, and note any changes after each test. This structured approach reduces trial-and-error and increases the likelihood of a successful DIY fix without compromising safety.
Safety and Preparation: The Non-Negotiables
Safety is the backbone of any garage door diagnostic process. Before you touch moving parts, unplug the opener and disconnect the battery backup if present. Wear eye protection, gloves, and sturdy footwear, and use a stable ladder for elevated tasks. Clear the area of pets and bystanders. Keep children away and never stand directly under a door while testing. As you prepare, organize your tools and lubrication in a designated workspace, and have a camera or phone ready to document before-and-after states. The 888lm approach emphasizes planning and spacing—breaking complex tasks into smaller, safer checks that you can complete in shorter bursts.
Visual Inspection: What to Look For Up Close
A thorough visual inspection often uncovers the root cause. Look for bent tracks, loose screws, tarnished springs, or cracked or worn rollers. Check door balance by lifting the door manually with the opener disconnected; it should feel light and balanced. Inspect the hinges for cracks or rust, and examine weather seals for wear. When you identify a potential issue, switch to a more detailed test only after ensuring all safety steps are in place. This section sets the stage for the hands-on steps that follow, and it helps you avoid unnecessary disassembly.
Electrical Checks and Opener Basics
Electrical checks ensure the opener itself isn’t failing. Verify that the wall switch and remote operate correctly, re-pair remotes if needed, and test auto-reverse with a safe test object like a short cardboard. If the door reverses on contact with the test object, the safety sensors are likely functioning, but you should still verify alignment and sensor cleanliness. If problems persist after safety checks, you may be dealing with a failing opener logic board or a power issue. Always consult the manual for specific reset procedures and reach out for professional evaluation if you suspect a component beyond basic maintenance.
Maintenance and Prevention: Keeping It Running Smoothly
Preventive maintenance saves time and money. Create a quarterly routine that includes cleaning tracks, lubricating moving parts with a silicone-based lubricant, and tightening hardware. Wipe down weather seals to maintain insulation and reduce drafts. Regularly inspect springs and cables for wear, corrosion, or fatigue, and replace worn components before they fail suddenly. The 888lm framework encourages homeowners to log maintenance dates, track part life, and plan replacements in advance. By prioritizing small, consistent adjustments, you reduce the risk of major failures and extend the life of the door and opener.
Tools & Materials
- Safety glasses(Protect eyes from debris and springs; ANSI Z87.1 compliant if possible)
- Work gloves(Grip and protect hands; cut-resistant preferred)
- Stepladder(Stable ladder tall enough to reach tracks safely)
- Non-marring mallet(For gentle adjustments without damaging parts)
- Screwdriver set (Phillips and flathead)(For track hardware and hinge screws)
- Socket wrench set(Useful for adjusting bolts and fittings)
- Lubricant (silicone spray or lithium grease)(Lubricate hinges, rollers, and tracks; avoid oil on nylon components)
- Cloth or rags(Clean surfaces before lubrication and inspection)
- Voltage tester (non-contact)(Safe power checks for opener wiring)
- Smartphone or camera(Document before/after states for reference)
Steps
Estimated time: 60-90 minutes
- 1
Verify safety and prepare tools
Before any inspection, unplug the opener and disconnect batteries if present. Set up a stable brace for manual testing and organize your tools within reach. This initial step prevents accidental door movement and ensures you can work safely across the entire process.
Tip: Never skip safety gear; a quick safety check saves time later. - 2
Test door balance with opener disconnected
With the door supported and the opener disengaged, lift the door halfway and release. It should stay balanced with only light resistance. If it drops or rises quickly, springs or balance components may be worn or misadjusted.
Tip: Balanced doors feel light to lift; imbalance is a warning sign. - 3
Inspect tracks, rollers, and hinges
Examine tracks for dents, misalignment, or obstruction. Check rollers and hinges for wear or rust. Tighten loose screws and remove debris from the track to restore smooth movement.
Tip: Use a flashlight and wipe tracks clean before adjusting. - 4
Check opener operation and safety features
Reconnect power and test the opener with a short cycle. Verify auto-reverse using a test object and ensure safety sensors align and function. If the door doesn’t reverse properly, don’t force it further.
Tip: Sensor misalignment is a common cause of false safety trips. - 5
Inspect cables and hardware for wear
Look for frayed cables, bent brackets, or loose linkage. Do not attempt to adjust high-tension cables; note wear and plan replacement when necessary.
Tip: Never work under a door suspended by faulty cables. - 6
Lubricate moving parts
Apply silicone-based lubricant to hinges, rollers, and tracks. Wipe away excess to avoid attracting dirt. Lubrication reduces friction and prolongs component life.
Tip: Avoid oil-based lubricants on nylon rollers. - 7
Address noises and misalignment
Tighten loose hardware and recheck alignment. If noises persist after tightening, suspect worn components and plan replacements. Re-test door movement to confirm improvements.
Tip: Small adjustments can fix most squeaks and binding. - 8
Document findings and plan next steps
Record observations, parts replaced, and future maintenance dates. Create a simple action plan for upcoming weeks so you don’t lose track of required tasks.
Tip: A maintenance log helps you track life expectancy and plan budgets.
Got Questions?
What is 888lm, and how does it apply to garage door diagnostics?
888lm refers to a practical framework for step-by-step guidance in home repair. In this article, it guides homeowners through diagnostics, safety checks, and routine maintenance for garage doors, helping you identify root causes and decide when to DIY or call a professional.
888lm provides a clear, step-by-step approach to garage door diagnostics so you can troubleshoot safely and efficiently.
Is it safe to diagnose a garage door issue by myself?
You can perform many basic checks if you follow safety protocols: disconnect power, wear protective gear, and avoid high-tension components. If you encounter springs, cables, or structural damage, contact a professional.
DIY is possible for safe diagnostics, but leave high-tension components to pros.
What basic tools do I need for diagnostics?
Essential tools include safety glasses, gloves, a stable ladder, screwdrivers, a socket set, a flashlight, and lubricant. A camera helps document changes for reference and future maintenance.
A basic toolkit plus a camera keeps you prepared for most common checks.
How long does a typical diagnostic take?
A thorough DIY diagnostic with checks and lubrication usually takes about 60 to 90 minutes, depending on door condition and accessibility. Plan for extra time if you encounter stubborn hardware.
Most DIY diagnostics take about an hour or so, with longer times if parts need replacement.
When should springs be replaced?
Springs should be replaced when they show signs of wear, deformation, or inconsistent tension. Because springs are dangerous, consult a pro if you suspect fatigue or damage.
If you see wear or fatigue in springs, call a pro for safety and proper sizing.
Can I reprogram the opener after repairs?
Yes. After any repairs that affect the opener, re-pair remotes and follow the owner's manual steps to calibrate travel, limits, and safety features.
Yes, you can reprogram the opener after repairs by following the manual’s pairing steps.
Watch Video
Quick Summary
- Identify root causes with a structured diagnostic plan
- Prioritize safety and document observations
- Follow step-by-step checks for predictable results
- Know when to call a pro for high-tension components
- Maintain a routine to extend door and opener life