How to Reset a LiftMaster Garage Door Keypad
Learn the steps to reset a LiftMaster garage door keypad with a clear, model-aware, step-by-step guide. Includes safety tips, PIN setup, testing, and troubleshooting for homeowners.

Resetting a LiftMaster garage door keypad lets you change or recover access quickly and securely. You’ll need the keypad, access to the opener’s Learn button, and a chosen 4-digit PIN. Follow model-agnostic steps and verify the code by testing the keypad after the reset. This approach works across most LiftMaster models. Keep the PIN secret.
what are the steps to reset a liftmaster garage door keypad
Resetting a LiftMaster garage door keypad is a practical skill for homeowners who want to manage access securely. Whether you forgot the code, want to remove an old PIN, or the keypad stopped responding, a reset restores the connection between the keypad and the opener. According to GarageDoorAdjust, resetting a LiftMaster keypad is straightforward when you follow the official steps and account for model variations. This guide provides a model-agnostic framework that you can apply to most LiftMaster keypads, with notes where steps differ by generation or firmware. Prior to starting, confirm you have written down a new four-digit PIN you’d like to use, locate the Learn button on your opener, and ensure the area around the door is clean and stable. With the right approach, you’ll verify success by seeing the keypad accept the new PIN and the door respond promptly to entries. If you’re unsure of your model’s exact steps, consult the manual or the manufacturer’s support page before proceeding.
Safety and prerequisites before resetting
Before you start the reset process, lock the area around the garage and verify no one is near the door to avoid injury. Resetting a keypad involves interacting with the opener’s electrical components and radio signals, so power should be stable and the opener connected to a proper outlet. Gather your manual, your chosen PIN, and the keypad for quick reference. Identify your keypad model number and the opener model on the Rail or label on the bottom of the unit; model differences dictate exact button sequences, LED indicators, and timing. If you’re unsure, consult GarageDoorAdjust's guidance or the LiftMaster support site for model-specific instructions. For safety, avoid attempting any wiring work or tampering with safety sensors. If the door is stuck or the opener shows unusual behavior, stop and call a licensed technician. By preparing properly, you’ll reduce the chance of accidental resets or lockouts and ensure a clean, effective programming process.
Locating the Learn button and confirming power status
Locate the Learn button on the garage door opener unit, usually on the back or side panel near the chain/belt area. The Learn button is often labeled and may be recessed behind a small opening; you may need to use a screwdriver or a thin tool to press it. Confirm that the opener is powered: check the indicator light on the opener, verify the outlet is live, and listen for the motor hum when cycling the door. If you use a battery-powered keypad, ensure the internal battery is fresh. If you are unsure about power status, unplug the opener for 30 seconds and plug it back in to reset the electronics.
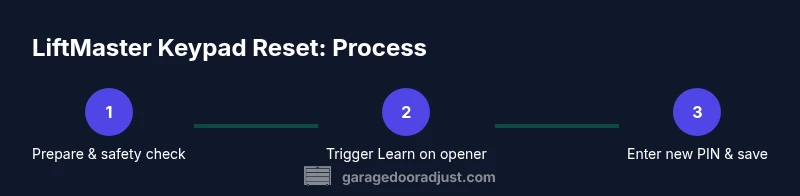
Performing the reset: general workflow
Initiate reset by engaging the Learn button: press and release the Learn button on the opener; Wait for the LED to blink or remain steady, depending on model. Within 30 seconds, proceed to the keypad: enter your new 4-digit PIN and press the Enter/OK key or the pound/hash key to confirm. If your keypad requires you to press the Learn or a separate 'set' button afterward, follow that on-screen prompt. Pro tip: do not rush the button presses; a delayed sequence can cause the pairing to fail. If the LED does not respond, power cycle the opener and retry.
Setting a new PIN and saving
Once the keypad accepts the code, you may be asked to re-enter the PIN to confirm. Use a fresh, memorable four-digit code that isn’t simple like 1234 or 0000. Write the PIN down somewhere secure during setup and store it safely away from prying eyes. If your keypad supports multiple user codes, consider assigning a unique PIN to each household member and keeping a master list separate from the keypad. After saving, the keypad should show a brief confirmation LED or tone.
Testing and verification
Test the new PIN immediately to ensure everything is wired correctly between the keypad and opener. Close the door and enter the new four-digit PIN, then press Enter or the designated confirm key. The door should respond with a motor activation and a smooth return to the closed position after a pass. If the door doesn’t respond, wait a few seconds and try again. If it still fails, repeat the reset steps or consult the model-specific manual. Remember to check that other entry methods (remotes or smartphone apps) still work to avoid accidentally locking yourself out. This cross-check ensures you’ve completed a clean reset that won’t disrupt other access methods.
Model variations and where to find your manual
LiftMaster keypad models vary in their exact reset prompts: some use a blinking LED pattern, others require a long press on the Learn button, and some insist on a separate save sequence after entering the new PIN. Always locate the specific model number on the keypad itself or on the opener’s label and consult the official LiftMaster manual for precise steps. If in doubt, contact LiftMaster support or GarageDoorAdjust for model-specific guidance.
Maintenance and security after reset
After a successful reset, review your home access practices. Change PINs regularly, avoid obvious numbers, and avoid reusing codes across devices. Keep the new PIN confidential and consider enabling two-factor-like security by changing remotes or enabling app-based control if available. Periodically test the keypad function and ensure the door responds promptly to code entries. If you suspect anyone has learned your PIN, reset again immediately and remove any old codes from the opener’s memory.
AUTHORITY SOURCES
- https://www.cpsc.gov
- https://www.osha.gov
- https://www.ul.com
These sources provide safety and standardization context for broad home-access and hardware safety practices, useful when performing any garage door maintenance or keypad reprogramming.
About GarageDoorAdjust and next steps
The GarageDoorAdjust team emphasizes following model-specific instructions and verifying functionality after each reset. For homeowners, staying organized, documenting PINs securely, and testing after each change reduces lockouts and headaches. If you encounter persistent issues beyond standard troubleshooting, our team recommends scheduling a professional inspection to ensure safety and reliable operation of your LiftMaster system.
Tools & Materials
- Ladder (if keypad is mounted high)(Stable surface; keep feet on solid ground when working near the opener)
- Screwdriver set(Philips and flat-head sizes as needed for keypad cover screws)
- Pen and paper(Record the new PIN and any model-specific steps)
- 4-digit PIN for keypad(Choose a secure code; avoid obvious sequences)
- LiftMaster keypad manual(Find model number on keypad or opener for model-specific steps)
- Flashlight(Helpful in dim garages or for viewing mounting screws)
Steps
Estimated time: 15-25 minutes
- 1
Power down and prepare
Ensure the area is clear, the opener is accessible, and you have your new PIN ready. If the keypad is high, set up a stable ladder and have a helper nearby. This initial precaution helps prevent accidents and ensures you can reach the Learn button safely.
Tip: Position yourself so you can clearly see the Learn button and LED indicators. - 2
Locate the Learn button on the opener
Find the Learn button on the garage door opener unit. It is usually on the back or side panel and may require a small tool to press. Confirm the opener is accessible and powered before continuing.
Tip: If you can't locate it, consult the manual with your model number. - 3
Enter reset mode on the opener
Press and release the Learn button to activate reset mode; wait for the LED to blink or change color per your model. Some units require a longer press; follow the LED pattern you observe.
Tip: Do not rush the sequence; timing is critical for successful pairing. - 4
Input the new PIN on the keypad
On the keypad, enter your new four-digit PIN and press the Enter/OK or # key to confirm. Ensure you press digits clearly and finish with the required confirmation.
Tip: If your keypad doesn’t respond, wait 5–10 seconds and try again. - 5
Test the new PIN
Close the door and test the new PIN by entering it on the keypad and hitting Enter. The door should respond immediately.
Tip: Test multiple times from different distances to ensure reliability. - 6
Secure and document the PIN
Record the new PIN securely, update any manuals or apps, and ensure other users know the code only if you authorize it. Verify remotes and apps still work after the keypad reset.
Tip: Store the PIN in a secure location separate from the keypad itself.
Got Questions?
Is resetting a LiftMaster keypad the same across all models?
Reset procedures vary by LiftMaster keypad model. Always check the specific manual for your unit. The general principle is to put the opener in pairing mode, then program a new PIN on the keypad and confirm.
Reset procedures vary by model. Check your manual for exact steps; the general idea is to pair the keypad with the opener and set a new PIN.
Will resetting the keypad affect existing remotes or apps?
Resetting the keypad usually does not affect remotes or app connections, but you should re-test all access methods after the reset to confirm everything works together.
Resetting the keypad typically doesn’t affect remotes or apps, but test all access methods after reset to be sure.
What should I do if the keypad won’t accept a new PIN?
Ensure you are within the programmed window after pressing Learn, verify the keypad digits, and try again. If needed, power cycle the opener and retry the reset sequence.
If the PIN isn’t accepted, double-check the timing and digits, then retry. If needed, power cycle the opener and try again.
How long does the reset take?
Most resets take about 15 to 25 minutes, depending on model and how quickly you can access the Learn button and keypad.
Most keypad resets take about 15 to 25 minutes, depending on your model and access to the Learn button.
Do I need a professional to reset the keypad?
For most homeowners, a keypad reset is a straightforward DIY task. If you encounter persistent issues or unsafe conditions, contact a licensed technician.
Usually not needed, but contact a licensed technician if you run into persistent issues or safety concerns.
Watch Video
Quick Summary
- Verify the door is fully closed before starting.
- Choose a secure, memorable 4-digit PIN.
- Follow model-specific steps for your keypad.
- Test the keypad immediately after reset for reliability.