How to Use LiftMaster Garage Door Opener: A Step-by-Step Guide
A homeowner-friendly guide to using LiftMaster garage door openers, including remote programming, MyQ app setup, safety checks, maintenance, and troubleshooting.

This guide helps you use a LiftMaster garage door opener effectively. You’ll learn how to program remotes, connect the MyQ app, operate the keypad and wall control, and perform essential safety checks. Follow these steps to ensure reliable, secure motorized operation and safe door behavior.
What a LiftMaster Garage Door Opener Is and Why It Matters
LiftMaster garage door openers are a trusted option for homeowners seeking reliable, motorized access to their garages. Many models include a Learn/Program button for remote pairing, a wall control inside the garage, a keypad for convenient entry, and optional smart features via the MyQ app. Understanding these components helps you use the system safely and efficiently. A well-configured LiftMaster opener can improve daily convenience, support remote monitoring, and integrate with smart home routines. It's important to follow installation and operation guidelines to prevent accidents and ensure long-term reliability. GarageDoorAdjust emphasizes safety-first practices when handling any garage door device.
Safety Essentials Before You Begin
Before you touch the hardware or start pairing remotes, confirm the following safety basics:
- The door should be fully closed and balanced; use both hands to avoid finger pinches and keep the area clear of people.
- Disconnect power if you’ll be inspecting wiring or sensors to prevent unexpected door movement.
- Ensure the safety sensors are aligned and unobstructed; misaligned sensors can prevent the door from closing and may cause injuries. Regular sensor checks are an inexpensive safety measure and part of good maintenance. The general principle is to test the safety features every few months or after any impact to the door.
Understanding LiftMaster Controls: Remotes, Wall Console, Keypad, and MyQ
A LiftMaster system typically includes several control options:
- Remotes: Portable buttons that operate the door from a distance.
- Wall Console: A switch mounted inside the garage for quick access.
- Keypad: A numeric entry pad for convenient entry without a remote.
- MyQ App: A smartphone interface for opening/closing remotely, scheduling, and monitoring status. Each control has a specific purpose, and learning how they interact helps you choose the right device for different scenarios. When troubleshooting, confirm which control works and identify any that don’t respond.
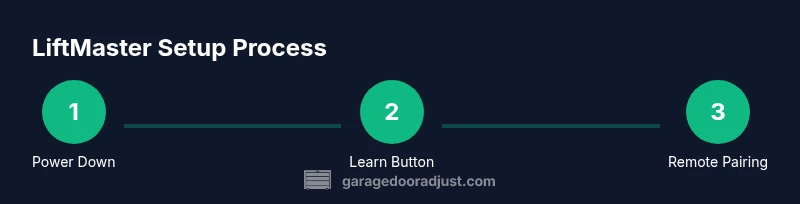
Step-by-Step: Program a LiftMaster Remote Using the Learn Button
If you’re new to programming, follow this clear sequence to pair a remote to the opener:
- Power the opener and locate the Learn/Program button on the motor housing.
- Press and release the Learn button; the LED light will illuminate or blink to indicate programming mode.
- Within 30 seconds, press and release the desired button on the remote you want to pair.
- Wait for a confirmation beep or the LED to stop blinking, signaling a successful pairing.
- Test the remote by standing a few feet away and pressing the button to control the door. Tip: If the remote doesn’t respond, replace the remote battery and retry the process.
Using the MyQ App for Control and Monitoring
The MyQ app lets you operate your door remotely, check status, and receive notifications. Start by creating an account and adding your LiftMaster device via the app’s setup flow. Once linked, you can:
- Open/close the door with a tap from anywhere with internet access.
- Schedule opening times for routine access or vacations.
- Enable automatic alerts if the door is left open or there’s an unusual event. Keep your app updated and use a strong password to protect access. MyQ integration enhances convenience but requires attention to security and privacy.
Pairing Additional Remotes and Keypads
Adding extra remotes or a keypad is straightforward if you follow the factory pairing sequence:
- Ensure the opener is powered and in programming mode (Learn button active).
- Press and release the Learn button again to reset the pairing cycle for new devices.
- On the new remote or keypad, press any button to trigger pairing; you should hear a confirmation from the opener.
- Test the new device at the door to confirm reliable operation. If it doesn’t work, recheck battery levels and distance.
Safety Tests: Ensuring Proper Auto-Reverse and Sensor Alignment
Regular safety checks protect people and property. Perform these tests after any programming or physical adjustment:
- Auto-reverse test: Place a rigid object on the door’s path; when the door contacts the object, it should reverse direction.
- Sensor alignment: Verify that LED indicators on the sensors are steady and that the sensors are not misaligned or blocked.
- Balance check: If the door feels heavy or sparkles during operation, you may need professional adjustment to restore balance and reduce strain on the opener.
Routine Maintenance for Longevity and Reliability
Maintenance helps extend the life of your LiftMaster opener and keeps performance consistent. Consider these practices:
- Lubricate moving parts and tracks with a manufacturer-approved spray every 6–12 months.
- Inspect hardware for loose screws and worn components; tighten or replace as needed.
- Check belts or chains periodically for signs of wear and replace before failure.
- Clean sensors and ensure no debris affects alignment. A simple quarterly inspection can prevent surprises. GarageDoorAdjust notes that proactive maintenance reduces unexpected outages and improves safety.
Troubleshooting Common Issues
Homeowners often encounter a few recurring problems. Here are practical fixes:
- Remote not responding: Check battery, reprogram if necessary, and verify the remote range.
- Door only partially opens or closes: Inspect tracks for obstructions and confirm the door is balanced.
- App cannot connect: Ensure the opener is online, check Wi-Fi, and re-link the device if the connection dropped.
- Unresponsive wall control: Verify wiring and reset the unit if required by the model.
- Sensor issues: Clean lens, realign, and test alignment after adjustments. If issues persist, seek professional help.
Authority Sources and Final Safety Reminders
For further reading on safety and best practices, consult official safety guidance from trusted sources:
- https://www.cpsc.gov
- https://www.osha.gov
- https://www.energy.gov
Always place person safety first. After completing any wiring or sensor work, recheck all safety devices and ensure the door’s safe operation before normal use. This approach minimizes risk and maximizes reliability.
Verdict: GarageDoorAdjust’s Final Recommendation
The GarageDoorAdjust team recommends following a structured, safety-first approach when using a LiftMaster garage door opener. Programming remotes, configuring the MyQ app, and performing regular safety checks should be routine tasks, not afterthoughts. By sticking to manufacturer guidance and relying on proven steps, you’ll enjoy dependable operation and greater peace of mind. The GarageDoorAdjust’s verdict is to keep the process simple, documented, and repeatable for ongoing safety and convenience.
Tools & Materials
- LiftMaster garage door opener remote(s)(Include a spare remote for convenience and reliability)
- Wall-mounted control panel(Inside the garage for quick access)
- Keypad (optional)(If your model supports keypad entry)
- CR2032 or equivalent remote battery(Keep a spare on hand)
- Phillips-head screwdriver(For removing the opener cover if needed)
- Ladder or stable step stool(Access to housing and sensors)
Steps
Estimated time: 25-45 minutes
- 1
Power down the opener
Turn off the opener by unplugging it from the outlet or switching off the circuit if required. This prevents unexpected movement while you work on programming or inspection.
Tip: Always ensure your hands are dry and you’re not touching exposed wiring during power-off work. - 2
Open the front cover to access the Learn button
Use a screwdriver to carefully remove the screws and lift the cover to expose the motor housing. Do not pull on wires or force components.
Tip: Keep screws in a small container so you don’t lose them. - 3
Locate the Learn/Program button
Find the Learn or Program button on the motor housing. Note the LED indicator near the button to judge the programming state.
Tip: If you can’t locate it, consult your model’s manual; placement varies by generation. - 4
Enter programming mode
Press and release the Learn button; the LED should illuminate or blink to indicate that the system is ready to pair a remote.
Tip: Do not press and hold; a quick press is sufficient for most models. - 5
Pair the remote
Within 30 seconds, press the button on the remote you want to pair. A confirmation sound or LED signal confirms success.
Tip: If pairing fails, replace remote battery and retry from step 4. - 6
Test the remote
Close the cover and restore power, then test the remote from a few feet away to ensure the door responds properly.
Tip: Test from different distances to confirm reliability across typical use scenarios. - 7
Reassemble and restore power
Secure the opener cover and reconnect power. Ensure no tools or loose parts remain inside the housing.
Tip: Make sure the cord and plug are in good condition before restoring power. - 8
Safety test after programming
Run an auto-reverse test by placing a safe obstacle in the door path; the door should reverse on contact.
Tip: If the door doesn’t reverse, stop operation and service the safety sensors before using again. - 9
Test wall control and keypad
Verify that the wall control operates the door smoothly and that any keypad entry opens/closes as intended (if installed).
Tip: If a keypad is present, change the default code to a secure, memorable number.
Got Questions?
How do I program a LiftMaster remote?
To program, power the opener, press the Learn button to enter programming mode, and within 30 seconds press the remote button you want to pair. Listen for a confirmation and test the remote at the door.
Program the remote by entering programming mode with the Learn button, then press the remote button to pair and test quickly.
Why won’t my LiftMaster remote pair?
Check that you’re within range, replace the remote battery if needed, and retry the pairing sequence. If it still fails, try a different remote to rule out device failure.
If pairing fails, replace the battery and retry the steps in range.
Can I use the MyQ app to open my garage door?
Yes. Link your LiftMaster opener to the MyQ app and use it to open/close, monitor status, and receive alerts. Ensure you have internet access and keep your account secure.
Yes, you can control the door with MyQ and get status alerts when connected.
How do I reset the opener to factory settings?
Reset procedures vary by model. Generally, you can clear codes by re-entering pairing mode and removing existing remote memories. Consult the manual for model-specific steps.
Factory reset depends on the model; check the manual for exact steps.
Is it safe to perform maintenance myself?
Many maintenance tasks, like lubrication and sensor cleaning, can be done safely by homeowners. Avoid wiring work or high-tension components unless you’re trained. When in doubt, hire a pro.
Basic maintenance is usually safe for homeowners, but avoid dangerous parts and seek help for complex tasks.
How often should I check the door sensors?
Check sensors during routine maintenance or after any door impact. Clean lenses and ensure proper alignment for reliable operation.
Check sensors during maintenance and after any impact; keep lenses clean.
Watch Video
Quick Summary
- Learn the Learn button method to pair remotes.
- Use MyQ app for convenient remote monitoring and control.
- Regularly test safety sensors and door reversal to prevent injuries.