Myliftmaster Setup Guide: Step-by-Step for LiftMaster Openers
Learn how to install, connect, and troubleshoot myliftmaster features with LiftMaster garage door openers. This step-by-step guide covers app setup, safety sensors, remotes, and ongoing maintenance for homeowners.

This guide shows homeowners how to set up myliftmaster with LiftMaster garage door openers, connect the MyLiftMaster app, program remotes, and verify safety sensors. You’ll learn the essential tools, safety precautions, and the exact steps to complete the setup efficiently. Follow along to get a responsive, secure, and well-maintained system.
Why myliftmaster matters for your garage
The term myliftmaster refers to the ecosystem of features offered by LiftMaster that connect your garage door opener to Wi‑Fi and the MyLiftMaster (MyQ) app. When homeowners adopt myliftmaster, they gain remote operation, real‑time status, and alerting for door position, all from a single interface. The GarageDoorAdjust team has found that a properly configured myliftmaster setup improves reliability and security by enabling you to monitor door activity from anywhere. In practice, this means you can check if the door is down after leaving home, receive maintenance reminders, and customize access for family members. Consistent use of myliftmaster also simplifies routine maintenance because you’ll receive firmware prompts and diagnostic tips that help prevent surprises like a stuck door or sensor misalignment. For best results, treat myliftmaster as an ongoing system, not a one‑time install, and stay mindful of compatibility with your specific LiftMaster opener model.
Tools, safety prerequisites, and planning
Before you begin, gather the essential items and review safety basics. Working on or near a live garage door can be hazardous, so follow the manufacturer’s safety recommendations and wear eye protection if you’re reaching sensor alignment or replacing hardware.
Key planning steps include confirming your opener model supports myliftmaster features, ensuring you have stable Wi‑Fi, and identifying where you’ll place the control devices for convenient access. The MyLiftMaster ecosystem relies on the opener’s compatibility with the Wi‑Fi module and cloud services, so confirming compatibility reduces troubleshooting later. If you have an older opener, you may need a module upgrade, which is safer to discuss with a garage door professional. With the right planning, you’ll minimize frustration and reduce repeated trips to the hardware store.
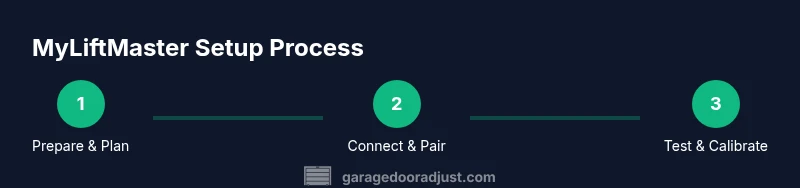
Quick-start overview for setting up myliftmaster
This section provides a high‑level map of the setup process without repeating the step-by-step instructions. You’ll verify power to the opener, ensure the safety sensors are aligned, connect the device to your home network, and pair remotes or keypads. Expect to test door limits and auto‑close settings, then sign in to the MyLiftMaster app to complete configuration. The goal is a fully integrated system where the door responds reliably to app commands, remotes, and voice assistants if you use compatible devices. Throughout, keep an eye on the myliftmaster status indicators so you can catch misalignment or communication issues early.
Connecting myliftmaster to Wi‑Fi and the app
A robust Wi‑Fi connection is the backbone of myliftmaster. Start by powering up the gateway or Wi‑Fi module that interfaces with your LiftMaster opener. Open the MyLiftMaster app and follow the prompts to add a new device, selecting your home network and entering the security credentials. If your network uses 2.4 GHz only, ensure the device supports it, as 5 GHz often doesn’t reach the garage reliably. Once connected, you’ll see status indicators showing online status and firmware version. From here you can label the device, set preferred naming, and enable notifications for door movement, battery changes, or sensor faults. Remember to test the integration by issuing a test command from the app and confirming the door responds within a few seconds.
Reprogramming remotes and keypad for myliftmaster
Reprogramming remotes or a keypad is a common maintenance task when you add or replace devices in your garage. Start by erasing old codes if needed to prevent conflicts, then put the opener into programming mode as described in your manual. Hold the new remote button until the indicator light signals success, then test from different locations in your garage. If using a keypad, ensure you’ve chosen a secure entry code and confirm the keypad is properly mounted at an accessible height. Accurate programming ensures that all entry points work reliably and that myliftmaster responds correctly to each device, keeping your home secure.
Safety sensor alignment and calibration for myliftmaster
Safety sensors are a critical safety feature. If a door won’t close fully or reverses unexpectedly, check the alignment of the infrared sensors on each side of the door track. Use a small level to ensure the sensors face each other directly, with the LED indicators indicating a clear path. If light beams are blocked, clean the lenses and adjust mounting screws gently until the signal is uninterrupted. Re-test by initiating a close command from the app or remote. Proper alignment reduces nuisance closings and improves overall safety. This is a common source of trouble for many LiftMaster users upgrading to myliftmaster, so take your time here.
Common problems and quick fixes for myliftmaster
No system is perfect, but most hiccups with myliftmaster are easy to diagnose with methodical checks. If the app shows a device offline, verify the Wi‑Fi signal at the garage and re‑pair the device. For unreliable remote performance, reprogram the remotes or replace the batteries. If you notice delayed responses, check the internet connection and ensure the opener firmware is up to date. In some cases, resyncing the app with the opener fixes latency. Regularly reviewing sensor alignment and door balance helps prevent repetitive faults and prolongs the life of your LiftMaster opener.
GarageDoorAdjust emphasizes documenting each change you make during the setup so you can reverse if something doesn’t work as expected. By staying organized you’ll reduce downtime and avoid confusion about which step caused a particular improvement.
Maintenance and long‑term care for myliftmaster systems
Ongoing maintenance keeps your myliftmaster functioning smoothly. Schedule periodic firmware checks via the app and apply updates promptly when available. Clean the sensors and the mounting hardware to prevent debris from causing misreads. Test the door balance monthly and lubricate moving parts per the manufacturer’s recommendations to preserve efficiency and quiet operation. With regular attention, your myliftmaster setup remains reliable for years, providing peace of mind and consistent performance.
Tools & Materials
- Power drill with appropriate bits(For mounting sensors or mounting brackets if needed)
- Screwdrivers (Phillips and flathead)(Set of sizes #1 and #2 for hardware changes)
- Voltage tester or multimeter(Check electrical connections safely)
- Ladder or stable step stool(Access to ceiling-mounted components)
- Level and measuring tape(Ensure sensors are precisely aligned)
- Silicone spray or lubricant suitable for garage doors(Lubricate springs, rollers as recommended)
- Mobile device with MyLiftMaster app installed(For pairing and control)
- Wi‑Fi router with 2.4 GHz band(Necessary for app connectivity)
- Replacement batteries for remotes(Keep spares handy)
- Safety gloves and eye protection(Protect hands and eyes during adjustments)
Steps
Estimated time: 60-90 minutes
- 1
Prepare the opener and workspace
Power down the opener, clear the area, and inspect for any visible damage. Gather tools and confirm you have a stable ladder. This reduces the risk of accidents during wiring or mounting tasks.
Tip: Double-check that the door is in the fully closed position before starting. - 2
Verify compatibility and network readiness
Confirm your LiftMaster model supports myliftmaster features and ensure your Wi‑Fi network is 2.4 GHz. A stable network speeds up pairing and reduces disconnects during use.
Tip: Move the router closer to the garage or use a Wi‑Fi extender if the signal is weak. - 3
Power the device and put the opener into pairing mode
Connect the Wi‑Fi module or gateway, then activate pairing mode on the opener as directed by the manual. You’ll typically hold a pairing button until an indicator flashes.
Tip: Do not press multiple pair buttons at once to avoid conflicts. - 4
Add the opener to the MyLiftMaster app
Open the app, choose add device, and follow prompts to connect to your home network. When successful, the opener shows as online with firmware details.
Tip: Label the device clearly in the app for future reference. - 5
Program remotes and keypad
Enter programming mode on the opener, then press and hold the remote button until the LED confirms. For a keypad, enter your chosen code and test.
Tip: Test from various distances for reliability. - 6
Check and align safety sensors
Inspect sensor lenses for dirt, align them with a small level, and verify the indicator lights. Realign if beams are not aligned or if the status shows blocked.
Tip: Clean lenses gently with a soft cloth before rechecking. - 7
Test door limits and auto-reverse
Use the app and remotes to test open/close limits and auto-reverse. Adjust travel limits per your door height and weight, ensuring safe operation.
Tip: Be near the door while testing so you can act quickly if something goes wrong. - 8
Finalize setup and document
Review all settings in the app, enable notifications, and save your preferred names and codes. Create a quick reference sheet for future maintenance.
Tip: Back up remotes' codes and app settings in a safe place.
Got Questions?
What is myliftmaster and why should I use it with LiftMaster openers?
myliftmaster is a connected ecosystem that links your LiftMaster opener to the MyLiftMaster app, enabling remote control, status monitoring, and notifications. It helps homeowners manage door activity more conveniently and securely.
myliftmaster connects your LiftMaster opener to the app so you can control and monitor your door from anywhere. It improves safety and convenience.
Do I need a new opener to use myliftmaster?
Some older LiftMaster models support myliftmaster with the appropriate Wi‑Fi module. Check your model’s compatibility in the manual or on LiftMaster’s support site. If needed, upgrading the module or the opener ensures full feature access.
Compatibility depends on your model; many units work with a Wi‑Fi module, but verify first before upgrading.
How do I connect myliftmaster to Wi‑Fi?
Install the MyLiftMaster app, select add device, choose your Wi‑Fi network (2.4 GHz), and follow prompts to pair. Ensure the door is powered and unobstructed during setup.
Open the app, add your device, pick a 2.4 GHz network, and complete the prompts to pair.
What should I do if my app shows the opener offline?
Check that the opener is connected to power and the router provides a stable signal. Reboot the router and re-pair the device if needed. Verify firmware status in the app.
If offline, confirm power and Wi‑Fi, then reboot the router and re-pair from the app.
How often should I test safety sensors?
Test sensors monthly or after significant weather events or repairs. Ensure the beams align and the door reverses on contact to maintain safety.
Test the safety sensors monthly and after work on the door. Make sure they align and reverse on contact.
Can I control myliftmaster with voice assistants?
Yes, with compatible devices and proper integration in the MyLiftMaster app. You can issue open/close commands and receive status updates via voice.
Yes, when you set up compatibility with your voice assistant through the app.
Watch Video
Quick Summary
- Identify compatible hardware before starting myliftmaster setup
- Connect to 2.4 GHz Wi‑Fi for reliable app control
- Calibrate sensors for safe operation and accurate sensing
- Program remotes and keypad correctly to prevent conflicts
- Maintain the system with regular firmware checks and sensor cleanings