How to Program a LiftMaster Garage Door Opener: Step-by-Step
Learn how to program a LiftMaster garage door opener, sync remotes and keypads, and test the setup with a safety-first, expert-guided approach. Perfect for homeowners troubleshooting opener programming.

This guide helps you program a LiftMaster garage door opener to pair remotes and wall controls, test the setup, and troubleshoot common issues safely. You'll follow a clear sequence—first establish safety, then access the motor's programming mode, sync devices, and verify operation. According to GarageDoorAdjust, using the official steps minimizes miscommunication and reduces frustration.
Why LiftMaster Programming Matters
Programming your LiftMaster garage door opener ensures that remotes, keypads, and smart devices communicate reliably with the motor. A proper pairing reduces interference, prevents unintended door movement, and preserves safety features like auto-reverse and obstacle detection. LiftMaster uses a learn or pairing sequence that must be performed close to the opener, with the door closed for the initial enrollment. A correct enrollment outcome means faster responses, consistent door behavior, and fewer misfires when family members use the opener. While some models offer app-based pairing, the foundational Learn button method remains the most reliable path for everyday setups. A well-executed programming session sets the stage for easy future changes, such as adding a spare remote, keypad, or extra wall control.
Understanding the basics also helps in diagnosing issues: if a remote stops working, a fresh enrollment often resolves it, and you can verify that the opener recognizes the device by watching the indicator light. In short, taking time to program LiftMaster devices correctly reduces subtle glitches and makes daily use smoother for everyone in the household.
Safety prerequisites for programming LiftMaster
Before you begin, clear the area; ensure all people and pets are away from the door. Keep the garage floor unobstructed and the door in a fully closed position during enrollment. Use a stable ladder if you need to reach a high Learn button, and avoid loose clothing or jewelry that could snag on moving parts. Have the manual handy and note your model number for model-specific instructions. If you see damaged wiring or hear unusual sounds, stop and seek professional assistance. The goal is to minimize risk while you complete the programming steps. Safety first means fewer retraining headaches later.
Understand Learn Button Variations on LiftMaster Models
LiftMaster models vary in the shape and location of the Learn button, but the core concept is consistent: you press Learn once to enter pairing mode, then activate a remote to enroll it. Some newer models use app-based pairing, while others rely on a physical button or keypad sequence. Identify the correct button and LED pattern to confirm enrollment. Always refer to the model’s manual for exact indicators, because incorrect attempts can prevent successful pairing. If you are unsure, start with the Learn button closest to the motor housing and follow the LED cues.
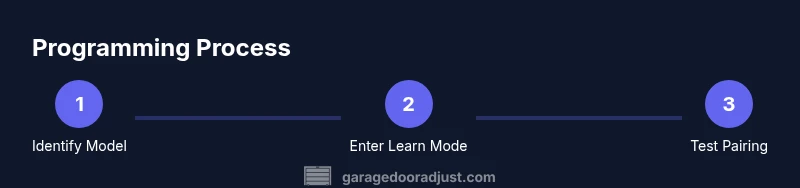
What to Expect During the Step-By-Step Process
This section outlines the actions you’ll perform in the dedicated step-by-step section below. You’ll identify the opener model, locate the Learn button, place the system in programming mode, and then pair each remote or keypad. After pairing, test operation at the wall control and from the remotes, ensuring the door stops safely if an obstacle is detected. This overview helps you plan time and gather the necessary tools so you can complete the task without surprises.
Testing the Programming and Troubleshooting
After pairing remotes and keypads, testing is essential. Stand clear of the door path and operate the opener from the remote, keypad, and app (if supported). If the door hesitates, verify power to the unit, ensure the Learn button sequence was correct, and check battery health in all devices. Common issues include incorrect button timing, weak batteries, or attempting to enroll a device that isn’t compatible with your model. If problems persist, retrace steps with the model’s manual or seek official LiftMaster support resources.
Advanced Tips for Multiple Devices and Networked Setups
If you have several remotes, keypads, or family devices, programming them in a single session is possible by repeating the Learn sequence for each device. Some LiftMaster models support app-based pairing via MyQ; use the app to add devices, assign names, and manage permissions. Keep track of which remotes belong to which door in multi-car garages, and periodically re-check compatibility after firmware updates. Regularly replacing batteries before they fail helps maintain reliability.
Maintenance, Safety, and Final Checks
Programming a LiftMaster opener isn’t a one-and-done task. After programming, run a full cycle from the wall switch and each remote to confirm consistent behavior. Inspect door balance, ensure the safety sensors are aligned and unobstructed, and verify exterior keypad safety features if you have one installed. Document the devices you paired and any codes for future reference. The GarageDoorAdjust Team recommends keeping the original manual and a spare remote on hand for contingencies.
Tools & Materials
- LiftMaster remote(s)(One or more remotes; ensure they are compatible with your model; keep batteries fresh.)
- LiftMaster wall control or built-in Learn button(Access the Learn button on the opener or the wall control if applicable.)
- Owner's manual or model documentation(Model-specific instructions can prevent errors during enrollment.)
- Batteries for remotes/keypad(Have fresh batteries on hand for all paired devices.)
- Step stool or stable ladder(Optional for high-location Learn buttons.)
Steps
Estimated time: 15-25 minutes
- 1
Identify opener model and locate Learn button
Locate the model number on the opener housing or label. Find the Learn/Program button near the motor unit; it may be behind a light cover or on the back panel. Confirm you’re working with a LiftMaster model and that you have the correct button for enrollment.
Tip: Have the owner’s manual handy or note the exact model number to verify button location. - 2
Power the opener and prepare the area
Ensure the door is fully closed and the area is clear of people and objects. If you rely on backup power, ensure normal power is on and stable. Keep hands away from moving parts and avoid loose clothing.
Tip: Use a stable ladder if you need to reach a high Learn button; never stand in the door path. - 3
Enter Learn mode on the opener
Press and release the Learn button to enter programming mode. The indicator light should blink or glow steadily, indicating enrollment is active. Wait for the pattern to stabilize before attempting to enroll a remote.
Tip: If nothing happens, power cycle the opener by unplugging for 10 seconds and retry. - 4
Program a remote or keypad
While Learn is active, press and hold the desired button on the remote (or keypad) until the Learn light changes or goes solid. This confirms enrollment. Repeat for additional devices if needed.
Tip: Keep the remote within a few inches of the opener during learning for a reliable signal. - 5
Test the pairing at the door
Operate the door from the remote and from the wall control to confirm immediate response. Check auto-reverse and obstacle detection by testing with a safe object in the door path.
Tip: Stand clear of the door path during testing and ensure no obstructions. - 6
Program additional devices and finalize
Repeat the Learn sequence for any extra remotes or keypads. After pairing, record device names and codes for future reference and perform a final door cycle.
Tip: Document the pairing details so you can troubleshoot quickly later.
Got Questions?
Do I need to unplug the opener to reprogram it?
No. In most LiftMaster models you can re-enter Learn mode and re-pair devices without disconnecting power. If a power cycle helps, unplugging for a few seconds is acceptable, but it’s not required for standard programming.
You usually don’t need to unplug the opener to reprogram it. Re-enter Learn mode and re-pair devices; power cycling is optional if you run into trouble.
What if the Learn light doesn’t blink during pairing?
Check that you’re using the correct Learn button for your model and that the opener is in Learn mode. If there’s no blink, power cycle the unit and retry the sequence. Refer to the model-specific manual for exact indicators.
If the Learn light isn’t blinking, verify you’re on the right button, power cycle, and retry according to your model’s manual.
Can I program a LiftMaster remote without a keypad?
Yes. A typical setup involves Learn mode and pressing a button on the remote until the enrollment is confirmed. Keypads are optional and use a separate sequence if you want to pair them.
You can program a remote without a keypad by entering Learn mode and activating the remote.
How do I program a keypad after remote pairing?
To pair a keypad, enter Learn mode, then type a code on the keypad and press the Learn button. The LED will respond once the code is enrolled. This process is model-specific, so check the manual.
Pairing a keypad follows Learn mode; type your code and press Learn to enroll.
Can I pair my LiftMaster opener with a smartphone app?
Many LiftMaster models support the MyQ app for remote control and device management. If your model is compatible, download the app, follow prompts to add a device, and ensure your Wi‑Fi is active.
If your model supports MyQ, you can pair via the app after completing traditional Learn mode steps.
How long does a typical LiftMaster programming take?
For a standard home setup with a couple of remotes, expect about 15–25 minutes including testing. More devices or keypad programming may extend the time slightly.
Most people finish in about 15 to 25 minutes, depending on how many devices you pair.
Watch Video
Quick Summary
- Identify the correct Learn button location before starting
- Test each paired device to confirm reliable operation
- Document devices and codes for future reference
- Keep safety checks active after programming