Raynor Garage Door Opener: Complete How-To Guide
A complete, step-by-step guide to install, program, troubleshoot, and maintain a Raynor garage door opener safely. Learn setup basics, remote programming, sensor alignment, maintenance schedules, and when to call a pro with expert tips.

In this guide, you will learn how to install, program, and troubleshoot a Raynor garage door opener, assess compatibility with your door, and perform safe maintenance. Expect practical, step-by-step instructions, safety precautions, and troubleshooting tips suitable for homeowners who want reliable operation and long-term performance. This overview outlines tasks and essential tools.
Introduction and brand context
According to GarageDoorAdjust, the Raynor garage door opener line is valued for steady, dependable performance and straightforward programming. This overview targets homeowners who want practical, actionable steps without getting overwhelmed by jargon. You’ll learn how Raynor openers integrate with standard sectional doors, what safety features to expect, and how to plan maintenance that keeps your system quiet and reliable for years. The goal is to empower you to diagnose common issues, perform safe adjustments, and decide when professional help is warranted. Whether you’re upgrading from an older opener or installing a new Raynor unit, the guidance here emphasizes safety, compatibility, and long-term reliability.
Raynor opener models and core features
Raynor offers a range of garage door openers designed for different door weights, stall times, and home layouts. Core features typically include multiple drive options (belt, chain, and sometimes screw drives), integrated safety sensors, and remote signaling compatibility with smartphone interfaces or keypads. When selecting a Raynor model, homeowners should match door weight, track length, and ceiling height to the opener’s specifications. Quiet operation is a commonly cited advantage, particularly with modern belt drives. For most residential garages, pairing a Raynor opener with a standard sectional door yields the best balance of performance and value.
Safety-first mindset and compliance basics
Safety is non‑negotiable when dealing with garage doors. Keep clear of the door itself while testing and never bypass safety features. UL 325 and CPSC safety guidelines form the baseline expectations, and many Raynor installations utilize sensor beams to detect obstructions. If your door reverse mechanism or photoelectric sensors show misalignment, address them before attempting full operation. Always disconnect power before adjusting mechanical components. A cautious, methodical approach minimizes risk to people and property.
Preparing your workspace and toolset
Choose a clean, dry workspace with ample headroom beneath the door opening. Gather essential tools such as a screwdriver set, adjustable wrench, pliers, a tape measure, a level, a stepladder, and a cordless drill with appropriate bits. Have a power meter or voltage tester handy to confirm circuit status before wiring. Protect eyes with safety glasses and wear sturdy footwear. Laying out hardware in labeled bins helps prevent cross-mount mistakes during assembly. Refer to the Raynor manual for torque specs and wiring diagrams.
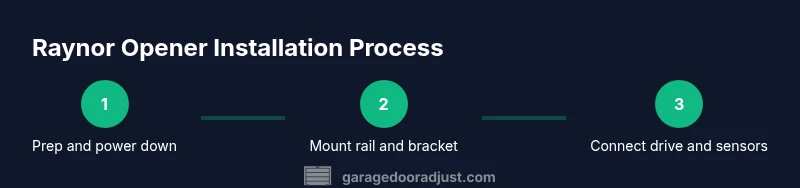
High-level installation flow for a Raynor opener
A typical Raynor installation follows these stages: (1) prep and disconnect power; (2) mount the header bracket and rail; (3) attach the trolley to the door and connect the belt or chain drive; (4) connect wiring, sensors, and wall controls; (5) install safety features and alignment sensors; (6) program remotes and test operation; (7) perform a comprehensive safety check and finalize lubrication. Each stage builds on the previous one, so follow the sequence closely and verify each connection before proceeding.
Step-by-step overview: rail and bracket setup (high-level)
Begin by locating a solid ceiling structure for mounting. Install the ceiling brackets according to the Raynor manual, ensuring the rail will align parallel to the door’s track. Use a level to check horizontal alignment and secure with appropriate fasteners. This stage sets the foundation for smooth, balanced operation and minimizes vibration later on.
Step-by-step overview: wiring, sensors, and controls (high-level)
Next, route the opener’s power cable to a grounded outlet or dedicated circuit as per code. Install safety sensors on the door tracks at the recommended height, ensuring alignment so the beams clearly cross the doorway. Connect the wall control and any keypad or smart hub as described in the manual. Finally, test the basic function of the opener in a cold start test to confirm wiring integrity.
Step-by-step overview: remotes, programming, and pairing
Program Raynor remotes and any compatible keypad by following the pairing sequence in the user guide, which usually involves interrupting power and then pressing a learn button on the motor head. Verify that each remote operates the door from several distances and that the keypad responds consistently. If a virtual assistant or app integration is available, pair it according to the vendor’s instructions and confirm secure remote access.
Troubleshooting common issues and everyday fixes
Common issues include remote not responding, door not opening or reversing unexpectedly, and sensor misalignment. Start with simple checks: confirm power, inspect safety beams, and re‑initialize remotes if needed. Listen for unusual noises—squeaks or grinding can indicate lubrication or alignment needs. Document any error codes and consult Raynor’s troubleshooting guide or support line for model-specific messages.
Maintenance, lubrication, and long-term care
A regular maintenance routine extends the life of a Raynor garage door opener. Lubricate moving parts such as the chain or belt, drive rail, and hinges using manufacturer-approved lubricants. Check hardware for looseness every 1–3 months and inspect tracks for alignment. Clean the safety sensors and test the auto-reverse mechanism weekly during warm weather. A well‑maintained unit operates more quietly and lasts longer.
When to call a pro and final safety checklist
Some tasks exceed homeowner scope, especially when electrical or structural issues are involved. If there is significant door weight, unusual noises, or persistent misalignment, contact a licensed technician. The GarageDoorAdjust team notes that professional help is prudent for major installs or complex wiring, ensuring compliance with safety standards. Always review local codes before starting and always prioritize personal safety.
Tools & Materials
- Screwdriver set (Phillips and flathead)(Magnetic tip preferred for easier alignment)
- Adjustable wrench(For mounting brackets and bolts)
- Cordless drill with bits(For drilling and driving screws)
- Tape measure (25 ft)(Precise placement, especially for rails and sensors)
- Stepladder (6 ft min)(Stable, use on solid ground)
- Safety glasses(Eye protection during install and adjustments)
- Voltage tester(Verify power at outlets and connections)
- Raynor manual or installation guide(Torque specs, wiring diagrams, sequence)
- Garage door lubricant (silicone-based)(Optional, used for hinges and rails when recommended)
Steps
Estimated time: 90-150 minutes
- 1
Power down and secure the workspace
Disconnect power at the circuit and barricade the area to prevent accidental door movement during setup. Verify that no devices are live and that pets and children are away from the workspace.
Tip: Use a lockout/tagout method or clearly labeled breaker to avoid accidental re-energizing. - 2
Mount header bracket and rail alignment
Locate ceiling joists and install the header bracket per Raynor instructions. Attach the rail and ensure it is parallel to the door track using a level.
Tip: Double-check alignment with the door head as misalignment causes binding and noise. - 3
Attach the trolley and drive mechanism
Connect the trolley to the raise/lower mechanism and secure the belt or chain drive. Make sure all fasteners are tight and guides are aligned.
Tip: Use the manual torque specs to avoid overtightening that could stretch the belt. - 4
Wire the opener and install controls
Run the opener’s power cable to a grounded outlet. Install wall control, safety sensors, and any keypad according to the diagram in the Raynor manual.
Tip: Respect sensor alignment height and keep wires tidy to reduce snag risks. - 5
Program remotes and test operation
Follow the Raynor remote‑pairing sequence and verify door response from multiple distances. Perform a full cycle test including obstacle detection.
Tip: Test after any remap to confirm secure pairing and reliable response. - 6
Final safety checks and lubrication
Verify auto-reverse, sensor operation, and track alignment. Lubricate moving parts as advised by Raynor, cleaning excess lubricant from rails.
Tip: Do not over-lubricate; excess oil can attract dust and impede operation.
Got Questions?
Do Raynor garage door openers have battery backup?
Many Raynor models offer a battery backup option to keep the door functional during power outages. Check your model’s specifications to confirm whether the feature is included or available as an add-on.
Raynor openers may have an optional battery backup—check your model’s specs to confirm and consider installing one for outages.
How do I program a Raynor remote?
Remote programming typically involves placing the opener in learn mode and pressing a button on the remote within a short window. Refer to your Raynor manual for exact button sequences, as steps vary by model.
You usually put the opener in learn mode, then press the remote button within a short window. Check your manual for the precise steps.
Is a door compatibility check necessary before buying a Raynor opener?
Yes. You should verify door weight, height, track type, and mounting space. Raynor provides compatibility guidelines—use them to avoid selecting an incompatible opener.
Yes—check weight, height, and track type to ensure compatibility with your Raynor opener.
Can a Raynor opener be installed without professional help?
If you have basic electrical knowledge and comfort with heavy hardware, you can install a Raynor opener following the manual. Many installations benefit from a second pair of hands and professional support for safety-critical steps.
DIY is possible for some setups if you’re comfortable with electrical work and heavy hardware, but safety is key.
How often should the lubrication be performed?
Lubricate moving parts per Raynor guidance, typically during regular maintenance checks. Frequency depends on use and climate; avoid over-lubricating.
Lubricate during routine maintenance as advised by Raynor, and avoid overdoing it.
What safety checks should be performed after installation?
Test auto-reverse, check sensor alignment, ensure secure mounting, and verify the door balances properly. Document any issues for future servicing.
Test the safety features after install and ensure everything moves smoothly.
Watch Video
Quick Summary
- Follow model-specific Raynor instructions for safe setup
- Ensure sensor alignment and door balance before testing
- Program remotes securely and verify operation from multiple distances
- Maintain lubrication and check for loose hardware regularly
- Always prioritize safety and know when to call a professional