How to Install and Troubleshoot LiftMaster 8500 Garage Door Opener
Step-by-step guide to install, program, and troubleshoot the LiftMaster 8500 garage door opener, including safety tips, wiring basics, and remotes pairing. Built for homeowners, with expert guidance from GarageDoorAdjust.

You're about to install or upgrade to a LiftMaster 8500 garage door opener with wall-mount efficiency and integrated battery backup. This guide walks homeowners through a safe, code-compliant install and essential troubleshooting. According to GarageDoorAdjust, the 8500's jackshaft-wide compatibility and quiet operation make it a solid choice for attached garages; follow these steps to complete a secure setup.
Why LiftMaster 8500 garage door opener is a strong choice for many homes
Choosing a LiftMaster 8500 garage door opener brings a wall-mounted, jackshaft design that helps free up ceiling space and reduce belt noise. The 8500 typically offers integrated battery backup and MyQ connectivity, which lets you monitor and control the opener from a smartphone. For homeowners with attached garages, the compact wall-mount reduces overhead clutter and improves safety because the motor is out of the door path. According to GarageDoorAdjust, this model is especially effective for doors with standard torsion setups and doors that require quiet operation or a modern control experience. As you consider this upgrade, verify door weight and spring compatibility with your door system, because incorrect pairing can affect safety sensors, travel limits, and performance over time.
Critical pre-install considerations
Before you lift a finger, confirm that your door and torsion system meet the LiftMaster 8500’s general requirements. Check the door’s weight rating, ensure the torsion spring hardware is in good condition, and measure the mounting area for a wall-mounted opener. You’ll also need to confirm adequate clearance around the mounting wall and the garage space for wiring and safety sensor alignment. This upfront planning saves you from multiple disassembly cycles and ensures you’ll complete the install safely and efficiently.
What makes this project doable for a confident DIY homeowner
The LiftMaster 8500 kit is designed for do-it-yourself installation if you have basic carpentry and electrical skills, plus a helper for heavy lifting. The project is hands-on and involves mounting hardware, wiring low-voltage sensors, and programming remotes. With clear instructions, you’ll align sensors, ensure the door responds to remote commands, and verify safety reversal. Keep in mind that some doors or torsion setups may require professional assistance to avoid improper tension or sensor misalignment.
Safety sensors, wiring, and alignment basics
Safe operation hinges on correctly aligned safety sensors and properly routed wiring. Place the infrared safety eyes on either side of the door opening, no more than 6 inches off the floor, and ensure a direct line between the sensors. Route low-voltage wires away from moving parts and heat sources. Use waterproof connectors if you operate in damp environments. Double-check that the door automatically reverses when the beam is interrupted, and test multiple times from different angles to confirm reliability.
Programming remotes, keypads, and app integration
Pair remotes and keypads according to the LiftMaster 8500’s instructions, using the Learn button and the user manual. For smart features, connect the unit to your home Wi-Fi and enable MyQ to enable scheduling, remote control, and alerting. If you have multiple remotes or a new keypad, follow the pairing steps in sequence to avoid interference with existing devices. GarageDoorAdjust recommends testing each remote in a variety of positions and ensuring the app recognizes the opener promptly.
Troubleshooting: common issues and quick fixes
If the door doesn’t move when commanded, confirm the opener has power and the wall switch is functional. Check for door balance issues, misaligned safety sensors, or sensor obstruction. If the door reverses unexpectedly or stops mid-travel, recalibrate the travel limits and force settings following the manual. Replacing batteries in remotes, resetting the opener, and re-pairing remotes often resolves stubborn issues. If problems persist, consult the official LiftMaster support resources or a licensed technician.
Maintenance and long-term care after install
To keep the LiftMaster 8500 running smoothly, lubricate moving parts sparingly with silicone-based spray, inspect mounting hardware for loosening screws, and test safety features monthly. Clean sensor lenses regularly and replace batteries in remote transceivers as needed. Schedule an annual check of the torsion system and door balance with a professional if you notice unusual noises or effort when opening or closing.
Tools & Materials
- LiftMaster 8500 kit (opener, wall mount, rail kit, safety sensors)(Ensure kit is designed for your door width and torsion setup)
- Power drill and driver bits(Phillips #2 bit, targeted for mounting screws)
- Stud finder and level(To accurately locate studs and ensure level mounting)
- Measuring tape and pencil(For precise placement and alignment)
- Wire cutters/strippers(Low-voltage wiring work and sensor wiring)
- Screwdriver set (flat and Phillips)(General hardware assembly)
- Ladder or sturdy step stool(Safe access to mounting height)
- Electrical tape and wire nuts(Secure low-voltage connections)
- Silicone-based lubricant(Apply sparingly to moving components)
- Safety glasses(Eye protection during drilling and wiring)
- Assistant/helper(Lift and position the unit safely)
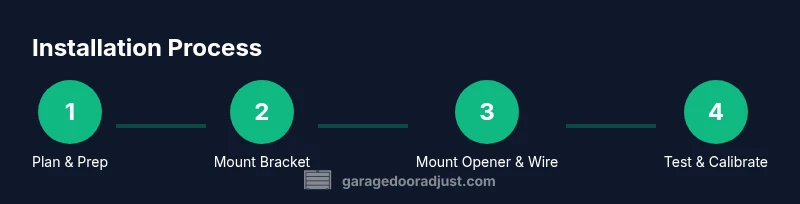
Steps
Estimated time: 2-4 hours
- 1
Prepare workspace and gather tools
Clear the garage, read the LiftMaster 8500 manual, and verify your door spec. Gather all tools and ensure the helper is available. Confirm power is off to avoid shock during wiring.
Tip: Label wires as you disconnect or connect to avoid confusion during reassembly. - 2
Disconnect existing opener and secure door
Unplug the current opener, disconnect any power cords, and manually secure the door to prevent movement. If door is heavy, use support straps or a helper to hold the door steady.
Tip: Never attempt to lift a heavy door solo; use a second person or a stable support. - 3
Install wall-mount bracket and position the opener
Mark stud locations, mount the wall bracket at an appropriate height, and ensure the jackshaft will align with the torsion shaft. Use a level to keep the unit plumb and secure screws into studs.
Tip: Double-check that the torsion shaft still spins freely after mounting the bracket. - 4
Attach the LiftMaster 8500 to the wall bracket
Lift the unit onto the bracket with a helper, align mounting holes, and tighten screws evenly. Verify that the unit sits flush and is not binding on nearby components.
Tip: Keep fingers clear of pinch points when lifting the heavy unit into place. - 5
Wire safety sensors and connect low-voltage harnesses
Position safety eyes on either side of the door opening. Route low-voltage wires along the wall away from moving parts, and secure with clips. Connect the sensor leads to the opener according to the manual.
Tip: Test sensor alignment by crossing the beams with the door closed and open to confirm instant reversal. - 6
Program remotes, keypad, and app integration
Use the Learn button on the opener to pair remotes and keypad. Connect to Wi-Fi if supported and install the MyQ app for remote control and alerts. Verify each device responds to commands.
Tip: After pairing, move to varying distances and angles to ensure reliable operation. - 7
Calibrate travel limits and test operation
With power restored, set travel limits, ensure the door stops fully and reverses on contact with an obstacle. Run multiple open/close cycles with remote and wall switch. Confirm the door closes securely and sits flat in the tracks.
Tip: Keep a clear area in front of the door during testing to avoid injuries. - 8
Final checks and routine maintenance
Lubricate moving parts, inspect hardware for tightness, and test safety features monthly. Replace batteries in remotes and confirm app notifications are functioning.
Tip: Create a maintenance checklist to track periodic checks.
Got Questions?
Is the LiftMaster 8500 compatible with all doors or only specific torsion setups?
Compatibility depends on door weight, torsion hardware, and mounting space. Consult the product manual and GarageDoorAdjust’s guidance to confirm your door’s suitability before starting.
Compatibility depends on your door’s weight and torsion hardware; check the manual and our guide for specifics.
Do I need a professional installer for the LiftMaster 8500?
Many homeowners with basic electrical and carpentry skills can install the 8500. If your door is heavy, has complex torsion, or you’re unsure about wiring, consider professional installation for safety.
You can do it yourself if you’re comfortable with electrical and structural work; otherwise, hire a pro.
How do I pair remotes and set up the MyQ app?
Use the Learn button on the opener to pair remotes and keypad, then connect to your Wi-Fi to enable MyQ features. Follow the app prompts for setup and device naming.
Press the Learn button, pair remotes, then connect to Wi-Fi via the MyQ app.
What should I do if the door reverses during closing?
First check sensor alignment and clear any obstructions. Recalibrate travel limits and force settings, then retest. If unresolved, consult the LiftMaster troubleshooting resources.
If the door reverses, check sensors, recalibrate limits, and test again; seek help if needed.
How often should I lubricate moving parts?
Lubricate annually or when you notice sticking or noise. Use a silicone-based spray on rollers, hinges, and tracks as directed.
Lubricate once a year or when you hear sticking; use silicone spray on moving parts.
Can I upgrade to a smart keypad or multiple remotes later?
Yes. The LiftMaster 8500 supports multiple remotes and smart keypads. Ensure you follow pairing sequences to avoid interference.
You can add more remotes or smart keypads later; just follow the pairing steps.
Watch Video
Quick Summary
- Plan and measure before mounting to avoid rework.
- Safety sensors must be correctly aligned for safe operation.
- Program remotes and app features for full control.
- Test and recalibrate travel limits after installation.
- Perform regular maintenance to extend the opener’s life.