Garage Door Remote Guide: Pick, Program, and Troubleshoot
Learn how to choose, program, and troubleshoot a garage door remote purchased at Home Depot. This expert, step-by-step guide covers compatibility, batteries, pairing methods, and safety to prevent interference.

You will learn to choose a compatible garage door remote from Home Depot, install fresh batteries, and program it to your opener in a few simple steps. This guide covers compatibility checks, pairing methods for popular brands, and safety tips to avoid mis-pairing. We'll also discuss when to upgrade, how to test range, and how to reduce interference.
Understanding Compatibility and Home Depot Options
Choosing a garage door remote that matches your opener is the first hurdle. When you shop at Home Depot, you’ll see remotes described as LiftMaster, Chamberlain, Genie, and universal models. The key is to verify that the remote frequency and the learning method are compatible with your current opener. Many openers use a 'learn' procedure rather than DIP switches, but some older units may require switches to be set manually. By knowing your opener’s model number, current frequency, and the type of pairing it supports, you can avoid buying a remote that won’t work with your system. According to GarageDoorAdjust, homeowners frequently purchase a remote that is advertised as universal but later discover it won’t operate their specific unit. A short compatibility check saves time and money.
GARAGE DOOR REMOTE HOME DEPOT is a common search term for homeowners looking to replace or upgrade remotes. This article will guide you through selecting a compatible unit, understanding the pairing process, and safely testing performance.
Shopping at Home Depot: What to Look For
When you’re at Home Depot, you’ll encounter a range of options: brand-specific remotes that pair with LiftMaster, Chamberlain, Genie, and Craftsman openers, plus universal remotes designed to handle multiple brands. Look for the model description, compatibility notes, and the included pairing method. If you’re unsure, ask a store associate or check the manufacturer’s compatibility list online before purchasing. Pay attention to the battery type—most remotes use a small coin-cell battery—and ensure the package includes it or that you’ll need to buy one separately. The Home Depot online listing often shows a compatibility chart and pairing instructions. Keeping your original opener’s manual handy is a smart move in case your model requires a specific process.
Choosing a garage door remote home depot product depends on whether you want a straightforward replacement or a universal solution that can work across multiple doors.
Key Terms You Should Know
Before you buy a new remote, familiarize yourself with key terms that affect pairing. The learn button on the opener is the most common method for programming; some older units rely on DIP switches or frequency settings. A rolling code changes every time the door operates, which improves security but can complicate initial pairing if the remote and opener aren’t aligned. Frequency is another critical factor; most modern remotes operate at standard frequencies (commonly around the 300-400 MHz range, though exact numbers vary by model). Understanding these concepts helps you navigate Home Depot listings and avoid buying a remote that won’t pair. For honesty and accuracy, always refer to your opener’s manual when verifying terms.
Choosing the Right Remote: Brand Variants
LiftMaster, Chamberlain, Genie, Craftsman, and other brands offer remotes that pair with their openers in slightly different ways. Brand-specific remotes typically guarantee compatibility with that brand’s devices, while universal remotes promise cross-brand compatibility. If you have a LiftMaster or Chamberlain system, a branded remote may provide a quicker and more reliable pairing experience. For many homeowners shopping at Home Depot, a universal remote seems convenient, but the pairing procedure may differ by model. Always confirm the pairing method listed in the product description or on the official site before purchasing. The goal is to find a remote that reduces confusion and delivers consistent performance in daily use.
Compatibility Check: How to Confirm Before You Buy
To avoid return frictions, perform a quick compatibility check before purchasing a remote. Gather your opener’s model number (usually found on a label on the motor housing) and note the warranty status. Check the Home Depot listing for explicit compatibility notes and the recommended pairing method. If you’re unsure, call or chat with a Pro Associate who can verify whether the remote will work with your specific opener. Keeping a photo of the opener’s label can simplify this process. A little upfront diligence reduces the risk of buying the wrong remote and needing an exchange.
Prepare Your Tools and Environment
Before you start, assemble essential tools and a safe work area. You’ll want a compatible garage door remote (the one you plan to buy at Home Depot), a fresh coin-cell battery (most remotes use a CR2032), a small screwdriver for opening the remote housing if it’s not a snap-fit, and a stable ladder if you need to reach the opener’s control panel. Clear the area around the garage door to avoid accidental injuries during testing. Having the opener’s model number and the manual handy helps you confirm the exact pairing steps for your unit. Keep a clean workspace and avoid touching moving parts of the garage door while testing.
Programming Basics: Learn Button vs DIP Switch Method
Most modern openers pair with remotes using a learn button, but some older models rely on DIP switches or fixed frequencies. With the learn button, you’ll typically press and release the button on the opener, then press a button on the remote to transmit the code. DIP-switch remotes require you to align the switches on the remote with those on the receiver; this method is less common on Home Depot purchases today but may exist for older equipment. Always check your opener’s manual for the exact procedure. This knowledge helps you avoid frustration when trying to program a garage door remote home depot purchase.
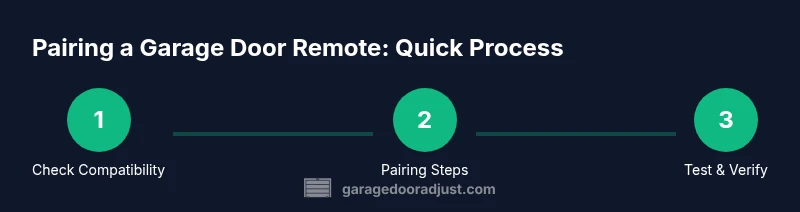
Step-by-Step Pairing Process: One-Opener Setup
The standard one-opener, one-remote pairing is straightforward when you follow the exact steps in your opener’s manual. Begin by turning off any obstructions around the door, then locate the learn button on the opener. Activate pairing mode and immediately press and hold the desired button on the new remote until the indicator light blinks or changes, signaling a successful pair. If the light blinks twice, repeat the process with a longer press or a different remote button. When finished, test the remote from the threshold to ensure reliable operation.
Programming for Multi-Remotes or Two Doors
If you have two doors or multiple remotes, you’ll repeat the pairing process for each remote while ensuring the first remote remains active. Some openers support multiple remotes by using different button configurations or memory slots. Follow the product guide to assign each remote to the correct door, and label them for future reference. When you add a second remote, re-test the range to confirm both remotes operate reliably from common areas around the door. Labeling saves confusion during maintenance and ensures consistent operation over time.
Common Issues and Fixes
If a remote fails to pair, confirm the battery is fresh and oriented correctly. Ensure you are within the recommended distance during pairing and avoid any interference from other wireless devices. If you hear a double-click or see no response, move closer to the door and repeat the pairing sequence. Some remotes require re-pairing after a power outage or a reset of the opener. Always consult the user manual for the exact steps relevant to your opener model.
Security Considerations and Privacy
Remotes operating with rolling codes automatically update the security code every time the door opens. This means even if someone overhears your signal, it won’t be usable for future access. To preserve security, never leave remotes in obvious places such as cars parked outside, where they can be stolen. If you’re concerned about neighbors accidentally triggering your opener, consider a programmable remote with a fixed or adjustable code and don’t share access codes with others. The Home Depot purchase should include a user manual that explains the security features of the remote and the recommended best practices.
Upgrading to a Smart Remote: Is It Worth It?
Smart remotes and hubs offer features like app-based control, battery monitoring, and activity history. If your current remote is a few years old or you’re expanding to multi-door setups, upgrading to a smart remote can save time and improve security. When evaluating options at Home Depot, look for compatibility with your existing opener, whether the app supports your phone’s OS, and the range the remote offers. A smart remote is particularly appealing for homeowners looking for remote access, scheduling, and notifications.
Testing Range and Interference Mitigation
After pairing, test the range by standing at the far end of the garage and at the driveway. If you notice reduced range, try moving the receiver or relocating any potential interference sources, such as wireless routers or other RF devices. Some remotes include a setting to adjust sensitivity or use a different frequency if your opener supports it. If you still experience issues, check whether walls or metal objects are blocking the signal and consider replacing the remote with a higher-gain model designed for longer range.
What to Do If You Have a Genie or LiftMaster vs. Other Brands
Some remotes work best with their brand’s openers but can require slightly different steps for pairing. Genie and LiftMaster remotes often share similar learn-button methods, but the exact sequence can vary. If you own a garage door remote home depot specific to a brand, always consult the brand’s official pairing instructions to avoid damaging the opener or voiding warranty. When possible, purchase the exact model recommended for your opener to minimize troubleshooting.
Maintenance and When to Upgrade
Regular maintenance includes keeping the remote clean, replacing the battery on a predictable schedule, and ensuring the opener’s receiving antenna remains unobstructed. If your remote shows signs of wear or the opener struggles to respond, it’s time to upgrade. A newer remote may offer stronger range, better security, and improved compatibility with newer openers. Remember to dispose of old batteries properly and recycle them according to local guidelines.
Tools & Materials
- Compatible garage door remote (from Home Depot)(Confirm compatibility with your opener’s brand and frequency; check the product page for pairing instructions)
- Coin-cell battery (CR2032)(Most remotes use a CR2032; replace if the remote is unresponsive)
- Screwdriver set (Phillips/flat-head)(Only if your remote housing is screw-secured)
- Ladder or stable step stool(Access to the opener’s control panel may require a step up)
- Owner’s manual or opener model number(Helpful for confirming the exact pairing method)
Steps
Estimated time: 30-60 minutes
- 1
Identify compatibility
Review your opener’s model number and frequency, then compare against the Home Depot remote listing to confirm compatibility. This step prevents buying a remote that cannot pair with your unit.
Tip: Having the opener manual or label handy speeds up the check. - 2
Gather required tools and remote
Collect the remote, fresh battery, and any tools needed to open the housing. Confirm you have the exact remote model that matches your opener.
Tip: Keep spare batteries nearby in case you need a replacement later. - 3
Locate the Learn button on the opener
Find the Learn or Training button on the ceiling-mounted motor housing. The location varies by model; it’s typically near the antenna or on the back of the unit.
Tip: If you can’t find it, consult the manual or manufacturer support for your model. - 4
Open the remote housing
Carefully use the appropriate tool to open the remote’s housing if needed. Do not force plastic tabs; work around the seam to avoid damage.
Tip: Note how the battery is seated and how the button layout is organized for reassembly. - 5
Insert or replace the battery
Place a fresh CR2032 coin-cell battery in the remote with correct polarity. A weak battery is a common cause of unresponsiveness.
Tip: Avoid touching the battery contacts with bare fingers to prevent oils from interfering with connections. - 6
Put the opener into pairing mode
Press and release the Learn button on the opener until an indicator light starts blinking, signaling pairing mode. Some models require holding the button for a few seconds.
Tip: Observe the light behavior; a steady or blinking pattern confirms readiness. - 7
Transmit the code from the new remote
Within a few seconds of the opener entering pairing mode, press and hold a button on the new remote until the opener confirms the pairing (light changes or beeps).
Tip: Only press one button at a time to avoid confusing the receiver. - 8
Test the remote at the door
Move to the doorway and press the remote to verify it opens and closes the door reliably within the expected range.
Tip: Test from multiple positions to gauge range and reliability. - 9
Program additional remotes
If you need more remotes, repeat the pairing steps for each remote while ensuring the first one remains active.
Tip: Label each remote with its intended door or zone for future reference. - 10
Test safety features and range
Cycle the door and confirm auto-reverse and safety sensors function as expected. Check that you have adequate range from the furthest accessible point.
Tip: If sensors trigger unexpectedly, re-check alignment and the receiver’s antenna placement. - 11
Document remotes and pairing
Record the date of pairing, the remote model, and which door it operates. This helps with future maintenance or re-pairing needs.
Tip: Keep a small log near the opener closet or in a home maintenance notebook. - 12
Store remotes securely
Place remotes in a dedicated holder or safe spot to prevent loss, especially if you have kids or frequent visitors.
Tip: Avoid leaving remotes in cars or obvious locations that could be stolen.
Got Questions?
Do universal remotes work with all garage door openers?
Universal remotes can work with many openers, but compatibility is not guaranteed. Always check the compatibility list on the product page and confirm the exact pairing method for your opener brand.
Universal remotes may work with many openers, but always verify compatibility and follow the official pairing steps for your model.
How do I program a new remote with my opener?
Most openers use a learn button method: put the opener in pairing mode, then press a button on the new remote until the door responds. If your model uses DIP switches, align the switches exactly as shown in the manual.
Put the opener in pairing mode, then press a button on the new remote until you hear a signal. If it uses DIP switches, match the switches precisely.
Why isn’t my new remote pairing?
Possible causes include a low battery, incorrect pairing method, or interference from nearby RF devices. Recheck battery orientation, confirm you followed the exact steps for your opener model, and move closer to the opener during pairing.
Common causes are a weak battery, wrong pairing method, or nearby interference. Recheck steps and try again closer to the opener.
Can I program multiple remotes for two doors?
Yes, many openers support multiple remotes, but you may need to repeat the pairing process for each remote and assign them to the correct door. Label remotes to avoid confusion.
Yes, you can pair multiple remotes. Repeat the steps for each remote and label them.
When should I upgrade to a smart remote?
Upgrade when you want app control, battery monitoring, and activity logs. Check that the smart remote is compatible with your current opener and supports your mobile device.
Upgrade if you want app control and monitoring. Make sure it works with your opener and phone.
Is it safe to replace the remote battery myself?
Replacing a battery is generally safe if you follow manufacturer instructions. Disconnect power if you’re removing the opener cover, and avoid touching wiring components.
Yes, it's usually safe with proper steps. Follow the manual and avoid touching internal wiring.
Watch Video
Quick Summary
- Verify compatibility before buying any remote.
- Follow exact pairing steps per opener brand.
- Test range and safety features after pairing.
- Keep remotes organized and battery-replacement-ready.