Easiest Garage Door Remote to Program: A Step-by-Step Guide
Learn which garage door remotes are easiest to program and follow a step-by-step process to pair safely and quickly. Includes tools, troubleshooting, and practical tips for homeowners.

This guide helps you identify the easiest garage door remote to program, verify compatibility with your opener, and pair it quickly using standard Learn button steps. You'll learn practical checks, safety tips, and troubleshooting if the remote won't program. By the end, your new remote should reliably operate your door.
What makes the easiest garage door remote to program truly easy
The keyword here is compatibility paired with a straightforward Learn-button workflow. An easy remote is typically labeled as compatible with your opener, uses the standard Learn button on the motor housing, and relies on a short, predictable sequence of button presses. According to GarageDoorAdjust, using these remotes reduces confusion and speeds up the pairing process for most homeowners. In this section, we explore how to identify models that fit that description, how to confirm compatibility, and why a simple remote often means fewer steps overall. By focusing on remotes with clear labeling, universal compatibility, and a simple pairing flow, you minimize mis-timing and error codes that would otherwise delay the process. You’ll also learn how to prepare your space and yourself to make the task as safe and efficient as possible, avoiding common beginner mistakes. The aim is to empower you with a quick-start mindset rather than a pile of brand-specific quirks.
Why compatibility matters for a quick setup
Not all remotes are created equal when it comes to ease of programming. Some brands require identical model numbers, some support universal Learn-button protocols, and a few use alternative entry points for pairing. The easiest remote-to-program choices are typically those that rely on a single Learn button, work across multiple garage door opener brands, and provide clear, intuitive prompts. Checking your opener’s manual and the remote’s packaging for compatibility notes saves time and reduces frustration. If you already have a newer opener, you’ll likely find a long list of compatible remotes that advertise “universal Learn” functionality. This approach helps you avoid hunting for rare remotes or digging through obscure firmware requirements. It also protects you from mismatched steps that can occur when you try to squeeze a non-standard remote into a routine Learn sequence.
How to narrow down your options quickly
Start by identifying your opener brand and model. Look for the model number on the opener housing or in the user manual. Then choose remotes that explicitly state compatibility with your brand or offer a universal Learn-button method. Prioritize remotes with fresh batteries and clear instructions. If you can, select a spare remote from the same family to minimize compatibility surprises. Finally, review return policies in case you need to swap for a model that programs more reliably with your specific opener.
Safety considerations when programming a remote
Programming a remote involves interacting with moving parts and energy sources. Always ensure the area beneath the door is clear and never stand in the path of a closing door. Use a stable ladder or step stool when reaching the Learn button, and disconnect any loose jewelry or clothing that could catch on components. If you feel unsure, pause and seek guidance from a professional. Safety should always come first, even when you’re eager to complete the setup.
A quick mental model for the process
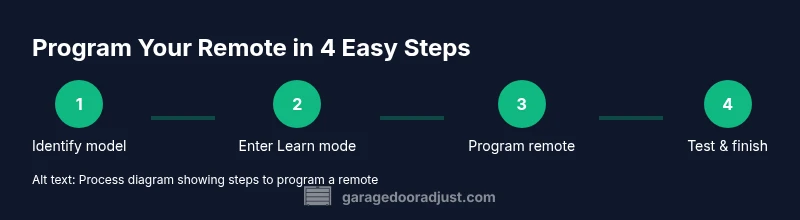
Think of programming as three levels: prepare, enter Learn mode, and test. Preparation means confirming compatibility, gathering batteries, and having a clear space. Entering Learn mode typically involves a small, momentary action on the opener (a Learn or Set button) and watching a light or indicator. Testing means pressing the programmed remote from close and then farther away to confirm reliable operation. When you follow these steps with a calm pace, you’ll often complete the task in under 15 minutes for a typical setup.
Tools & Materials
- Spare garage door remote (compatible with your opener model)(Ensure it is the correct model family; check compatibility with your opener brand.)
- Ladder(Access the receiver area and Learn button safely.)
- Fresh batteries for the remote(Alkaline or lithium as specified by the remote.)
- Owner’s manual or model card(For exact Learn button location and timing.)
- Pen and paper(Jot down model numbers or remote codes if needed for future remotes.)
Steps
Estimated time: 15-30 minutes
- 1
Identify opener model and remote compatibility
Locate the model number on the opener housing or in the manual. Confirm it uses a standard Learn button remote and note any branded quirks. This step prevents wasted effort on incompatible remotes.
Tip: Having the model number handy speeds verification and reduces back-and-forth with support. - 2
Gather and prepare your remote and tools
Collect a spare remote, fresh batteries, a ladder, and the manual. Check battery orientation and ensure you can access the Learn button without obstruction. Clear the area under the door before starting.
Tip: Test the new batteries outside the remote first to rule out dead cells. - 3
Access the Learn/Program button on the opener
Use the ladder to reach the motor housing and locate the Learn button. If your model uses a different label (Set or Learn/Train), refer to the manual. Ready the battery in the new remote and reposition yourself for a comfortable reach.
Tip: Take a photo of the button location for future reference. - 4
Put the opener into Learn mode
Press and release the Learn button, or press and hold the button briefly until the indicator light begins to blink or a solid light appears. Do not hold the button longer than needed, as this can trigger a reset or alternate modes.
Tip: If the light does not blink, double-check the battery and attempt again from a shorter distance. - 5
Program the remote
Within 30 seconds of entering Learn mode, press and release the remote button that you want to use for activation. The opener’s light will blink or change state to confirm the pairing.
Tip: If you have multiple remotes, program them one at a time and exit Learn mode after each successful pairing. - 6
Test the remote and finalize
Test the remote at short and extended distances to ensure reliable operation. If it fails, repeat steps 4–5 or perform a full reset and retry. Document the results for future reference.
Tip: Keep the manual handy for any model-specific nuances that may appear during testing.
Got Questions?
Can I program multiple remotes to the same opener?
Yes. Most openers allow pairing several remotes by repeating the Learn button process for each remote. Make sure to exit Learn mode after each pairing.
Yes, you can pair multiple remotes by repeating the Learn button sequence for each one.
What should I do if the Learn light won't blink?
Double-check the remote battery, ensure you’re within range, and retry. If it still won’t blink, reset the opener and retry, since some models require a factory reset.
If the Learn light won’t blink, check the battery and range, then retry; if needed, perform a factory reset.
Is programming a remote the same for all brands?
The basic Learn-button method is common, but exact steps and button names vary by brand. Refer to your owner's manual for brand-specific instructions.
Basics are similar, but always check your manual for brand-specific steps.
Do I need to unplug the opener to program a remote?
No. The standard method uses the Learn button on the motor housing; unplugging is not required and can be unsafe.
Usually you do not unplug the opener; just use Learn mode.
How long does it take to program a new remote?
Most remotes program in under a minute once you hit Learn mode and press the remote. If you have rolling code or older hardware, it may take slightly longer.
Usually under a minute, but some setups can take a bit longer.
Watch Video
Quick Summary
- Choose a compatible, easy-to-program remote first.
- Follow Learn-button prompts precisely to avoid errors.
- Always test the remote before concluding the setup.
- Keep manuals handy for model-specific steps.