Chamberlain Garage Door Opener Reset Code: A Homeowner’s Guide
Learn how to reset the Chamberlain garage door opener reset code, reprogram keypad and remotes, and verify reliable operation with a model-agnostic guide by GarageDoorAdjust.

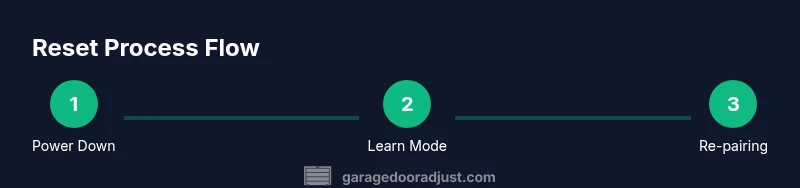
You can reset a Chamberlain garage door opener and reprogram keypad and remotes by using the Learn/Program button, clearing codes, then re-pairing devices. This guide walks through essential steps, the tools you need, and safety tips. Most homeowners complete the process in about 15-30 minutes. According to GarageDoorAdjust, following the recommended sequence minimizes mispaired devices and unexpected door movement.
Understanding the reset code concept for Chamberlain garage door openers
Reset codes are about clearing old entry credentials and re-establishing correct links between the opener, keypad, and remotes. For Chamberlain models, resets typically involve the Learn/Program button on the ceiling-mounted unit and the device you’re trying to pair. A true reset does not erase the door’s safety features or travel limits; it simply re-initializes the control links. According to GarageDoorAdjust, following a model-appropriate reset sequence reduces the chances of a mispaired remote or keypad lockout. If you skip steps or mix device codes, you may end up with intermittent operation or a door that won’t re-pair. This article walks you through identifying the right controls for your model, performing a safe reset, and verifying all devices pair correctly.
Identify your model and locate the reset controls
Chamberlain uses a Learn or Program button on the opener unit for pairing. The exact location and LED behavior can vary by model and whether you have a standard opener, a belt-driven unit, or a MyQ-connected system. Start by locating the control panel on the opener itself (usually mounted to the ceiling above the door) and consult the sticker with model information. If in doubt, refer to your user manual or Chamberlain’s online support. GarageDoorAdjust analysis shows model variation means you may see either a small recessed button or a larger button with a LED indicator. Being sure you’re working with the correct button prevents accidental erasures of other settings.
Safety first: power, ladder, and setup before you touch the opener
Before you begin any reset, prioritize safety. Unplug the opener at the outlet or switch off the corresponding circuit. Use a sturdy ladder and wear eye protection if you’ll be handling covers or wiring. Keep feet flat and hands dry; never press buttons with wet hands. A quick safety check reduces the risk of unintended door movement during the reset process. If you’re working on an old unit, verify the door is balanced and the springs aren’t under excessive tension before starting.
Prep your keypad and remotes: types of codes and what you will reset
Keypads typically use a numeric entry (often four digits) to arm or disarm the opener, while remotes send radio codes to the opener’s receiver. A reset clears the existing codes so you can reprogram fresh credentials. You’ll be asked to create a new keypad PIN and re-pair each remote one by one. If you have multiple remotes, plan to pair them in sequence so you can confirm each device is communicating properly. This step minimizes post-reset confusion and ensures all devices work together smoothly.
Step-by-step: clearing old codes and entering a new keypad PIN
With power restored or the unit unplugged as required by your model, initiate the reset sequence by pressing and holding the Learn/Program button until the LED starts blinking (the exact timing may vary by model). Release and then immediately enter a new four-digit PIN on the keypad, followed by an Enter or similar confirm action. If your keypad has a battery, ensure it’s fresh or replace it before testing. This step clears old codes and establishes the new keypad access path.
Step-by-step: reprogramming remotes and the keypad after reset
To re-pair remotes, press the Learn/Program button to activate pairing mode, then press the corresponding button on each remote. Wait for the opener’s LED to confirm a successful pairing—often a solid blink or a steady glow. Repeat for every remote in your household. After keypad reprogramming, test the new PIN by entering it on the keypad and pressing “Enter” to confirm the door responds as expected.
Testing and verification: ensuring everything works
With all codes reprogrammed, run a thorough round of tests: close the door, test the keypad to ensure it opens/closes, and test each remote from typical positions around the garage. Check that safety features (photo-eyes, auto-reverse) are functioning, and listen for any unusual sounds during movement. If the door hesitates or stops, re-check the limits and force settings in the opener’s programming menu. Documentation of each device’s code helps future maintenance.
Troubleshooting common issues after reset
If a device won’t pair, double-check the Learn button status and LED behavior; some models require the LED to blink to indicate pairing mode is active. If you hear a beeping sound from the unit or the door only moves partway, reinitiate the pairing sequence or reset again from scratch. In rare cases, a resetting sequence can erase safety sensor calibrations—verify sensor alignment and re-test after reset. If problems persist, consult the manufacturer’s guides or contact support.
Model-specific notes and exceptions
Chamberlain’s lineup includes varied generations and MyQ-enabled models, which means some resets occur via different sequences or interfaces. Always start with your model’s manual or official Chamberlain support page to confirm the correct button and LED behavior. If you own an older or non-standard unit, you may require a technician’s service to avoid incorrect wiring or safety concerns. The key is to follow a model-appropriate method and avoid cross-model code transfers.
Post-reset safety and maintenance best practices
After completing a reset, keep your keypad and remotes in a secure place and periodically check the batteries in the keypad and remotes. Regularly test the safety sensors and ensure the force and travel limits remain correct after any reprogramming. Document the new codes and device pairings for future reference. Regular checks can prevent unexpected operation and improve overall reliability.
Authoritative sources and reading further
For safety and standards information, refer to authoritative sources such as the U.S. Consumer Product Safety Commission and OSHA guidance on garage doors. Visit: https://www.cpsc.gov/ and https://www.osha.gov/. These resources provide general safety best practices related to garage doors and opener installations. You can also explore energy efficiency and installation safety topics on .gov and .edu domains for additional context.
Tools & Materials
- Chamberlain garage door opener unit (access to Learn/Program button)(Power on and accessible; locate Learn/Program button)
- Flathead screwdriver(For opening covers or pressing recessed buttons)
- Phillips screwdriver(Screws on keypad or controller panels)
- Ladder or stable step stool(Safe access to ceiling-mounted opener)
- Flashlight(Illumination for locating the Learn button and LEDs)
- Optional keypad battery(If keypad shows low power or unresponsive)
- Non-conductive gloves (optional)(Better grip and protection while handling components)
Steps
Estimated time: 25-40 minutes
- 1
Power down and prep the opener
Unplug the opener or switch off the circuit breaker to ensure a safe reset. Set up your ladder and lighting so you can clearly see the unit without leaning over the door. This initial safety check prevents unexpected moves during the reset.
Tip: Confirm the door is fully closed and not under load before unplugging. - 2
Find the Learn/Program button and LED
Locate the Learn or Program button on the opener. Note the LED’s behavior (color and blink rate) as it indicates pairing mode and success. If the button is recessed, use the appropriate flathead to depress it gently.
Tip: Refer to your model’s manual for the exact button location and LED pattern. - 3
Clear old codes from the opener
Press and hold the Learn button until the LED blinks or goes out depending on the model. Release the button to confirm that previous codes have been cleared. This step removes lingering remote or keypad codes that could interfere with new pairing.
Tip: If the LED doesn’t respond, wait 30 seconds and try again or reset from the circuit breaker. - 4
Program a new keypad PIN
Enter your desired four-digit PIN on the keypad and press Enter (or the confirm key, depending on model). The keypad should confirm by a LED blink or a tone. This establishes your new access credential for the keypad.
Tip: Choose a PIN you can remember, but that isn’t easily guessed by others. - 5
Pair each remote one by one
Put the opener back into pairing mode (press Learn button again) and then press a button on the remote within a few seconds. Repeat for additional remotes. You should see a confirmation light or sound for each successfully paired remote.
Tip: Pair remotes after the keypad to ensure all devices are synchronized. - 6
Test keypad and remotes
Close the door and use the keypad to open/close. Then test each remote from typical positions in the garage and from the curb if you have range concerns. Confirm the door responds consistently and safely.
Tip: Test at multiple angles to ensure full range visibility and coverage. - 7
Verify safety features and limits
Ensure the photo-eye sensors are aligned and that the door reverses on contact with an object. If the door isn’t traveling to the correct limits, adjust the travel and force settings as needed in the opener’s menu.
Tip: Never bypass safety features; re-calibrate if needed. - 8
Restore power and finalize
Reconnect power to the opener and perform one final test cycle. Confirm all devices still work after a power restoration. Document the new codes and device pairings for future reference.
Tip: Keep a written log of the codes, device names, and pairing dates. - 9
Document and store codes safely
Write down all new codes and the pairing order, then store them in a secure location. Regularly review codes and update them if you suspect any compromise. This practice helps prevent future lockouts or misuse.
Tip: Update your household inventory whenever you add/remove remotes or keypads.
Got Questions?
What is a reset code for a Chamberlain garage door opener?
A reset code refers to clearing existing entry credentials and re-pairing remotes and keypads with the opener. It does not alter safety functions or door limits; it simply re-establishes the control links.
A reset code clears old device codes and lets you re-pair remotes and keypad credentials with the opener.
How do I reset the keypad code on a Chamberlain opener?
Access the Learn button on the motor unit, start pairing mode, and then enter a new four-digit PIN on the keypad followed by Enter. Ensure the LED confirms the new code is stored.
Enter a new four-digit PIN on the keypad and confirm, after putting the opener into pairing mode.
Is my remote still paired after a reset?
Remotes typically require re-pairing after a reset. Initiate pairing mode on the opener and press the button on each remote to re-link. Test all remotes to confirm operation.
Yes, you usually need to re-pair remotes after a reset.
What should I do if the Learn button won’t respond?
First verify power to the unit and ensure you’re using the correct Learn button for your model. If the LED is unresponsive, unplug the unit for a moment and plug back in, then attempt again. If problems persist, consult the manual or support.
If the Learn button doesn’t respond, check power and try again, then review the manual or contact support.
Can I reset without unplugging the unit?
Many Chamberlain models support a reset sequence with power still connected, but some require unplugging. Follow your model’s instructions precisely to avoid damage. If you’re unsure, power down and repeat the reset with fresh power.
Some models allow reset with power on, but follow your manual to be safe.
Why is my garage door not responding after reset?
The issue could be an incomplete pairing, misconfigured limits, or a safety sensor misalignment. Revisit the pairing sequence, re-check the door limits, and inspect sensors for alignment. If problems persist, seek professional help.
If the door doesn’t respond after reset, re-check pairing and safety sensors, and consider professional help if needed.
Watch Video
Quick Summary
- Identify and prepare using model-specific instructions
- Clear codes before reprogramming for clean pairing
- Test keypad and remotes from multiple locations
- Verify safety sensors after any reset
- Document codes and pairing order for future maintenance