Keypad Chamberlain Garage Door Opener: A Step-by-Step Guide
Learn to program, troubleshoot, and maintain a keypad for Chamberlain garage door openers with a clear, step-by-step guide for homeowners.

This guide shows how to program a keypad Chamberlain garage door opener and use it securely. According to GarageDoorAdjust, you’ll need the keypad, fresh batteries, and your opener’s model number. By the end, you’ll be able to add, change, or reset codes with confidence. This content follows GarageDoorAdjust Analysis, 2026 guidelines to help homeowners safely complete the task.
What the keypad does for Chamberlain garage door opener
A keypad chamberlain garage door opener provides convenient access without a remote or smartphone. It stores user codes locally on the keypad and works with the garage door motor to transmit a valid code when you enter the correct digits. By design, these keypads offer a quick way for family members, regular service personnel, or guests to enter without compromising your primary remotes. The reliability of this interface depends on proper installation, fresh batteries, and correct pairing with the opener. According to GarageDoorAdjust, keypad reliability improves when you replace batteries on a regular schedule and refresh codes after major service windows. Once programmed, routine maintenance—like cleaning the keypad contacts and ensuring the mounting is solid—helps prevent misreads or misfires. This article focuses on typical Chamberlain keypads used with many Chamberlain garage door openers, but always refer to your specific model’s manual for any model-specific steps or button sequences. If you use a separate keypad with a rolling code feature, ensure the code you enter matches the code stored in the opener, otherwise the code will be rejected.
Locate your model and compatibility
Before you touch hardware, confirm your keypad is compatible with the Chamberlain garage door opener you own. Look for a model number on the keypad housing or backplate, and locate the opener’s model or serial number on the motor unit. Your manual or the Chamberlain support site will list compatible keypad models. If you’re unsure, contact GarageDoorAdjust’s support team for a quick compatibility check. Compatibility matters because some older keypads use different programming sequences or frequencies, and forcing a mismatch can lock you out or create security gaps.
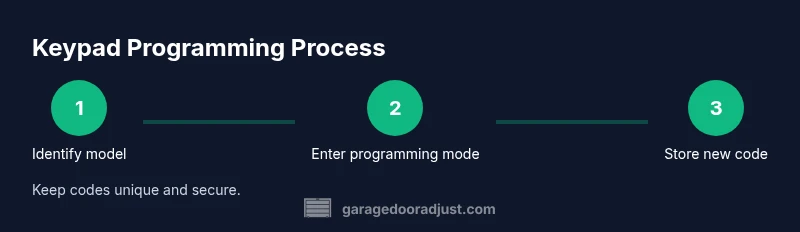
Step-by-step overview of the programming process
Most Chamberlain models use a simple pairing routine: you’ll place the opener into programming mode using its Learn button, then enter your chosen code on the keypad and confirm. The exact button presses will depend on your model, so always follow the user manual. In many cases, you’ll hear a confirmation tone or see a light flash on the opener when the code is accepted. After programming, test the keypad from the outside and again from the inside to verify consistency and avoid lockouts. If the code doesn’t register, re-enter the sequence slowly and double-check the battery status.
Common issues and quick fixes
If the keypad stops responding, first check the batteries and ensure they’re fresh. Weak batteries can cause intermittent signals and failed pairings. If codes aren’t accepted, confirm you’re using the correct code length and that the keypad’s code list isn’t corrupted. Replacing the batteries and reprogramming from scratch often resolves most issues. For stubborn problems, remove power from the opener for 60 seconds, then re-initiate the pairing sequence.
Battery life and power considerations
Wireless keypads depend on reliable power. Use fresh, high-quality batteries and avoid low-power indicators by replacing them promptly. If your keypad uses rechargeable batteries, monitor charging cycles and avoid leaving the batteries completely drained for long periods. In climates with extreme temperatures, battery performance can drop, so check and replace more often during very hot or cold seasons. Always store a written log of battery dates to prevent unexpected outages.
Security best practices for keypad access
Limit who knows the code and rotate it periodically, especially after housekeeping, contractors, or guests. Do not share codes verbally in public spaces and avoid obvious PINs. Consider pairing a temporary code for guests and deleting it after use. If your keypad supports it, enable rolling codes so that each entry uses a new code. Regularly review access activity, and if you suspect unauthorized access, reprogram immediately.
Maintenance and routine checks
Schedule a quick monthly check to replace batteries, inspect mounting screws, and wipe the keypad surface to remove dust and grime. Ensure the keypad is mounted at a comfortable height and clear of obstructions. Check the wiring and connectors behind the keypad housing if you notice any dim displays or inconsistent signals. A short maintenance routine reduces the risk of unexpected lockouts and extends the lifespan of your device.
Tools & Materials
- Chamberlain keypad (installed or compatible model)(Model number visible on keypad housing or back panel)
- 2x AAA batteries(Alkaline recommended for best performance)
- Screwdriver set(Phillips head #1 or #2 as needed)
- Ladder or step stool(Stable platform to reach mounted keypad)
- Owner’s manual or model-specific guide(Helpful for model-specific steps)
- Notepad and pen(Log codes and battery dates)
Steps
Estimated time: 30-45 minutes
- 1
Gather model details and safety checks
Locate the keypad model and the opener model. Check the area is clear and the ladder stable before touching components. This step ensures you follow the correct sequence for your exact hardware.
Tip: If you can’t locate a model number, photograph the label and search the manufacturer site for cross-reference details. - 2
Install fresh batteries
Open the keypad cover, remove old batteries, and insert fresh ones with correct polarity. A reliable power source reduces signal errors during programming.
Tip: Use high-quality alkaline batteries; avoid mixed brands in the same device. - 3
Put the opener into programming mode
Locate the Learn or Home button on the garage door opener motor unit and activate programming mode according to your model’s manual. The indicator light will flash or a tone will confirm mode is active.
Tip: If you can't find the button, consult the manual or the manufacturer’s support site for model-specific instructions. - 4
Enter and confirm a new keypad code
Enter your chosen 4- to 6-digit code on the keypad and confirm by following the manual’s prompts. Ensure you hear the confirmation and see the opener respond.
Tip: Choose a unique code not used elsewhere in the home; avoid obvious sequences like 1234. - 5
Test from both sides
Close the door and test by entering the code from outside, then confirm from inside. This validates programming accuracy and code authorization.
Tip: Test with the door in a near-closed position to verify safe reversal if needed. - 6
Record and finish
Log the new code in your notebook or password manager and store the manual for future reference. If anything fails, reset everything and start again from step 2.
Tip: Keep codes private and secure; avoid writing them in visible places.
Got Questions?
How do I reset my keypad to default on Chamberlain openers?
Reset procedures vary by model. Check the manual or Chamberlain support for exact steps. In many cases, you must re-enter programming mode and reprogram a new code to replace the old one.
Model-specific reset steps are in the manual. Reprogram a new code after reset to restore access.
Can I use a third-party keypad with Chamberlain openers?
Only if the keypad is listed as compatible with your Chamberlain model. Check the opener’s documentation or contact support for confirmation.
Compatibility is model-specific; verify with the manual or support before pairing.
What should I do if the keypad won’t pair with the opener?
Double-check the battery, confirm you’re in programming mode, and re-enter the code slowly. If persistent, reset the opener or consult the manual for model-specific steps.
Make sure the batteries are fresh and you are following the exact steps for your model.
How do I change or delete keypad PINs?
Enter the keypad in programming mode and follow the sequence to add or delete codes. Keep a log of the changes and remove old codes that are no longer in use.
Use programming mode to manage codes; delete unused ones and document changes.
Is the keypad battery replaceable?
Yes. Most keypads use replaceable batteries. Use the recommended battery type and replace promptly when signals weaken.
Yes, batteries can be replaced; use the right type and replace early if performance drops.
What happens during a power outage?
The keypad will only work if it has power. If the opener loses power, the keypad may not function until power returns; you can still use the wall switch if available.
Power outages may disable keypad operation until power is restored; use the wall switch if present.
Watch Video
Quick Summary
- Verify keypad compatibility before programming.
- Use fresh batteries and follow model-specific programming steps.
- Test the code from both sides to ensure reliability.
- Rotate codes regularly and log changes for security.