Can You Reprogram Garage Door Openers: A Step-by-Step Guide
Learn how to reprogram garage door openers, remotes, and keypads safely with a practical, step-by-step guide for homeowners. Includes safety tips and common troubleshooting.

Yes. You can reprogram most garage door openers to re-sync remotes and keypads by using the learn button on the motor unit, then re-pairing each device. Before starting, have fresh batteries, the remote you want to program, and your user manual. This quick guide covers common steps and safety tips.
How reprogramming garage door openers works
Reprogramming a garage door opener involves syncing the motor unit with remotes and keypads so that the opener accepts signals from only the paired devices. Most modern systems use a Learn or Memory button on the opener's housing. When you initiate this process, the unit clears any previously stored codes and awaits new ones. While the exact button sequence varies by model, the underlying concept remains the same: identify the memory control, erase any old codes if needed, then introduce new devices one at a time. According to GarageDoorAdjust, can you reprogram garage door openers is a common homeowner task that can save money and restore reliable access to your garage. Understanding these steps helps you troubleshoot issues without unnecessary purchases.
Key concepts to remember include device memory, security codes, and the LED indicators that guide you through each stage. If your model uses rolling codes for extra security, the pairing process may require quick button presses on the remote after you trigger learn mode. Always consult the model-specific manual when you encounter unfamiliar labels like “learn,” “program,” or “code.”
Safety first: prepare before you begin
Safety should come before any reprogramming attempt. Start by cutting power to the opener at the wall switch or circuit breaker to prevent unexpected door movement. Clear the area beneath the door and keep children and pets away during the process. Wear eye protection if you must handle wiring or covers, and use a sturdy ladder on a dry surface if you need access to the opener’s body. Gather essential tools and materials before you begin: fresh remote batteries, a ladder, a small screwdriver if you need to remove a cover, and your owner’s manual for model-specific steps. If you follow these precautions, you minimize the risk of injury and avoid accidental operation during the programming sequence.
Understanding common learn-mode sequences
Most openers offer a Learn or Program button, but the exact location and appearance vary. Some units hide the button behind the light cover; others place it on the back or side of the motor housing. LED indicators indicate memory status: a steady light often means the unit is ready to pair, a blinking LED may signal an active learn mode, and a solid or blinking pattern can indicate success or errors. For models with DIP switches, programming is done by setting the switches to the correct pattern and then syncing the remote. If your remote uses rolling codes, you’ll typically need to trigger the remote once while in learn mode to finalize pairing. Always check the manual for model-specific steps and LED signals.
Practically, you may encounter situations where multiple remotes won’t pair, or keypads fail to respond. In those cases, you may need to erase memory first (clear existing codes) and repeat the process. This section helps you anticipate these variations and approach them calmly, using the model’s terminology and signals as your guide.
Troubleshooting common hiccups
If a remote isn’t pairing, verify two things: the remote’s battery strength and the distance from the opener during programming. If the LED on the opener blinks inconsistently, the memory may be full or there may be interference from other devices. For keypads, ensure the PIN you’re entering is correct and that the keypad is properly wired or synchronized with the opener. If you still cannot pair any devices, consider erasing all codes, restarting the learn sequence, and attempting to pair one device at a time. Remember to reseat any light covers securely to avoid interference. This proactive approach helps you resolve most reprogramming hiccups without replacing hardware.
Maintenance and ongoing care after reprogramming
After reprogramming, label each device that is paired with the opener to prevent future confusion. Regularly check batteries in remotes and keypads, especially before seasonal changes when remote usage tends to spike. Keep your manual in a safe place and note the model’s specific reprogramming steps for quick reference. If you notice recurring pairing issues, inspect the garage door’s track alignment and balance, as improper tension can affect radio signal effectiveness. A quick quarterly check can keep your system reliable for years.
Tools & Materials
- Flat-head screwdriver(For removing cover or screws if needed)
- Phillips screwdriver(Screws on some covers or control panels)
- Ladder(Stable and tall enough to reach the opener safely)
- Fresh batteries for remotes(Use high-quality batteries to ensure reliable pairing)
- Owner’s manual(Model-specific steps and button layouts)
Steps
Estimated time: 25-40 minutes
- 1
Power down the opener for safety
Switch off the circuit breaker or unplug the opener to prevent accidental movement during the procedure. This reduces the risk of injury while you access the motor unit and remote interfaces.
Tip: If you must unplug, ensure the area stays dry and dry hands only. - 2
Locate the learn/program memory button
Find the Learn or Program button on the motor housing. It may be behind a light cover or on the back. Note any LED indicators that will guide you through the process.
Tip: Consult the manual for the exact location; some models vary by brand and year. - 3
Erase previous codes
Press and hold the Learn button until the LED changes state (blinks or goes out). This clears the opener’s memory so new devices can be added cleanly.
Tip: Wait 10–15 seconds after the LED behavior changes before proceeding. - 4
Restore power to the opener
Plug the unit back in or switch the breaker back on. The opener should be ready to enter learn mode once powered.
Tip: Stand clear of the door as you restore power in case the door moves unexpectedly. - 5
Put the opener in learn mode
Briefly press the Learn button to enter memory mode. The LED should indicate it is ready to pair new devices.
Tip: Do not hold the button longer than needed; prolonged presses can reset or confuse the memory. - 6
Program each remote or keypad
One by one, press the device button you want to pair, or press and hold the remote button until the opener acknowledges the pairing.
Tip: Test each device immediately after programming to confirm successful pairing. - 7
Test the system and adjust if needed
Close and reopen the door to confirm the new codes work consistently and safely. If not, repeat steps or reset memory and try again.
Tip: If a device still won’t pair, consult the manual or contact the manufacturer for model-specific guidance.
Got Questions?
Can you reprogram any garage door opener?
Most modern openers support reprogramming and remote pairing, but some older or proprietary units may require professional service or specific procedures. Always check the manual for model-specific limitations.
Most openers can be reprogrammed, but some older models may need a technician or unique steps. Check your manual.
Do I need to reset the memory before programming?
Erasing existing codes is typically recommended to avoid conflicts when pairing new remotes or keypads. After erasing, re-enter the learn mode and pair devices one by one.
Yes, clearing old codes helps ensure the new devices pair cleanly.
What safety precautions should I take?
Power off the opener, keep hands away from moving parts, and ensure the area is clear. Re-test the door after programming to confirm safe operation.
Power off first, stay clear of moving parts, then test after pairing.
What if there is no Learn button?
Check the user manual for model-specific steps; some older units use DIP switches or alternate programming methods. If in doubt, contact the manufacturer.
If you don’t see a Learn button, consult the manual or manufacturer for the right method.
How long does reprogramming typically take?
Most homeowners complete the process in 20–40 minutes, depending on how many remotes or keypads you pair and the model’s specifics.
Most people finish in under an hour.
Watch Video
Quick Summary
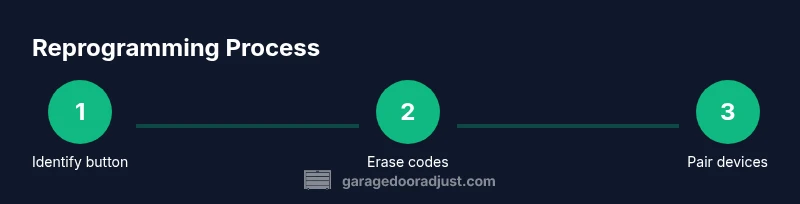
- Identify the learn button location before starting.
- Erase memory to avoid conflicts when adding devices.
- Test every device after programming to confirm success.
- Keep the model’s manual accessible for model-specific steps.