Buying a Garage Door Opener and Programming It
Learn how to buy a garage door opener, verify compatibility, install, and program remotes and keypad safely. This step-by-step guide covers drive types, features, and troubleshooting for homeowners.

According to GarageDoorAdjust, homeowners can buy a garage door opener and program it themselves when they choose a model that matches their door, rail length, and safety features. The process includes selecting the right horsepower and drive type, installing the rail and motor, and programming remotes or keypad through the opener’s learn button or app. This quick guide covers the steps, tools, and safety tips you need.
Can you buy a garage door opener and program it?
Yes—homeowners can buy a garage door opener and program it themselves when they select a model that matches their door, rail length, and safety features. The journey starts with understanding the main drive types (belt, chain, screw), the horsepower needed for your door weight, and compatibility with your door’s height and track setup. You’ll then install the rail, mount the motor, and program remotes or a keypad using the learn button or the manufacturer app. Throughout the installation, accuracy and safety matter more than speed. The GarageDoorAdjust team emphasizes careful preparation and adherence to the manual to avoid common pitfalls such as misaligned tracks or faulty sensor wiring. This section sets the stage for a confident DIY experience that ends with a smoothly operating opener.
Understanding Drive Types and Compatibility
Garage door openers come in several drive configurations, each offering different balances of noise, speed, and maintenance. Belt drives are the quietest, chain drives tend to be sturdier and louder, and screw drives offer fast operation with fewer moving parts. The right choice depends on door weight, insulation, and how you use the space above the doorway. When evaluating a model, check the horsepower rating (a higher rating is generally needed for heavy, insulated doors) and confirm the rail length matches your door height. Compatibility isn’t just about the door; it also involves the rails, brackets, and ceiling space. In practice, measure the door height, headroom, and track layout before you buy, and compare those measurements against the opener’s installation guide. GarageDoorAdjust’s analysis shows that most DIY projects succeed when you verify connector compatibility with your door and spring system before purchasing. A small upfront check reduces rework later and helps you choose features that will actually be useful, such as battery backup and smart hub.
Key Features to Look For
When you’re shopping, you’ll encounter a long list of features. Beyond the basic operation, consider belt vs chain vs screw drive, compatibility with existing remotes, and smart features (Wi-Fi connectivity, app control, voice integration). Look for safety features like auto-reverse, status indicators, and obstacle detectors. If your garage is used for storage or parking, you may also want a compact unit with a shorter ceiling footprint. Energy efficiency, noise levels, and the inclusion of a keypad or smartphone control should factor into your decision. Remember to budget for mounting hardware, installation brackets, and optional battery backup. Reading product manuals and comparing ratings from trusted sources helps you choose a model that aligns with your door size and daily use. GarageDoorAdjust’s approach emphasizes a thoughtful feature set rather than chasing bells and whistles that won’t get used.
Preparing for Installation: Tools, Safety, and Workspace
Adequate preparation makes DIY installation safer and faster. Gather the required tools: a drill, screwdrivers, a level, tape measure, pliers, a ladder, and a wrench set. Clear the work area and disconnect power to the old opener or to the circuit you’ll be using for the new unit. Plan the ceiling mounting: ensure there is enough headroom, no hidden wiring, and a solid attachment point for the motor bracket. It’s essential to wear safety glasses and work with a helper when handling the heavier components. If you’re unsure about electrical work, consult the manual for wiring details and follow local electrical codes. The goal is a clean, square installation with properly supported tracks and a safe sensor alignment. GarageDoorAdjust recommends reviewing the safety guidelines in your model’s manual and having a plan for wiring, wiring protection, and sensor placement.
Programming Remotes, Keypads, and Smart Features
Programming usually follows a similar pattern across brands, but exact steps vary. For most remotes, you’ll press and hold a Learn or Program button on the opener until a light signals, then press the remote button to memorize the signal. Keypads often require entering a code and pressing a Learn button to associate it with the opener. Smart features may require you to install a companion app, create an account, and pair the device by following on-screen prompts. If your opener supports security upgrades, enable rolling code or similar protection. Always test each remote and keypad from different distances and angles to confirm reliable operation. If you have a smart home hub, ensure the hub and the opener are on the same network and that any required skill or integration is enabled. GarageDoorAdjust notes that proper pairing is critical to security and convenience; mispaired devices are a common source of frustration.
Safety Sensors, Auto-Reverse, and Fine-Tuning
Safety sensors are the most important safety feature of your system. They detect obstacles in the door’s path and stop closing to prevent damage or injury. Install sensors at the bottom corners of the door frame and align them so their beams cross paths cleanly. After wiring sensors, perform a test by placing a small obstacle in the beam path and watching the door reverse—then remove the obstacle and test again. If the door doesn’t reverse on contact, adjust the force and limit settings per the manual. It’s crucial to ensure that the door opens fully and closes with adequate force without binding. Regularly test the pair of safety features monthly and after any heavy weather changes. Your setup should require active human intervention if a beam is obstructed, not at random intervals or after a partial closing.
Troubleshooting and Maintenance After Install
Even well-installed openers can encounter occasional issues. Common problems include remotes failing to pair, keypad codes not being recognized, and doors that won’t fully close. Start with the simplest fixes: replace batteries, reprogram remotes, and verify the Learn button procedure. If you notice unusual noises, squeaks, or a door that binds, inspect the tracks, rollers, and hinges for wear and lubrication needs. Worn springs or damaged cables require a professional, as do issues related to door balance. Create a maintenance checklist and schedule annual inspections for safety and performance. Regular lubrication, cleaning of sensors, and tightening of mounting screws help keep the system running smoothly. GarageDoorAdjust advises homeowners to document model numbers, serials, and firmware versions so future service or upgrades go smoothly.
Tools & Materials
- Power drill(Cordless with 1/4 inch hex bit; drill bits for wood/metal)
- Phillips screwdriver (PH2)(For mounting brackets and fasteners)
- Tape measure(Measure door width and rail length)
- Level(Ensure tracks are plumb)
- Step ladder(Sturdy, 2-3 steps)
- Wrench set(Sizes vary by model)
- Safety glasses(Eye protection during install)
- Voltage tester or multimeter(Check for live wires if wiring)
- Safety sensors and brackets(Infrared sensors and mounting hardware)
- Wire nuts and electrical tape(Wire connections)
- Optional smart hub or remote programming kit(If you want smart features)
- Straightedge or string line(Helpful for alignment)
Steps
Estimated time: 2-5 hours
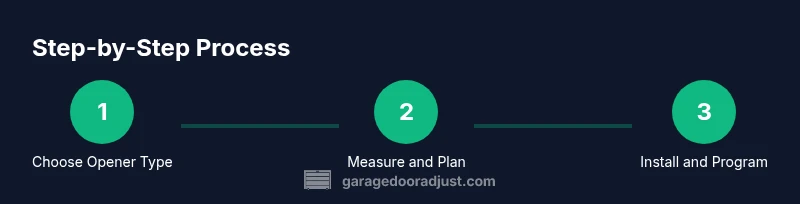
- 1
Choose opener type
Identify whether you want a belt, chain, or screw drive based on noise tolerance, maintenance, and door weight. Belt drives are quietest; chain drives are robust and affordable; screw drives are fast with fewer parts. Choosing the right type reduces future service calls and improves daily use.
Tip: Match your door weight and noise tolerance to the drive type. - 2
Measure door and rail requirements
Accurately measure door height, width, and headroom. Compare these measurements to the opener’s rail length and installation clearance. Longer headroom allows for more motor mounting options; insufficient headroom may require a different model or shorter rail.
Tip: Double-check headroom before purchasing to avoid misfit. - 3
Gather tools and safety gear
Gather all essential tools and PPE before starting. Having everything on hand reduces trips back and forth and lowers the risk of improper reassembly. Review the manual for any model-specific tools.
Tip: Lay out tools in a single workstation for efficiency. - 4
Disconnect power and remove old opener
Unplug the existing unit and disconnect any wiring from the door sensor. If you’re replacing a unit, carefully remove mounting brackets and disconnect the motor from the header. Label any cables to simplify reattachment.
Tip: Work with a helper when removing heavy components. - 5
Install rail and trolley on door
Attach the rail to the door bracket following the manufacturer’s spacing. Install the trolley onto the rail and check that it moves smoothly without binding. Ensure the track is level and square to avoid uneven wear.
Tip: Use a level and a straight edge to verify alignment. - 6
Mount the motor to ceiling and connect rail
Secure the motor bracket to a sturdy ceiling joist. Align the rail with the trolley and slide the carriage into position. Tighten mounting hardware to prevent movement during operation.
Tip: If you don’t have a secure joist, use reinforced mounting anchors. - 7
Install safety sensors and wires
Mount safety eyes at the bottom corners of the door frame and route wiring cleanly. Align sensors so their beams meet in the middle, with no obstructions. Replace any frayed wires and secure cable protection.
Tip: Test beam alignment by closing the door with an obstacle between sensors. - 8
Connect power and wire components
Connect the opener to a power source as directed by the manual. If you’re adding wiring for lights or smart features, route cables away from moving parts. Recheck all connections for tightness and proper insulation.
Tip: Power off when making any electrical connections. - 9
Program remotes and keypad
Enter programming mode on the opener by pressing the Learn button, then press each remote to memorize. For a keypad, enter a code and press the Learn button to pair. If you have a smart hub, follow the app prompts to complete pairing.
Tip: Test each device at various distances to confirm reliable operation. - 10
Test, adjust limits and finalize
Run the door through a full cycle and observe opening and closing limits. Adjust if needed so the door stops at the correct height and reverses when encountering an obstacle. Tighten screws and clean up the workspace before use.
Tip: Record settings for future maintenance or upgrades.
Got Questions?
Can I program any remote with a garage door opener?
Not all remotes work with every opener. Check the model number and compatibility list in the manual. If a universal remote is marketed for several brands, verify it supports your specific model by code or memory pairing.
Most remotes require compatibility confirmation. Check the manual to confirm; universal remotes may work only with certain compatibility codes.
What if my opener uses a newer smart remote or app?
Newer openers often support smartphone control via a companion app or a smart home hub. You may need to update firmware and create an account. Follow the manufacturer’s app instructions for pairing and features.
Many modern openers pair with apps through a setup process—follow the app’s steps for a quick connection.
Do I need to hire a pro for programming and wiring?
Many homeowners successfully install and program openers themselves. If you’re unfamiliar with ceiling mounting, electrical work, or garage wiring, consider professional installation for safety and warranty protection.
DIY is possible, but if you’re unsure about wiring or mounting on the ceiling, a pro can help.
Why won’t my remote pair with the opener?
Common causes include battery issues, incorrect Learn button timing, or an incompatible device. Recheck the button sequence in the manual and try replacing batteries. If needed, reset the opener to factory settings and retry the pairing process.
Try fresh batteries and the exact pairing steps in the manual; if it still fails, you might need a replacement remote.
What safety checks should I perform after programming?
Test auto-reverse with a small object in the door path, confirm the door reverses immediately, and check that sensors are aligned. Ensure the opener stops if forced and that the door opens smoothly without binding.
Test the safety reverse and sensor alignment to ensure the door stops safely when obstructed.
How often should I lubricate and inspect the door?
Inspect tracks, rollers, and hinges monthly and lubricate moving parts as needed. Regular maintenance helps prevent binding and reduces wear on springs and cables.
Do a quick monthly check of tracks and moving parts, and lubricate as needed.
Watch Video
Quick Summary
- Verify compatibility before buying any opener.
- Follow the manual closely for safe installation.
- Program remotes and keypad using the Learn button or app.
- Test safety features before regular use.
- Schedule regular maintenance to prevent issues.