What to Insulate Garage Doors With: A Practical How-To
Discover how to choose the right insulation materials for garage doors, install them correctly, and maintain energy efficiency and comfort all year long.

According to GarageDoorAdjust, you can dramatically improve energy efficiency and comfort by insulating your garage door. This guide shows how to choose insulation materials, assess door types, and install blankets or boards for common garage door designs. You’ll learn what to insulate with, how to fit it properly, and how to maintain thermal performance over time.
Why insulating a garage door matters
Insulating a garage door is more than a winter comfort upgrade—it’s a practical way to reduce heat loss, lower energy bills, and add year‑round usability to the space. For homeowners, the right insulation helps stabilize temperatures in adjacent rooms, protects stored items, and minimizes drafts that creep in around door edges. According to GarageDoorAdjust, insulation is a practical upgrade homeowners can do themselves, especially on sectional or panel doors. A well‑sealed door reduces heat transfer through the door surface and complements existing weather‑stripping to cut cold air infiltration. In busy garages that double as workshops, better insulation means fewer temperature swings, better stability for tools and finishes, and less strain on your heating system. This section sets the stage for material choices and practical installation approaches that fit different door configurations and climate conditions.
How to evaluate your door, climate, and goals
Your insulation strategy starts with understanding your door type and climate. Sectional doors, which roll up in panels, respond best to panel‑scale insulation like foam blankets or rigid foam boards cut to fit each panel. One‑piece or tilt‑up doors may benefit from flexible blankets or reflective foils that wrap along the door surface without adding excessive weight. Climate matters: colder zones demand higher R‑value solutions and robust edge seals, while milder climates may tolerate thinner insulation with better moisture control. You’ll also consider budget, ease of installation, and whether you plan to preserve the original door color or modify aesthetics. Before choosing material, record the door type, panel dimensions, hinge placements, and any existing seals so you can align insulation thickness with available clearance. In all cases, top‑quality weather stripping around the sides and bottom remains essential to prevent drafts and moisture intrusion.
Choosing the right insulation materials for your door
There are several insulation options, each with its own pros and tradeoffs. Fiberglass blankets are inexpensive and easy to cut, but they may require a light frame to keep the material in place. Foam boards (polystyrene or polyiso) offer higher R‑values with thinner profiles, which can be ideal for doors with tight clearance. Reflective foil blankets work well in hot climates by reducing radiant heat, but they are less protective against cold air and may need protective layers. For many homeowners, a composite approach—foam boards on the interior side of the panel paired with a weather‑seal kit on the edges—delivers a balanced combination of thermal performance and durability. When selecting materials, prioritize safety certificates, resistance to moisture, and compatibility with your door’s mounting hardware and springs. Always check for fire ratings and maintain venting clearances if you’re using any sprayed foams.
Installation strategies: retrofit options vs. replacement
Retrofitting insulation is usually the fastest and least invasive route. For sectional doors, cut insulation to panel shapes and secure with compatible adhesives or fasteners, taking care not to interfere with hinges or track hardware. If space allows, consider rigid foam boards mounted to the interior surface with a thin plywood backing to improve rigidity. Another retrofit option is insulating blankets that wrap over the door surface and tuck into the door’s edges; ensure the blanket won’t snag on moving parts. If the door is very old or damaged, replacement with an insulated door may offer greater long‑term benefits, particularly for energy efficiency and reduced maintenance. Whatever route you choose, confirm the door remains balanced and operates smoothly with your existing opener, and plan for occasional inspection of the insulation to prevent sagging or moisture buildup.
Maintenance, safety, and long‑term performance
After installation, perform a basic inspection to ensure there are no gaps, bulges, or interference with moving components. Check weather seals at the bottom and along the sides, and replenish any worn strips every season or two. Monitor for moisture, mold, or pest intrusion behind insulation, especially in humid climates. Periodically test the door’s balance and auto‑reverse function to ensure safe operation, consulting a professional for adjustments if you notice unusual noise or binding. Proper maintenance will maximize the insulation’s lifespan and keep the garage comfortable, quiet, and energy efficient over many years.
Tools & Materials
- Foam insulation boards (polystyrene or polyiso)(Cut to panel size with a utility knife; choose thickness based on door clearance)
- Fiberglass insulation blankets(Good value; add a rigid backing if necessary for panel rigidity)
- Reflective foil insulation blankets(Best for radiant heat; not a primary cold barrier)
- Weather-stripping kit (door bottom seal and side seals)(Essential to minimize drafts around edges)
- Adhesive spray or double‑sided tape(Choose heat‑resistant formulas suitable for door materials)
- Foil tape(Seal seams and edges to prevent air leaks)
- Measuring tape(Accurate measurements prevent wasted material)
- Utility knife or saw(For cutting boards and blankets to size)
- Scissors(Helpful for trimming blankets or fabric edges)
- Gloves and safety glasses(Protect hands and eyes during installation)
- Plywood backing (thin)(Used to stabilize insulation on panels)
- Ladder(Access higher door sections safely)
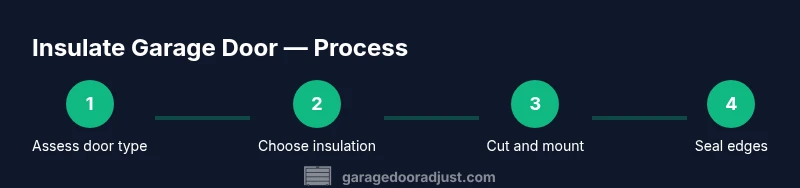
Steps
Estimated time: 60-120 minutes
- 1
Measure and prep the door
Begin by recording panel dimensions and existing clearances around hinges and tracks. Clean the door surface to remove dust and grease so insulation adheres properly. If you’re retrofitting, inspect for rust or damage that could affect mounting.
Tip: Double‑check clearance before cutting to avoid binding on tracks. - 2
Choose insulation material
Select one or a combination of insulation types based on your climate and door type. Consider the door’s internal space and whether you need extra rigidity, moisture resistance, or radiant heat control. Always verify compatibility with your door hardware.
Tip: In colder climates, favor higher R‑value materials and moisture barriers. - 3
Cut insulation to fit panels
Using measuring marks from step 1, cut boards or blankets to fit each panel without overlapping edges. Leave a small margin for edge seals to accommodate movement. Dry‑fit before applying adhesive to ensure a snug, gap‑free fit.
Tip: Mask off adjacent hardware to prevent damage during cutting. - 4
Attach insulation securely
Apply adhesive or tape to secure the insulation to the interior surface. Press firmly to avoid air pockets, and ensure no material overlaps moving parts. Use a backing board if you’re using blankets alone to improve rigidity.
Tip: Work in small sections to maintain alignment and avoid buckling. - 5
Seal edges and joints
Install weather‑stripping along the sides and bottom to seal gaps. Tape seams with foil tape to maximize airtightness and prevent moisture intrusion. Recheck clearances to ensure the door still opens and closes smoothly.
Tip: Pay extra attention to the bottom seal, where drafts are most common. - 6
Test and adjust the opener balance
Manually lift the door to confirm it stays balanced and doesn’t jump or bind. If the door is heavy or hard to move, call a professional for a balance adjustment before using the opener. Run the automatic opener to verify safe operation and adjust if needed.
Tip: Never operate the door if you detect binding—needle‑point balance is crucial for safe operation.
Got Questions?
Will insulating my garage door void the warranty?
Most manufacturers do not void a warranty simply for adding insulation if you use approved materials and follow installation instructions. Always check your door’s warranty terms and avoid modifying essential components beyond the user‑serviceable scope.
Insulation generally won’t void the warranty if you use approved materials and follow the instructions, but always check your specific warranty terms.
Can I insulate an old door or should I replace it?
Insulating an older door can be a cost‑effective improvement, but if the door is structurally compromised or heavily warped, replacement with an insulated door may offer better long‑term performance and fewer maintenance issues.
You can insulate an older door, but if it’s badly warped or damaged, consider replacing it for best results.
What insulation material is best for garages?
There isn’t a single best material; the choice depends on climate, door design, and budget. Foam boards offer high R‑values in thin profiles, while blankets are easier to install on irregular panels. A hybrid approach often provides the best balance of performance and ease.
Foam boards and blankets each have strengths; choose based on climate and door type, possibly combining them for best results.
Will insulation affect my garage door opener?
If you select the insulation thickness carefully and avoid obstructing tracks, hinges, or the opener mechanism, most doors continue to operate normally. Always test balance and opener functionality after installation to ensure safety.
As long as you don’t block moving parts and test the door, insulation usually won’t affect your opener.
How long does insulation last in a garage door?
The lifespan depends on material choice, climate, and humidity. With proper installation and maintenance, insulated doors can maintain performance for many years, with periodic checks for moisture and integrity of seals.
With good upkeep, insulated garage doors can perform well for years; check seals and moisture regularly.
Watch Video
Quick Summary
- Measure carefully before cutting to minimize waste.
- Choose insulation that matches your climate and door type.
- Seal edges well to maximize energy savings.
- Regularly inspect for moisture and wear to maintain performance.