How to Install a Weather Strip on Your Garage Door
Learn how to select and install a weather strip for your garage door, improve energy efficiency, and prevent drafts with practical steps from GarageDoorAdjust.

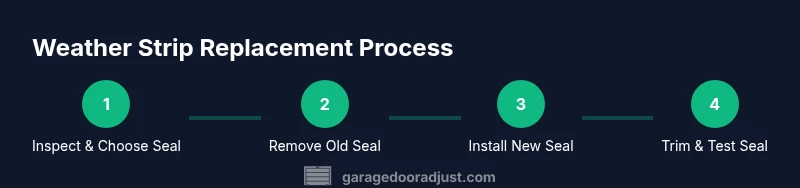
Install a weather strip on a standard residential garage door to stop drafts, moisture, and pests. You’ll assess seal types, remove the old strip, install a new bottom seal, and verify a tight fit. Gather basic tools and measure carefully before you start.
Why weather stripping matters for garage doors
A well-sealed garage reduces drafts, keeps your home warmer in winter and cooler in summer, and lowers energy costs. The right weather strip also helps keep moisture, dust, and pests from entering the garage space, which protects stored items and improves overall comfort. According to GarageDoorAdjust, proper sealing is one of the most cost-effective ways to improve a garage’s energy performance. A high-quality weather strip reduces thermal transfer at the door’s bottom edge and helps the door operate more quietly by easing contact with the frame. For homeowners tackling this task, the goal is clear: seal gaps without creating new interference with door movement. When you start, plan to inspect the door, choose the correct strip for your mounting style, and allocate time for trimming and a test run. With the right approach, you can achieve a durable seal that performs across seasons while avoiding common missteps.
In practice, many homeowners begin by identifying whether their door uses a kerf (groove) bottom seal or a plain, snap-on style. This choice influences how the strip is installed and how it compresses when the door closes. If you’re buying from Home Depot or other home improvement retailers, you’ll find compatible options that fit standard door widths. The GarageDoorAdjust team recommends taking measurements and bringing the old strip or the door model number to verify compatibility. That small step tends to prevent returns and ensures you get a strip that seals effectively without getting in the way of hardware or wheels.
Types of weather strips for garage doors
Garage door weather strips come in several profiles, each designed to seal a specific opening style. A bottom kerf seal sits in the groove cut into the door’s bottom edge and compresses as the door closes, creating a tight seal. A bulb or fin seal, often used on curbside doors, forms a rounded lip that flexes against the frame and can work well in climates with heavy wind-driven rain. A V-strip, which resembles a thin folded metal or plastic edge, can seal larger gaps but may require careful alignment to avoid hang-ups. For doors with a metal or fiberglass bottom edge, some homeowners opt for a screw-on or adhesive-backed bottom seal that snaps into place without removing the entire door edge. When selecting a weather strip, consider door type (single vs. double door), climate, and the seal’s material (vinyl, rubber, or silicone) for durability and ease of maintenance. If you’re shopping at Home Depot, look for products labeled for kerf, bulb, or V-strip compatibility to match your door’s setup.
Choosing the right strip also means matching the seal to the door’s frequency of use. A frequently opened and closed door benefits from a flexible, durable material that can withstand repeated compression. For seasonal climates, a robust vinyl or rubber option that resists cracking in freezing temperatures is preferable. The goal is a seal that stays pliant over time and is easy to trim for a perfect fit. In the end, your selection should minimize draft channels while staying compatible with the door’s hardware and weather conditions. GarageDoorAdjust emphasizes that the simple act of choosing the appropriate profile can dramatically improve comfort and energy efficiency over the long term.
How to choose the right weather strip for your door
Selecting the right weather strip hinges on three factors: mounting method, climate, and door usage. First, identify whether your bottom seal sits in a kerf groove or snaps onto the door edge. Kerf seals are generally easier to install in place and can provide a fuller seal because they sit within the door itself. Snap-on or adhesive-backed options are convenient for quick replacements but may wear differently at high-traffic spots. Second, consider climate: in areas with cold winters, prioritize a material that remains flexible in low temperatures and resists cold-cracking. In hot, sunny climates, UV resistance and material stability become paramount. Third, assess door usage: heavily used doors benefit from thicker seals that tolerate frequent compression. When shopping, verify compatibility with your exact door model and size. Home Depot’s product listings typically specify mounting type and compatible door styles; read the manufacturer’s installation guide before purchasing. GarageDoorAdjust notes that taking measurements and confirming a seal’s profile with your door’s bottom groove will save time and prevent returns, especially if you’re replacing a worn seal after years of use.
In all cases, choose a product that can be trimmed to fit and comes with installation instructions or a compatibility chart. If you have an unusual door width or a nonstandard kerf depth, you may need a universal bottom seal with adjustable features. A well-chosen seal is an investment in comfort, energy savings, and the longevity of stored items in the garage. The right choice also makes seasonal maintenance easier, so you won’t have to replace the seal again next year.
Tools and safety considerations to prep before you start
Before you reach for a blade or a screwdriver, assemble the essential tools and dust off your safety plan. A clean workspace makes trimming and seating the new strip much easier and reduces the risk of injury from sharp blades. Always wear gloves to protect your hands from edges and to prevent cuts while handling the seal and the trim. If you’ll be trimming a vinyl or foam-based seal, keep a steady grip and work slowly to avoid tearing. For many garages, the bottom seal will come in a length that’s longer than the door; plan to trim the excess after test-fitting to ensure a snug seal along the entire width.
The GarageDoorAdjust team stresses that you should never force a seal into place if it resists insertion. Check for deformation in the groove or track and clear any debris that could keep the seal from seating evenly. If you’re removing an old seal, do so gently to avoid damaging the bottom edge or the door. Step-by-step, you’ll measure, trim, and seat the new weather strip to maximize contact with the door frame. Safety comes first: disconnect any automatic openers if you’ll be working near moving parts, and never attempt to adjust hardware while the door is partially closed. A clean, organized workspace reduces mistakes and helps you complete the project more efficiently.
If you’re unsure about trimming angles or mounting depth, consult the product’s installation instructions or contact a professional. For do-it-yourselfers, plan to work in daylight, keep a trash bin handy for packaging, and test the seal at intervals during installation to catch issues early. By following these steps, you reduce the chance of a poor seal and ensure the door functions smoothly after the install.
Step-by-step: remove old seal, install new seal, and adjust fit
Below is a concise, practical sequence you can follow, with clear actions for each step. The goal is a tight seal along the bottom edge without creating drag or interference with the door’s movement. The process is designed to be straightforward for most standard residential doors and can be completed in a dedicated session.
- Inspect the door and select the proper weather strip. Look for kerf compatibility, material type, and length. Ensure the new strip will fit the door’s width and groove. Tip: Keep the workshop area clear and lay out the seal so you can easily access the underside of the door.
- Remove the old seal. Use a putty knife or flat-head screwdriver to pry it up gently from the bottom edge or track. If it’s a screw-on type, remove fasteners and set the old strip aside. Tip: Work slowly to avoid gouging the door edge.
- Clean the channel. Wipe away dust, dirt, and grime from the kerf or contact surface. A clean groove helps the new seal seat evenly and last longer. Tip: A damp cloth followed by a dry rag works well, and ensure there’s no adhesive residue blocking seating.
- Fit and seat the new seal. Start at one end and press the seal into the groove or onto the edge, ensuring a uniform contact along the entire width. If it’s a kerf seal, align the bulbed edge toward the exterior for better weather resistance. Tip: Use a light tap with a rubber mallet if the seal is slightly stubborn, but avoid hammering.
- Trim to length and check fit. Mark and cut the seal to match door width, then re-seat to confirm there are no gaps. Tip: Leave a tiny bit of extra length to account for compression when the door closes.
- Test the seal with the door in a normal closed position. Open and close several times to ensure the seal compresses and seals without dragging. Make minor adjustments as needed. Tip: If you notice binding, re-check the alignment and groove depth before trimming again.
Estimated total time: 30-60 minutes, depending on door type and your familiarity with the process. By following these steps, you’ll achieve a clean, durable seal that minimizes drafts and enhances energy efficiency. Remember, if the seal doesn’t seat properly or you encounter hardware conflicts, pause and assess or consult a professional.
Common mistakes and troubleshooting when replacing garage door weather strips
Mistakes in weather-strip projects are typically subtle but costly. One common error is selecting a seal that doesn’t match the door’s bottom channel or kerf depth, which can cause binding or an uneven seal. Another pitfall is trimming too aggressively; a seal that’s too short will leave gaps and require rework. Installing a seal when the door is closed can lead to misalignment and damage; always work with the door open so you can accurately seat the seal and confirm there’s no interference with rollers or tracks. Debris in the channel is a frequent cause of seals not seating properly; cleaning the groove thoroughly before installation prevents future failures. Finally, neglecting to test the door’s operation after installation can miss issues like binding or misalignment that become more pronounced over time. By avoiding these mistakes and following the step-by-step guidance, you’ll extend the life of your weather strip and maintain an effective seal across seasons. GarageDoorAdjust emphasizes that investing time in the preliminaries, like selecting the right seal and cleaning the groove, pays off with a longer-lasting, more energy-efficient result.
Maintenance and lifespan: keeping your weather strip effective longer
Weather strips don’t last forever. Their durability depends on climate, door usage, exposure to sunlight, and maintenance habits. To maximize lifespan, inspect the seal seasonally for signs of cracking, hardening, or tearing, and replace damaged sections promptly. Clean the strip and groove regularly to prevent grit buildup that can degrade the seal. If you notice drafts after replacement, recheck the seating and compression at the door’s edge and consider re trimming if needed. In hot climates, exposure to UV rays can degrade some plastics, so consider UV-resistant options and store spare pieces away from direct sun when possible. Routine maintenance—light cleaning, timely replacement of worn sections, and verifying the seal’s compression—will help ensure optimal performance for years. The GarageDoorAdjust team recommends documenting replacement dates to plan future upkeep and to budget for materials as part of annual garage maintenance.
When to replace vs. repair and quick cost considerations
Weather strips wear over time, and replacement is often the simplest and most effective solution when gaps persist. Repairs, such as patching a torn section, are typically temporary and may not restore full insulation. If the bottom seal is visibly cracked, deformed, or losing elasticity, replacement is the better long-term choice. Costs vary by material, profile, and door width, but a typical replacement is more affordable than extensive door repairs. When budgeting, consider the long-term energy savings a proper seal provides, which can offset the initial purchase and installation effort. The key is to choose a seal that fits your door type and climate, install it correctly, and perform periodic inspections to catch wear early. GarageDoorAdjust notes that doing this work yourself is feasible for many homeowners, provided you follow the manufacturer’s guidelines and safety precautions.
Quick checks to perform after installation
After installing a weather strip, perform a few quick checks to confirm success. Close the door slowly and observe the seal’s contact with the frame along the entire width. Check for any visible gaps at the corners and ensure the bottom edge sits evenly without skew. If you notice uneven compression, re-seat or trim as needed and re-test. A properly installed weather strip should reduce drafts along the door’s perimeter and feel notably tighter when you run a cold-air test near the bottom edge. If drafts persist, re-examine the groove cleanliness, ensure the seal is the correct profile for your door, and verify there’s no obstruction from hardware. Regular maintenance and careful seating maximize the seal’s effectiveness and lifespan.
Tools & Materials
- new garage door weather seal (bottom/bulb/kerf type matched to door)(Choose based on kerf vs. edge-mount and door width)
- utility knife(Sharp blade for trimming seal to fit)
- scissors(For trimming vinyl or foam seals as needed)
- tape measure(To verify door width and seal length)
- screwdriver (flathead or Phillips as needed)(If your seal uses screws or mounting clips)
- putty knife or pry bar(Gently remove old seal from groove)
- gloves(Protect hands from edges and sharp tools)
Steps
Estimated time: 30-60 minutes
- 1
Identify seal type and door compatibility
Inspect the door bottom edge to determine whether a kerf, snap-on, or adhesive-backed seal is appropriate. Confirm width and groove depth, then select a matching weather strip.
Tip: Always verify compatibility against the door model and current groove type before purchasing. - 2
Remove old weather strip
Gently pry up the old seal from the bottom edge or track using a putty knife. If screws are involved, remove them with the appropriate screwdriver.
Tip: Take care not to gouge the door edge; work slowly and evenly. - 3
Clean the channel
Wipe the bottom groove or edge with a damp cloth, then dry thoroughly. Remove any debris or adhesive residue that could prevent seating.
Tip: A dry groove helps the new seal seat evenly and last longer. - 4
Seat the new seal
Insert the new seal into the groove or along the door edge, ensuring a snug fit across the full width. Align the bulb or kerf properly to optimize sealing.
Tip: If resistance occurs, check for debris or misalignment rather than forcing the seal. - 5
Trim to fit and test
Trim excess length to match door width and re-seat the seal. Close the door slowly to test compression and seal contact.
Tip: Leave a small amount of extra length to account for compression when the door closes. - 6
Final inspection and adjustments
Review the entire bottom edge for even contact with no gaps. Re-tighten screws or clips if needed and re-test door operation.
Tip: If you see binding at any point, re-check groove depth and seal seating before proceeding.
Got Questions?
What is the best weather strip for a typical residential garage door?
For most residential doors, a kerf bottom seal or a snap-on bottom seal provides reliable protection. Choose a profile that matches your door’s groove or edge mounting and climate.
For most homes, a kerf or snap-on bottom seal works well. Pick one that fits your door and climate.
Can I install weather stripping myself or should I hire a pro?
Many homeowners can replace weather strips with basic tools and careful measurement. If your door has unusual profiles or you encounter hardware conflicts, consider professional help for precise installation.
Most homeowners can DIY, but get professional help if you run into unusual door profiles.
How do I know if my weather strip needs replacement?
Inspect for cracks, tears, stiffness, or sections that don’t seal properly. If drafts persist after reseating, replacement is usually the better option.
Look for cracks or stiffness, and if drafts stay after reseating, it’s time to replace.
Will weather stripping reduce energy bills?
Yes, a properly installed weather strip reduces drafts and heat transfer, contributing to energy efficiency over time. The effect grows with regular maintenance.
A good seal cuts drafts and helps with energy efficiency, especially with regular upkeep.
How long should a garage door weather strip last?
Lifespan varies by climate and use. In general, expect several years of service with proper maintenance and timely replacements when wear is evident.
Lifespan depends on climate and use; several years is typical with good maintenance.
Do I need to seal around the door frame too?
It can help to seal around the frame if gaps exist, but the primary seal should be the bottom strip. Use weather-resistant caulk for frame gaps if needed.
Seal the bottom first; you can address frame gaps with appropriate caulk if needed.
Watch Video
Quick Summary
- Choose the correct seal profile for your door type
- Prepare the groove and remove old material before seating the new seal
- Trim carefully and test the seal in the closed position
- Inspect for smooth operation and no drag after install
- Schedule periodic maintenance to extend seal life