Clopay Garage Door Insulation: A Homeowner's Step-by-Step Guide
Boost energy efficiency and comfort by insulating a Clopay garage door. This guide covers assessment, insulation options, safety, and a practical installation plan for homeowners.

You can dramatically improve comfort and energy efficiency by insulating a Clopay garage door. This guide explains how to assess door insulation, select appropriate materials, and install or upgrade insulation safely. You’ll learn how to measure, choose R-value targets, prepare the door, and verify a tight seal with weatherstripping.
Why Insulation Matters for Clopay Garage Doors
For many homes, the garage is a source of energy loss, especially with older or uninsulated Clopay garage doors. Insulation improves thermal performance, reduces drafts, dampens noise, and helps maintain a consistent temperature in the garage that can affect adjacent living spaces. When you choose insulation for a Clopay door, you’re balancing core materials, panel design, and weather seals. The GarageDoorAdjust team emphasizes that proper insulation starts with knowing your door type and how it is constructed. By selecting compatible insulation and sealing gaps, you can see meaningful comfort gains and modest energy savings over time.
Assessing Your Door and Your Goals
Before buying insulation, assess your current door and define your goals. Inspect whether the door has an insulated core or a bare panel, and examine weatherstripping around the perimeter for wear. Note any uneven panels, gaps at the bottom edge, or drafts near the opening edge. Measure the door’s width, height, and panel counts, and identify hinge locations that could impact insulation installation. If you have a high-use door or live in a climate with extreme temperatures, your goals should include minimizing heat transfer and preventing air leaks. According to GarageDoorAdjust, a clear plan reduces wasted effort and helps you pick the right insulation approach for Clopay models.
Insulation Options for Clopay Doors
Clopay offers doors with insulated cores and optional retrofit insulation solutions. Insulated cores typically use polyurethane foam or polystyrene panels to increase rigidity and reduce heat transfer. When evaluating insulation options, compare the door’s existing core versus retrofit kits designed for non-insulated or partially insulated models. Retrofit kits are a practical path to improve performance without replacing the whole door. If your door is very old, heavily drafty, or incompatible with a retrofit, replacing with a fully insulated Clopay model may deliver better long-term results. Always verify compatibility with your specific door model and frame configuration.
Preparing for Installation
Preparation is key to a successful insulation upgrade. Gather the necessary tools such as measuring tape, utility knife, weatherstripping, adhesive, and safety gear. Clean the door surface to remove dust, oil, and old adhesive before applying any insulation. If you are using a retrofit kit, lay out components and read the manufacturer’s instructions in advance. For weather stripping, ensure the track and frame edges are clean and dry to maximize adhesion. Planning ahead reduces delays and helps you work safely when the door is in the closed position.
Step-by-Step: A Practical Path to Insulation (DIY Retrofit Kit Path)
This section outlines a practical path for homeowners using a retrofit insulation kit. Follow kit instructions for panel alignment, adhesive application, and trimming. Do not overfill or force insulation into tight corners. Careful trimming ensures a precise fit along edges and around hardware. After application, press firmly to create a solid bond and allow adhesives to cure as directed. As you proceed, keep the door closed and test balance after each major stage to avoid binding or misalignment.
Step-by-Step: Full Replacement Path (IfYou Choose a New Insulated Door)
If your door is old, severely drafty, or structurally compromised, replacing with a fully insulated Clopay door can be worthwhile. Start by measuring rough opening and confirming ceiling height allowances. Remove the old door panels or sections as instructed by the manufacturer, then install the insulated door following the provided hardware sequence. Reconnect springs and balance components with caution, ensuring everything aligns with the track and opener connections. Finally, recheck operation and test seal integrity around the frame.
Authority Sources and Practical Verifications
To support your insulation decisions, consult reputable resources on home insulation and weatherproofing. Confirm guidance from government and university sources on insulation best practices and proper weatherstripping installations. In addition, verify the door’s operation after installation by testing with the door in the fully closed position and checking for any air leaks under the bottom edge. The combination of high-quality materials and careful installation yields the best long-term results for Clopay garage doors.
Common Mistakes and How to Avoid Them
Avoid common pitfalls like selecting an insulation option that’s not compatible with your door model, over-complicating installation, or neglecting a thorough seal around the perimeter. Take time to read instructions, confirm component compatibility, and perform a slow, deliberate installation. If in doubt, consult a professional installer who is familiar with Clopay doors and your climate zone.
Tools & Materials
- Measuring tape(At least 25 ft to measure door dimensions and gaps.)
- Utility knife(For trimming insulation and weatherstripping.)
- Putty knife / scraper(Scrape away old adhesive and clean surfaces.)
- Scissors or shears(Trim retrofit insulation to fit panels.)
- Weatherstripping kit(New seals around the door perimeter.)
- Adhesive/cement suitable for foam(Secure insulation panels where needed.)
- Cleaner/degreaser(Prepare surfaces for adhesive bonding.)
- Gloves and safety glasses(Protect hands and eyes during installation.)
- Ladder or stepped stool(Access upper door panels safely.)
- Hammer and small pry bar(Use if panels or trim require gentle adjustment.)
- Heat gun (optional)(Softens some plastics for bending or shaping.)
Steps
Estimated time: 2-4 hours
- 1
Inspect and measure
With the door fully closed, inspect the surface for dirt, old adhesive, and damage. Record door width, height, panel count, and hinge locations. Take photos for reference and double-check that weatherstripping is intact. This sets the basis for selecting an insulation approach and confirms clearance for installation tools.
Tip: Document your measurements on a quick sketch to avoid misinterpretation later. - 2
Choose insulation approach
Decide between retrofitting insulation onto existing panels or replacing with a fully insulated door. Retrofit kits work well for modest improvements and budget constraints. Replacing with an insulated model can deliver stronger long-term performance in extreme climates. Ensure compatibility with your door model and opener type.
Tip: If in doubt, compare a retrofit kit’s coverage against your door’s area and hinge layout. - 3
Prepare the surface
Clean the door thoroughly to remove dust, grease, and residue. A dry surface improves adhesive bonding. If you remove hardware or weatherstripping, label parts to simplify reassembly. Ensure the track area is clear before starting.
Tip: Wipe with a degreaser and dry completely before applying adhesive. - 4
Apply insulation or install retrofit kit
Follow the kit’s instructions or door manufacturer’s guidelines. Align insulation with panel faces, trim to fit edges, and press firmly to ensure adhesive contact. Avoid gaps at corners and near tracks that could bind the door. Work in manageable sections to maintain alignment.
Tip: Work slowly on edges; a straight edge helps keep panels flush against the door. - 5
Seal edges and trim
Apply weatherstripping along the perimeter, trimming to fit. Seal any visible seams with the appropriate adhesive or tape. Confirm that bottom seals create a tight contact with the floor when the door is closed. Reinstall hardware and ensure nothing interferes with operation.
Tip: Finish with a light pressure check along all edges to confirm a snug seal. - 6
Test operation and verify seal
Open and close the door to verify smooth operation. Check for rubbing on insulation edges and adjust if necessary. Test for air leaks by feeling for drafts near the frame with the door closed. If you notice leaks, reapply seals or trim excess material.
Tip: Test multiple cycles to ensure stable balance and without binding.
Got Questions?
What insulation options does Clopay offer for garage doors?
Clopay doors can come with insulated cores, often polyurethane foam or polystyrene panels. For existing doors, retrofit insulation kits or weatherstripping improvements are common, affordable upgrades. Always verify compatibility with your specific model.
Clopay doors may have insulated cores, or you can improve non-insulated doors using retrofit kits and weatherstripping. Check compatibility with your model before starting.
Can I insulate an existing non-insulated Clopay door myself?
Yes, many homeowners can install a retrofit insulation kit with basic tools. If your door is heavy or the kit requires tools you don’t have, consider hiring a professional. Always follow the kit instructions carefully.
Yes, you can often DIY with a retrofit kit. If the door is very heavy or you lack tools, a pro is a safer choice.
What signs indicate my door needs insulation?
Frequent drafts, cold interiors near the garage, or temperature differences between the garage and adjacent rooms suggest insulation is needed. Visible gaps or worn weatherstripping are also indicators. Inspect the door’s joints and bottom seal for air leaks.
If you notice drafts or cold rooms next to the garage, it’s a good sign insulation could help. Check seals and gaps too.
Is insulation worth the cost in a drafty climate?
Insulation generally improves comfort and reduces energy transfer, which can lower heating and cooling costs over time. The effectiveness depends on climate, door type, and how well perimeters are sealed. Weigh upfront kit or replacement costs against expected savings.
In drafty climates, insulation often pays off through comfort and energy savings, though results vary by setup.
How long does installation take?
DIY retrofit installations typically take a few hours, depending on door size and kit complexity. Full door replacement takes longer and may require professional help for safe handling of torsion springs and tracks.
Most retrofit installs take a few hours; full replacements take longer and may need a pro.
Should I hire a professional to insulate my Clopay door?
Hire a professional if you lack the tools, encounter hardware challenges, or deal with heavy or high-lift doors. For straightforward retrofit kits and basic homes, a confident DIY approach is often sufficient with careful adherence to instructions.
Consider a pro if you’re unsure about safety or door balance; otherwise, a careful DIY can work.
Watch Video
Quick Summary
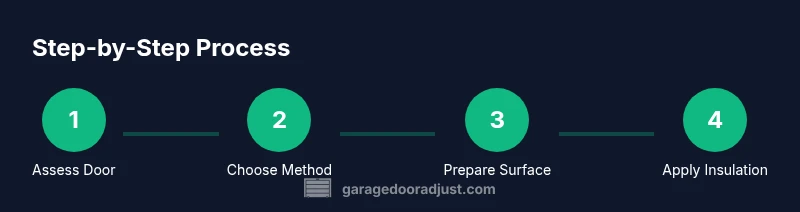
- Assess door and climate before insulation.
- Choose retrofit or full-door insulation based on goals.
- Prepare surfaces and follow safety protocols.
- Test the finished door for leaks and balance.