Garage Door Insulation Foam Board: DIY Guide for Homeowners
Boost comfort and cut energy waste by insulating a garage door with foam board. This DIY guide covers materials, safety, cutting, sealing, and finishing.

This guide shows homeowners how to install garage door insulation foam board to improve comfort and energy efficiency. You'll learn about material types, safety, measuring, cutting, fastening, and finishing. Essential tools, step-by-step instructions, and pro tips keep the project simple and safe.
Why garage door insulation foam board matters
A properly insulated garage door reduces drafts, helps maintain stable temperatures in adjacent living spaces, and can lower heating and cooling costs. Foam board insulation is lightweight, rigid, and relatively easy to cut to size, making it a popular choice for homeowners tackling a DIY project. When you install foam board on a garage door, you create an extra thermal barrier that minimizes heat transfer through the door’s surface and along the seams where air leaks commonly occur. According to GarageDoorAdjust, focusing on air sealing and correct fit yields the most noticeable gains in comfort and energy efficiency. Before you begin, assess your door’s construction, the door’s hardware clearances, and the surrounding weather conditions. If you live in a humid climate, choose a moisture-resistant board and plan for exterior sealing where necessary. This block sets the stage for a practical, step-by-step approach that balances insulation performance with door operation and safety.
Types of foam board insulation
Foam board insulation comes in several common varieties, each with unique properties. Expanded polystyrene (EPS) and extruded polystyrene (XPS) are rigid and lightweight, with good moisture resistance when properly sealed. Polyisocyanurate (polyiso) boards offer higher initial R-values per inch and strong thermal performance, but can be more sensitive to moisture unless coated. Some boards include fire retardants and edge profiles that help them seal more effectively against door panels. For garages with high humidity or exposure to steam from vehicles, moisture-resistant or foil-faced options often perform best. Consider the door’s material, the climate, and how the insulation will be protected from sun and weather. GarageDoorAdjust’s guidance emphasizes selecting a board that balances rigidity, moisture resistance, and ease of handling, since a bulky board that fits poorly will create gaps and reduce performance.
Measuring and planning fit
A precise plan reduces waste and ensures the insulation doesn’t interfere with the door’s operation. Start by removing any loose weatherstripping and cleaning the door surface to create a stable working base. Measure each panel’s width and height, then lay out the number of foam-board pieces needed for a snug, flush fit with a small allowance for compression. When planning cuts, account for the door’s track positions and any hardware that protrudes. Mark cut lines clearly on the boards before you cut, and cut slowly with a sharp utility knife or a board saw for clean edges. Dry-fit each piece before applying adhesive to confirm alignment and that the panel can still open and close without binding. A well-planned fit minimizes waste and ensures a secure, lasting installation that won’t rattle or shift during operation.
Tools and materials you'll need
Before you start, gather essential tools and materials to keep the project moving smoothly. A clean workspace, sharp blades, and precise measuring tools reduce mistakes and waste. Having the right fasteners and seals helps your insulation stay in place and protect against moisture ingress. Review the full list in the Tools & Materials section so you don’t end up mid-project with missing supplies. A well-equipped setup also improves safety and overall quality of the finish. GarageDoorAdjust emphasizes preparing a complete toolbox to avoid delays and ensure a durable installation.
Safety considerations and surface prep
Always prioritize safety when handling foam boards, adhesives, and sealants. Wear gloves and eye protection, and work in a well-ventilated area when using adhesives or sealants. Avoid cutting toward your body and store blades safely when not in use. Prepare the door surface by cleaning all dust and grease; a clean surface ensures the adhesive bonds properly. If you’re replacing old weatherstripping, plan the order of operations so new foam boards aren’t damaged during the process. Finally, verify that the added thickness won’t interfere with door balance or track alignment. A cautious, methodical approach reduces risk and preserves the long-term function of your garage door.
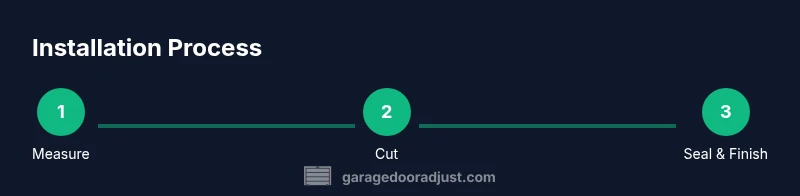
Step-by-step overview
Installing insulation foam board on a garage door is a multi-step process that benefits from careful planning and steady hands. The overview below lays a foundation for the detailed steps that follow in the dedicated STEP-BY-STEP section. Start by verifying you have all materials, then measure, cut, fit, and seal each piece. Pay close attention to edge alignment and avoid overtightening any fasteners that could crack the foam. Finally, test the door’s operation across its full range and adjust as needed to keep compression and clearance balanced. With patience and precision, you’ll create a durable, energy-saving layer that stands up to daily use.
Finishing touches and sealing
Sealing the edges and seams is essential to maximize the insulation’s effectiveness. Apply a compatible sealant or weatherstripping around the door’s perimeter to close any remaining gaps where air could escape. Use foil tape to secure edge joints and reinforce seams, ensuring a tight, weather-resistant barrier. Inspect the finished surface for gaps, rough edges, or uneven adhesion and trim or re-seal as needed. If the garage is subject to temperature extremes, consider applying a protective layer such as a thin, clear coating on the exposed foam edges to guard against UV exposure and moisture. Regular inspections every season help maintain performance and extend the life of your project.
Energy impact and real-world results
Homeowners who install foam-board insulation on garage doors often notice a gentler temperature swing in adjacent spaces and reduced drafts along the door’s perimeter. While results vary with climate, door type, and the extent of air leakage, properly installed boards provide a real boost to comfort and energy efficiency. It’s important to pair insulation with proper weatherstripping, door calibration, and tracker alignment for optimal performance. GarageDoorAdjust’s analysis highlights that attention to fit and sealing is typically more impactful than choosing a higher-cost foam board alone. The combination of sealing and insulation yields the best return on effort and investment.
AUTHORITY SOURCES
- Energy.gov: Insulation types and best practices (https://www.energy.gov/energysaver/insulation-types-and-r-values)
- Oak Ridge National Laboratory (ORNL): Practical guidance on building envelope insulation and moisture management (https://www.ornl.gov)
- National Renewable Energy Laboratory (NREL): Energy efficiency and building physics resources (https://www.nrel.gov)
Tools & Materials
- foam board insulation sheets (polystyrene or polyiso)(Cut to fit door panels with a small excess for compression)
- utility knife or insulation saw(Sharp blade; maintain a clean edge for tight fits)
- measuring tape(Accurate width/height measurements of each panel)
- straightedge or ruler(Guides straight cuts for clean edges)
- adhesive or double-sided tape(Foam-safe adhesive or strong double-sided tape)
- foil tape(Seal seams and edge joints to prevent air leaks)
- silicone caulk or weatherstripping(Seal gaps around the edges for moisture control)
- gloves and safety goggles(Personal protective equipment for safety)
- dust mask(Optional for cutting; improves comfort in dusty environments)
- spray bottle with water(Humidification during scoring optional)
Steps
Estimated time: 2-3 hours
- 1
Measure and plan cuts
Measure each door panel and plan the layout of insulation pieces. Mark cut lines precisely on the foam boards, allowing a small margin for compression during fit. Dry-run the layout to minimize offcuts and waste.
Tip: Double-check track clearances before marking to avoid obstructing door movement. - 2
Cut foam board to size
Place the board on a stable surface and score along the marked line, then use clean, straight cuts with a sharp blade. For thicker boards, cutting in stages helps prevent splintering and ragged edges.
Tip: Keep blade perpendicular to the board for square cuts and reduce the chance of binding. - 3
Test dry-fit pieces
Position each cut piece on the corresponding panel to confirm fit. Adjust as needed before applying adhesive so you don’t have to re-cut later.
Tip: Dry-fit prevents waste and helps you notice any misalignment early. - 4
Apply adhesive and attach
Apply a light, even layer of foam-safe adhesive to the back of each piece or use double-sided tape. Press firmly into place until the board seats flush with the door surface.
Tip: Avoid over-adhesive; too much can ooze out at seams and make finishing difficult. - 5
Seal seams and edges
Cover every joint with foil tape and run a bead of silicone caulk along the outer edges to block air infiltration and moisture ingress.
Tip: Press tape firmly to avoid creases that can trap air and moisture. - 6
Install weatherstripping and trim
Reinstall or add perimeter weatherstripping around the door frame if needed to ensure a complete seal against drafts.
Tip: Check that weatherstripping doesn’t interfere with door travel or hinge movement. - 7
Check door operation
Open and close the door several times to verify there’s no binding and that insulation does not impede movement. Adjust as necessary.
Tip: A light test run confirms the installation won’t cause future issues. - 8
Inspect final fit and finish
Look for gaps, misaligned boards, or loose edges. Trim excess pieces and re-seal as needed for a clean, durable finish.
Tip: A neat finish improves both appearance and performance.
Got Questions?
Do I need to remove existing insulation before installing foam board on the garage door?
If current insulation is loose or damaged, remove it and clean the surface before applying new foam board. A clean, stable surface yields better adhesion and a longer-lasting result.
If your old insulation is loose, take it off and clean the surface before you apply the foam board so it sticks properly.
Will insulation foam board degrade with sun exposure if the garage door is sunlit?
Some foam boards are UV-sensitive. Choose foil-faced or UV-protected boards and consider protecting the door from direct sun with a UV-blocking finish or a shaded installation area.
UV can weaken some boards, so pick UV-protected options and seal or cover as needed.
Can I insulate both sides of the door, or is one side enough?
Insulating both sides can improve performance in very cold climates, but often one well-sealed inner surface provides most benefit. Evaluate your climate and door construction.
You can insulate just one side for normal climates, but two sides help in harsher conditions.
How long does installation take for an average single-car garage door?
Timing varies with door size and experience, but most DIY projects fall within a few hours. Plan for several breaks and a thorough finish.
Expect a few hours, depending on your door size and how precise you want to be.
Is insulation foam board fire-safe for a garage environment?
Choose boards rated for flame resistance and follow manufacturer guidelines. Maintain clearance from any heat sources and ensure proper ventilation during installation.
Pick fire-rated boards and follow the safety instructions to keep the garage safe.
Will adding foam board affect garage door balance or spring tension?
Extra weight can affect balance if excessive. Check door balance and spring tension after installation and adjust if needed to maintain safe operation.
The extra weight can matter—test and adjust door balance if you notice binding or speed changes.
Watch Video
Quick Summary
- Plan measurements before cutting to minimize waste
- Choose moisture-resistant foam board for durability
- Seal all seams and edges for maximum efficiency
- Test door operation after installation
- Inspect annually for moisture or warping and reseal as needed