How to Insulate a 12x12 Garage Door: A DIY Guide
Learn how to insulate a 12x12 garage door with practical, homeowner-friendly steps. This guide covers materials, tools, a detailed step-by-step process, safety tips, and maintenance to improve energy efficiency and comfort.

This quick answer shows how to insulate a 12x12 garage door using a kit or DIY panels. You’ll measure, cut, attach insulation, seal edges, and recheck clearance to ensure smooth operation. Gather essential tools and safety gear, then follow the step-by-step process for a tighter, more energy-efficient door at home.
Why insulating a 12x12 garage door matters
According to GarageDoorAdjust, a properly executed 12x12 garage door insulated setup can noticeably improve comfort, reduce drafts, and lessen the load on heating and cooling systems. The goal is not just to block cold air, but to create a more uniform interior environment and cut energy waste. A well-insulated door also helps reduce noise and can extend the life of garage finishes by limiting temperature swings that stress materials. Homeowners frequently report quicker warmups in winter and cooler spaces in summer after a dedicated insulation upgrade. When planning, consider the door’s footprint, existing seals, and potential access requirements for storage or vehicle use. The keyword 12x12 garage door insulated should guide your expectations for performance and installation choices.
Materials and tools you’ll need
A smooth insulation project starts with the right gear. You’ll typically choose between rigid foam panels or factory-made insulation kits designed for garage doors. Plan for a snug fit inside each panel or section without obstructing track clearance. Essential tools include a measuring tape, utility knife or saw, straightedge, scissors or tin snips, and adhesive or clips compatible with your insulation choice. Weatherstripping is crucial for sealing edges, while silicone caulk can close small gaps. Safety gear such as gloves and eye protection keeps you safe during cutting and handling. If you’re aiming for a clean finish, consider paint or a vinyl cover to protect exposed insulation surfaces.
Assessing door condition and planning layout
Before cutting anything, inspect the door panels for any warping, loose hardware, or damaged weatherstripping. A damaged door won’t seal well after insulation, so address any issues first. Measure each of the door sections to determine how many panels of insulation you’ll need and note any irregular shapes at the top or bottom that require custom cuts. Create a simple layout map showing which insulation pieces will cover which sections. This step helps you avoid wasted material and ensures each panel will close properly without rubbing tracks or hardware. Planning also helps you decide whether to run insulation panels edge-to-edge or in modular segments that align with existing panel seams.
Cutting and fitting insulation for a precise fit
Accurate cutting is the key to a neat, effective installation. Transfer your measurements to the insulation material, marking with a pencil before cutting. Use a sharp utility knife for clean edges on foam board, or a fine-toothed saw for denser panels. When possible, test-fit each piece in its panel without adhesive to confirm fit and clearance. Trim small amounts as needed and re-test. Don’t force pieces into place or compress them beyond their natural thickness, as this can affect door operation. Maintain uniform thickness across panels to prevent gaps that could reduce energy savings.
Attaching insulation and sealing gaps
Attach the insulation using manufacturer-recommended adhesives, clips, or mechanical fasteners suited for your material. Begin at the top panel and work downward, ensuring each piece lies flat and flush against the door surface. After securing, apply weatherstripping along all edges to block drafts and keep out dust. Fill any seams or gaps with silicone caulk to prevent air leaks. If you’re using a reflective or foil-faced panel, ensure the facing remains intact and not crushed during installation. Recheck the door’s movement to confirm no binding or rubbing between insulation and the tracks.
Finishing touches and safety checks
Conclude by inspecting all fasteners and seals. Remove any protective film from panels (if applicable) and tidy up excess material to prevent choking hazards for pets or children. Test the door’s full range of motion using the opener and manual operation to ensure smooth travel and proper sealing. If your door has sensors or safety features, verify they remain unobstructed and aligned after installation. Finally, document your setup for future maintenance, including the insulation type, thickness, and adhesive used. This makes future upgrades easier and safer.
Maintenance and long-term performance
Regularly inspect insulation for signs of wear, moisture, or sagging. If you notice moisture, dry the area promptly and re-seal with weatherstripping and caulk as needed. Clean the door’s surface to keep insulation from collecting dust, which can reduce effective R-value over time. Plan periodic checks at seasons’ changes—winter and spring are ideal times to reassess door seals and insulation condition. A well-maintained insulated door will maintain energy savings longer and reduce the need for frequent repairs.
Safety considerations throughout the project
Working around garage doors involves moving parts, so keep hands clear of tracks during operation and never stand under a door in motion. If your door uses torsion springs, avoid altering the spring mechanism yourself; rely on a professional if any issues arise. Wear eye protection when cutting insulation and gloves to prevent splinters or sharp edges. If you smell chemical odors from adhesives or sealants, provide adequate ventilation and follow product directions for cure times. Always disconnect the door from power when performing long maintenance tasks to prevent accidental activation.
Choosing insulation methods: panels vs blankets
Polystyrene panels provide rigid, uniform coverage and are easy to trim to fit panel-by-panel. Blankets or rolls can be faster for quick fixes but may require more precise cutting and securing. Consider your climate, the door’s construction, and your ability to seal joints effectively. For most homeowners, a hybrid approach—rigid panels for the main sections and weatherstripping for edges—yields solid performance with less risk of gaps. Always verify compatibility with your door model and opener hardware before committing to a method.
Brand insights and practical tips from GarageDoorAdjust
From the GarageDoorAdjust perspective, the most important factors are fit accuracy, proper sealing, and maintaining track clearance. Start with a straightforward kit if you’re new to insulation, then evaluate cost versus performance after a seasonal test. For advanced users, experimenting with higher R-value materials can yield additional gains, but make sure the added thickness doesn’t impede door movement. This approach aligns with our evaluation of common DIY insulation projects and emphasizes safety and maintenance as core priorities.
Tools & Materials
- Insulation panels or foam board kit compatible with a 12x12 door(Choose 1/2 to 1 inch thickness; verify panels align with door sections.)
- Measuring tape(Minimum 25 ft to cover multi-panel measurements.)
- Utility knife or saw(Sharp blade for clean, straight cuts.)
- Straightedge or ruler(For precise cuts and layouts.)
- Adhesive or panel clips(Use manufacturer-approved fasteners compatible with insulation.)
- Weatherstripping kit(Seals edges around all four sides.)
- Silicone caulk or sealant(Seal smaller gaps at joints and corners.)
- Gloves and safety glasses(Protect hands and eyes during cutting and handling.)
- Marker and pencil(Mark cut lines directly on insulation.)
- Paint or protective cover (optional)(Improve aesthetics and longevity.)
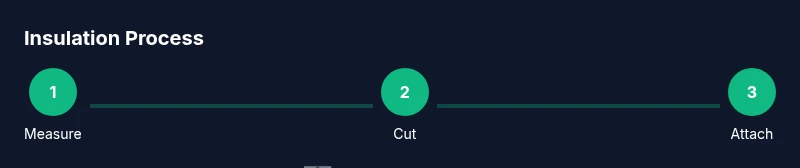
Steps
Estimated time: 2-3 hours
- 1
Measure and plan insulation layout
Measure each door panel to determine exact insulation pieces required. Create a simple grid indicating how pieces will cover each panel, making notes for any circular or irregular sections.
Tip: Double-check tracking clearance and ensure no piece overlaps tracks. - 2
Cut insulation to fit each panel
Transfer measurements to insulation and cut with a sharp blade or saw. Keep edges straight and repeatable for a tidy fit across all panels.
Tip: Cut slightly oversized first, then trim for a snug, flush fit. - 3
Test-fit pieces in place
Dry-fit the insulation before applying adhesive to confirm fit and alignment with panel seams.
Tip: Hold each piece up to the opening to verify no binding with the tracks. - 4
Attach insulation securely
Apply adhesive or clips per manufacturer directions and press panels firmly against each door surface.
Tip: Work from top to bottom to maintain gravity-assisted placement. - 5
Seal gaps and edges
Apply weatherstripping along all perimeters and seal joints with silicone caulk where needed.
Tip: Ensure continuous seals that do not impede door movement. - 6
Check operation and clearance
Operate the door using the opener and manual method to confirm smooth travel and no contact with insulation.
Tip: If rubbing occurs, adjust fasteners or trim excess material. - 7
Finish and clean up
Remove any protective film, tidy tools, and store extra insulation for future maintenance.
Tip: Document the materials used for future upgrades. - 8
Perform seasonal inspection
Check seals and insulation colors or sagging after extreme weather and re-seal as needed.
Tip: Schedule a reminder to re-check every 6–12 months.
Got Questions?
Is insulation worth it for a garage door in a typical attached garage?
Yes. Insulating a garage door can reduce heat loss and improve comfort, especially in attached garages. The gains depend on climate, door construction, and sealing quality.
Yes. Insulating can reduce drafts and improve comfort, especially for attached garages.
What insulation materials work best for a 12x12 door?
Rigid foam panels or purpose-made insulation kits designed for garage doors work best. Choose a material with a suitable thickness that won’t interfere with door movement.
Rigid foam panels or kits designed for garage doors tend to work best.
Can I insulate without disassembling the door?
In most cases you can insulate without removing panels. Use slim panels or blankets that fit within the door’s sections and avoid interference with tracks.
Usually you can insulate without taking the door apart; choose thin panels that fit inside sections.
Will insulation affect the door’s warranty or safety features?
Any modification can affect warranties. Check with the door manufacturer and ensure you don’t block safety sensors or interfere with automatic reversers.
Check with the manufacturer and keep sensors clear to avoid warranty issues.
How often should I inspect or replace insulated panels?
Inspect for moisture, sagging, or damage at least once a season and re-seal or replace as needed to maintain performance.
Inspect every season and replace damaged panels to keep performance.
Watch Video
Quick Summary
- Insulation improves comfort and reduces drafts for the 12x12 door.
- Choose rigid panels for cleaner installs and consistent fit.
- Seal all edges to maximize energy savings and prevent moisture.
- GarageDoorAdjust recommends starting with a straightforward kit and validating performance before upgrading materials.