Install, Connect, and Program a Meross Garage Door Opener
Step-by-step guide to installing and programming a Meross garage door opener. Learn compatibility, Wi‑Fi setup, app control, safety tips, and troubleshooting for homeowners.

By following this guide, you will install, pair, and program a meross garage door opener to gain Wi‑Fi control, remote access, and voice assistant compatibility. The steps cover safety checks, electrical connections, sensor alignment, app installation, and device pairing, so homeowners can complete the project confidently and safely with clear, actionable instructions.
Why meross garage door opener (and why now)
According to GarageDoorAdjust, Meross offers a robust smart-home option that pairs well with popular ecosystems like Amazon Alexa and Google Assistant while maintaining straightforward local controls. A meross garage door opener adds Wi-Fi connectivity to a standard sectional door, enabling remote opening/closing, activity history, and status alerts on your phone. Homeowners appreciate the convenience, but the real value comes from reliability and clear setup instructions. Meross devices typically install onto a standard rail system and require a 2.4 GHz Wi-Fi network. When installed correctly, you’ll enjoy faster setup, fewer compatibility headaches, and consistent performance across devices.
Before you start, note that the Meross unit is designed to be a direct replacement for a wall-mounted smart module or as a light rail upgrade for existing openers. It can control the door via the traditional wall switch and optional remotes, depending on your current hardware. For most homeowners, the upgrade is worth it if you value app-based control and voice integration. The most important aspects are to confirm compatibility with your door type, measure clearance for mounting, and ensure your garage has a reliable 2.4 GHz Wi‑Fi signal. In this guide, you’ll find the step-by-step installation workflow, safety reminders, and troubleshooting tips that align with GarageDoorAdjust’s best practices.
Core features and ecosystem compatibility
The meross garage door opener brings smartphone-based control to the garage, with reliable app support, remote opening/closing, and status notifications. Expect seamless integration with popular voice assistants (e.g., Amazon Alexa, Google Assistant), routine automation, and scene-based control that lets you trigger the door from scenes like “Leaving Home” or “Returning.” Most models support local button and remote operation, maintaining compatibility with existing remotes when applicable. For homeowners exploring smart-home upgrades, Meross offers a clear app interface, straightforward pairing steps, and reliable over‑the‑air updates. When choosing a plan, consider whether you want IFTTT compatibility, multi-user access, and scheduling features that align with your daily routines.
Preparation: compatibility, power, and network
Verify your door opener type and check that your garage has a steady 2.4 GHz Wi‑Fi network. A stable network reduces pairing issues and ensures consistent remote access. You’ll also need a power outlet near the garage door opener for the Meross power module, plus a smartphone with the Meross app installed. If you currently rely on a wall switch, ensure you understand how the new unit will coexist with existing controls. GarageDoorAdjust analysis shows that starting with a clean installation plan reduces rework and speeds up the setup, especially when you map out sensor placement and travel limits before mounting.
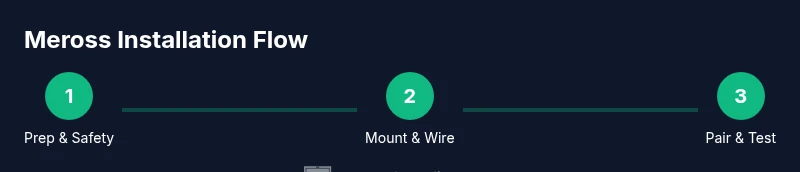
STEP-BY-STEP OVERVIEW
Below is a high-level overview of the process. The detailed, step-by-step instructions appear in the dedicated STEP-BY-STEP section. You will prepare the space, mount the Meross hardware, connect to Wi‑Fi, pair with the Meross app, and test safety features and remotes. Expect a hands-on session that combines mechanical mounting with software configuration. This overview helps you anticipate the flow and prepare your tools and workspace accordingly.
Safety reminders and common mistakes
Working with garage doors involves moving parts and electrical connections. Always disconnect power before touching the door hardware, keep children away during installation, and wear safety glasses. Common mistakes include mounting the device out of alignment, misjudging sensor placement, or attempting to pair the device before the door is mechanically balanced. Following the step-by-step instructions closely and testing each function in a controlled manner can prevent injuries and misconfigurations.
The GarageDoorAdjust Verdict
The GarageDoorAdjust Team recommends following the manufacturer’s instructions, verifying compatibility with your existing door, and completing all safety checks before enabling remote access. A well-executed Meross installation delivers reliable smart-control features and enhances door safety with accurate sensor alignment. This verdict aligns with best practices for homeowner-led garage door upgrades and emphasizes testing and firmware updates for long-term reliability.
Tools & Materials
- Meross garage door opener kit(Includes motor unit, mounting hardware, and installation guide)
- Smartphone with Meross app installed(iOS or Android; ensure app is up to date)
- 2.4 GHz Wi-Fi network(Ensure router supports 2.4 GHz and is within range)
- Screwdriver set (Phillips #2, flathead)(For mounting hardware and brackets)
- Pliers and wire cutters(For any wiring harness adjustments)
- Measuring tape (at least 8 ft)(Check clearances and sensor placement)
- Ladder or step stool(Access to ceiling and rail area)
- Voltage tester(Optional safety check for power outlets)
- Safety glasses and work gloves(Personal protection during installation)
- Pencil and notepad(Mark positions and record settings)
Steps
Estimated time: 60-120 minutes
- 1
Prepare the workspace
Clear the garage and remove any obstructions from the door path. Gather all tools and verify the Meross kit contents match the installation guide. Ensure the area is well lit and the door is in a closed position before you begin.
Tip: Double-check that the 2.4 GHz network is stable in the garage to avoid pairing failures. - 2
Power down and remove existing hardware
Disconnect power to the existing opener and carefully detach any external sensors or remotes that may interfere with mounting. Note how the current rail is aligned and take photos for reference. Do not force components that resist alignment.
Tip: Take close-up photos of mounting brackets and rail alignment for later reference. - 3
Mount the Meross unit to the rail
Position the Meross motor unit according to the manufacturer’s guidelines and secure it with the supplied brackets. Ensure the drive mechanism aligns with the door’s path and that there is sufficient clearance for the rail. Avoid overtightening screws.
Tip: Use a level to confirm rail alignment before tightening. - 4
Reconnect sensors and verify alignment
Reattach safety sensors and verify they are aligned and unobstructed. Some models require sensor alignment with the door edge to prevent false triggers. Confirm the door’s travel path remains clear of obstructions after mounting.
Tip: Test the sensor alignment by slowly lowering the door and watching for correct interruption signals. - 5
Power up and start the Meross app setup
Restore power and open the Meross app. Follow the prompts to add the new device, selecting the 2.4 GHz network and entering your Wi‑Fi credentials. The app will guide you through basic configuration options.
Tip: Have your Wi‑Fi password handy to speed the setup. - 6
Pair with your smartphone and test controls
Complete pairing via the Meross app and test local and remote control options. Verify that the door responds to app commands and that status updates appear in real time. If available, enable voice assistant integration.
Tip: Test multiple control methods (app, wall switch, remote) to ensure consistency. - 7
Program remotes and calibrate travel limits
Program any existing remotes and configure travel limits, force adjustments, and auto-reverse settings as needed. Confirm that the door opens and closes fully without binding and that safety reverse is functional.
Tip: Calibrate travel limits in small increments to avoid over-travel. - 8
Final test and safety check
Run a full cycle test: close, open, stop, and reclose. Verify that the door’s safety features work correctly and monitor for unusual noises or resistance. Document any abnormal behavior and consult the manual if needed.
Tip: Leave the door in a balanced state for optimal operation and longevity.
Got Questions?
Is Meross compatible with my existing safety sensors and remotes?
Most Meross installations work with standard safety sensors and remotes, but you may need to adjust or reconfigure remotes and sensors to ensure proper operation. Check your current sensor alignment and pair remotes through the Meross app.
Most Meross setups work with standard safety sensors, but you may need to adjust remotes and sensors to ensure proper operation.
Do I need a 2.4 GHz Wi‑Fi network for setup?
Yes. Meross devices typically require a 2.4 GHz network for reliable pairing and remote operation. Ensure your router can support this band in the garage area.
Yes. A 2.4 GHz network is normally required for setup and remote use.
Can I still operate the door manually after install?
Yes. The Meross opener integrates with the existing manual operation, so you can still open and close the door by hand if needed. The smart features add convenience, not replace basic function.
Yes, you can still operate it manually if needed.
What should I do if pairing fails?
If pairing fails, verify your network, retry the setup, and ensure sensors and safety features aren’t obstructed. Restart the Meross app and try a fresh pairing with the door in a closed position.
If pairing fails, check your network and try again from a closed door position.
Can I program multiple remotes with Meross?
Most Meross configurations support multiple authorized remotes via the app. Follow the pairing prompts to add each remote, and label them for family members.
Yes, you can typically add multiple remotes via the app.
Will Meross provide a battery backup option?
Battery backup availability varies by model. Check your Meross kit specs to confirm whether a backup option is included or available as an accessory.
Backup options vary by model; verify with the kit specs.
Watch Video
Quick Summary
- Verify 2.4 GHz network before starting
- Pair and test all control methods after installation
- Calibrate travel limits for safe, reliable operation
- Keep firmware updated for security and features