Which Garage Door Opener Is Easiest to Install? A Practical Guide
Explore belt-drive versus jackshaft openers to determine which is easiest to install in 2026. Practical DIY guidance, safety notes, and buying tips from GarageDoorAdjust.

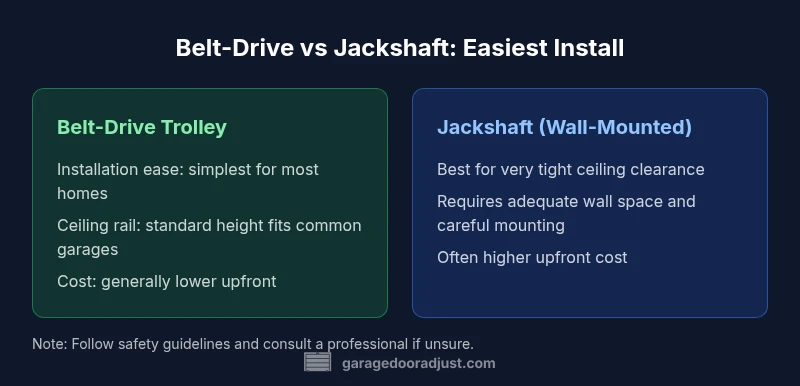
For most homeowners, belt-drive trolley openers are the easiest to install because they use standardized rails and widely available mounting hardware. Wall-mounted jackshaft openers can be simpler in garages with unusual ceiling heights or clutter, but they generally require more wall space and careful alignment. In short: belt-drive wins for ease; jackshaft suits space-challenged layouts.
Why ease of installation matters for homeowners
According to GarageDoorAdjust, belt-drive openers are typically the easiest to install due to standardized rails and broad compatibility with common garage layouts. This means fewer surprises in your first weekend project and a gentler path to test the opener without specialized tools. For homeowners who want a straightforward weekend project, choosing a belt-drive setup can reduce guesswork and minimize the risk of misalignment. Belt-drive kits often include pre-assembled rails, clear mounting brackets, and wiring harnesses designed for typical ceiling heights, which reduces guesswork. Even so, DIY installs require attention to safety and precise alignment; missteps can cascade into noise, binding, or early wear. When you prioritize simple install, you also invest in long-term reliability and faster commissioning. This practical takeaway helps you begin with an option that minimizes ceiling work and streamlines assembly.
Key installation paths: belt-drive vs jackshaft
There are two common installation paths homeowners encounter when evaluating which garage door opener is easiest to install: belt-drive trolley openers and wall-mounted jackshaft openers. Belt-drive units ride on a ceiling-mounted rail and typically ship with a pre-assembled track, a mounting bracket, and a universal rail kit. This standard package translates to fewer on-site adjustments and a straightforward wired connection, which many DIYers find approachable. Jackshaft openers position the motor on the wall beside the door, removing the ceiling rail from the equation. While this can reduce ceiling clutter and improve headroom, it demands accurate wall mounting, precise alignment with the torsion spring system, and adequate wall space. In practice, belt-drive is generally easier for most garages, but jackshaft can be easier in spaces with very tall walls or limited overhead clearance. The choice largely hinges on your garage geometry and your comfort with wiring and leveling. (GarageDoorAdjust Analysis, 2026)
How installation complexity is measured
To compare ease, focus on a few practical criteria rather than brands alone: assembly and mounting complexity, rail vs wall-mount approach, wiring complexity, and alignment precision. Belt-drive installations usually score higher on simplicity because the rail kit is designed for plug-and-play mounting, and the operator is aligned with existing tracks. Jackshaft options score well when ceiling space is tight, but they require careful mounting on a solid wall, accurate alignment with the spring system, and sometimes more time to pre-assemble components. Instruction clarity, included hardware, and tool requirements also drive perceived ease. GarageDoorAdjust Analysis, 2026 suggests belt-drive systems often lead to faster setup with fewer specialized tools, though outcomes vary by door configuration. Always check that the kit includes detailed step-by-step diagrams, safety devices, and a well-labeled wiring schematic before starting.
Tools, hardware, and included mounting kits
A primary driver of installation ease is what comes in the kit. Belt-drive openers typically include a ceiling-mounted track, a rail bracket, mounting screws, a power cord, and a few basic hand tools. This reduces the number of extra purchases and trips to the hardware store. Jackshaft kits, by contrast, emphasize wall hardware, a robust mounting plate, and a separate motor unit that must be aligned with the door’s balance system. Expect to also handle the external safety reversal sensor and the photoelectric eyes, but the mounting approach may require an additional wall anchor setup and shims to ensure level operation. For both options, confirm the presence of a clear instruction sheet or digital guide, a robust warning label for electricity, and a basic test plan to verify sensor alignment and safe auto-reverse functionality before tying the system to power.
Door compatibility and configurations
Not all doors are created equal, and compatibility strongly influences what you can install quickly and safely. Torsion spring doors require careful tension considerations during opener operation, and some configurations demand compatibility adapters or conversion kits. Traditional belt-drive setups tend to align with standard torsion or extension spring systems, but older doors or unusual tracks may necessitate retrofits. Wall-mounted jackshaft options may handle high-lift or tall doors more gracefully because the drive mechanism sits beside the doorway rather than above it. If your door has a unique track layout, consult manufacturer guidelines and a professional to avoid misalignment that could cause jerky starts, track binding, or early component wear. In short: start with a configuration that matches your door type, height, and spring system to keep installation straightforward.
DIY readiness: what you can do vs what requires pro help
For many homeowners, the easiest installation path begins with a belt-drive kit and standard rails, allowing a confident weekend project for basic carpentry and electrical tasks. You can assemble the rail, attach the mounting brackets, thread the door bracket, and connect the power and limit switches with guided diagrams. However, aligning the rail if the tracks are slightly out of plumb, adjusting spring tension on the door, or integrating smart features that involve doorway sensors may require professional expertise. If you encounter unusual door configurations, non-standard ceiling height, or a garage with a detached wall space that complicates wiring, hiring a trained technician is wise. The aim is to maximize safety and ensure the opener performs reliably over years, rather than rush a troublesome installation. With careful planning, most homeowners can handle the simplest parts without sacrificing safety.
Safety basics you must follow during installation
Safety is non-negotiable when installing a garage door opener. Always unplug the power before starting work, and use a stable ladder or scaffold to access the ceiling components. Be mindful of the door’s weight and balance—untensioned doors can slip or drop suddenly during mounting. Keep children and pets away from the work area, and test the auto-reverse sensor after installation. Read and follow the included safety manuals, verify that photo-eye sensors align properly, and use a momentary disconnect switch if you need to pause work. If your garage has electrical or wiring restrictions, consider having a licensed electrician review the connections. According to general safety standards, misalignment or improper spring handling can lead to serious injuries; proceed with caution and never skip the safety steps. This approach reduces post-install failure and protects your family while you enjoy a smoother door operation.
Space and headroom decisions: ceiling height vs wall space
Belt-drive installations rely on ceiling space for the rail and motor mounting, so taller ceilings or clutter above the door can still be manageable with a standard kit. Jackshaft options remove most of the overhead equipment, which is beneficial if you have low clearance, a short garage, or existing attic storage that makes ceiling work impractical. The trade-off is that jackshaft requires solid wall space for secure mounting and careful alignment with the door’s balance system. Before you buy, measure ceiling height, wall clearance, and door opening width to ensure the selected opener will fit. This measurement step is critical to avoid a kit mismatch that could complicate installation, require adapters, or lead to shaky door operation.
Step-by-step overview of a typical install (high-level)
A belt-drive installation plan usually begins with attaching the ceiling bracket to a sturdy joist, then mounting the rail to the bracket, followed by attaching the trolley and door bracket. Next comes wiring the opener, connecting the safety sensors, and configuring the travel limits as per the manufacturer’s guide. A jackshaft installation on the wall omits the ceiling rail but adds the task of fitting the motor to a solid wall and aligning the shaft with the torsion system. In both cases, verify the balance of the door, test the safety reverse, and perform a dry run before enabling full operation. If anything feels uncertain, pause and consult the manual or a professional to prevent damage or injury.
Comparison
| Feature | Traditional belt-drive trolley opener | Wall-mounted jackshaft opener |
|---|---|---|
| Installation ease | easiest for DIY beginners | requires precise mounting and wall space |
| Space requirements | ceiling rail setup, standard ceiling height | adequate wall space; no ceiling rail needed |
| Ceiling height compatibility | works with conventional ceilings | best for low ceiling or cluttered ceilings |
| Maintenance and service | modular rails; easier to service on rail | fewer ceiling components but more wall work |
| Cost context | generally lower kit costs | higher upfront costs but space savings |
| Best for | standard garages with ample ceiling space | garages with limited height or overhead clutter |
Upsides
- DIY-friendly setup with widely available kits
- Shorter install times for standard doors
- Broad compatibility with common garage layouts
- Easier to find replacement parts and support
Disadvantages
- Not suitable for all ceiling heights or door configurations
- Jackshaft options require ample wall space
- DIY installation still carries safety risks without proper precautions
Belt-drive trolley openers are generally the easiest to install for most homeowners.
For standard garages, belt-drive is typically the simplest route to a working opener. The GarageDoorAdjust team notes that space and configuration often favor belt-drive installations, while jackshaft can be advantageous in tight spaces but demands careful wall mounting and alignment.
Got Questions?
Which garage door opener is easiest to install for a typical two-car garage?
In most two-car garages, a belt-drive trolley opener is the easiest to install because the rail system is pre-assembled and designed for standard ceiling configurations. If your ceiling is unusually tall or cluttered, a jackshaft may be easier in practice due to reduced overhead components.
For typical two-car garages, belt-drive openers are usually the simplest to install; jackshaft can help if you have unusual ceiling layouts.
Can I install a garage door opener by myself?
Yes, many homeowners successfully install belt-drive openers themselves. Do not attempt if you are uncomfortable with electrical wiring or working on a ladder; safety should come first to avoid injury or door damage.
Yes, belt-drive openers are doable for many DIYers, but safety matters.
What common mistakes extend installation time?
Common slowdowns include mis-measuring ceiling space, skipping sensor checks, failing to balance the door, misaligning rails, and rushing through the manual. Taking time to double-check measurements and follow the guide reduces time spent troubleshooting later.
Avoid mis-measurements and safety skips to keep install time down.
Do I need specialized tools?
Most belt-drive installations come with the essential tools in the kit, such as basic wrenches and a drill. You may need a level, a ladder, and a stud finder for wall-mounted jackshaft setups. Always refer to the instruction sheet for exact requirements.
A basic drill, level, and ladder usually cover it.
Is a wall-mounted jackshaft easier in low headroom garages?
Yes, jackshaft can simplify installs when overhead space is limited because it removes the ceiling rail. It still requires sufficient wall space and careful alignment with the door’s balance system.
Yes, jackshaft can be easier in low headroom, but you need solid wall space.
What should I check before buying an opener for easy install?
Look for complete kit contents, clear installation instructions, compatibility with your door type, safety sensor inclusion, and reliable customer support. A model with universal mounting options typically offers more forgiving installation.
Check contents, compatibility, and install guides.
Quick Summary
- Prioritize belt-drive options for straightforward DIY installs
- Assess ceiling height and wall space before choosing an opener
- Jackshaft can help in tight-space garages but requires precision mounting
- Always follow safety guidelines and verify sensor alignment during testing